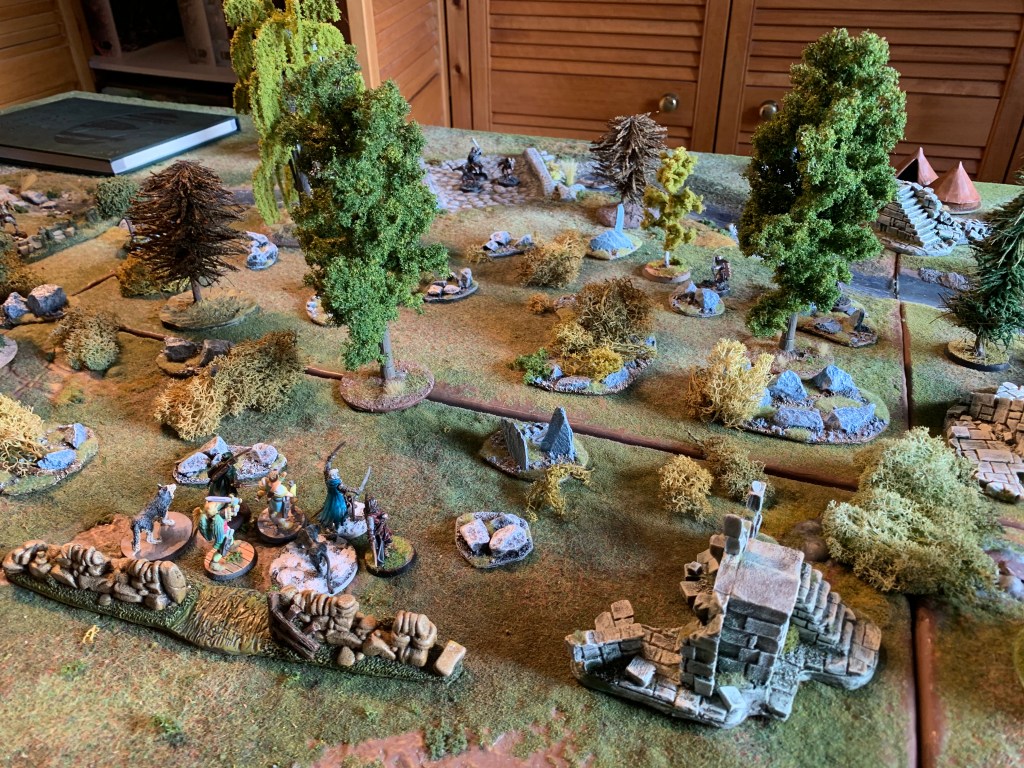
The adventure continues. Scenario Two: Orcs defending a bridge and an Orc Camp.
Our heroes need to cross the river and exit from the other side. They can investigate the camp on the way. They can use stealth and cover to avoid the Orcs until the alarm is raised. Cover blocks line of sight in this scenario where possible- our heroes crouching and being stealthy until the alarm is raised.
Link stealthily headed right supported by Gwalchmai. Panther went left whilst the others kept to cover. Link’s stealth caused the archers to look towards the river rather than the see our heroes.
Gwalchmai used his teleport spell to cross the river and hide behind the ruin. Meanwhile the Orcs clearly suspecting some activity (randomly) headed towards the ford where Link, Birdo the Man at Arms and Bobby the Recruit were all heading. Panther headed far left and the heavily wounded Swordsman kept to cover in the now clear central route.
Link raised the alarm by attacking but failing to subdue the Orc Sergeant who dealt him 9 damage with a blow from his two handed sword.
Gwalchmai grabbed the treasure secretly but then found himself in the open as the alarm was raised by the Sergeant. Two orcs rushed at Gwalchmai. A bitter battle near the ford ensued with both Bobby and Birdo falling in the fight against the sergeant. Panther pushed an orc archer into the fast flowing river: but he held his footing and shot an arrow killing the big cat.
In the end though Link with Swordsman’s aid was able to defeat the sergeant and evade the orcs to cross the ford to the camp where he and Gwalchmai found a book of poems. Then under a hail of arrows the three heroes escaped. Under cover of darkness Birdo and Bobby joined them, but the evil vulture had surely spotted them. They bound their wounds successfully and rejoined the resting War Dog of Link and headed towards an evil looking tower.
We found the map to the sulfur mine early on in our campaign. We never did it thinking we would wait until we had the scoundrel to loot all those chests.
Now that our team comprises scoundrel, bladeswarm , brute and diviner it seemed a good opportunity to warm up our new characters.
It was a good challenge with the bladeswarm having some bad luck with his summons who seemed to get killed needlessly. The Brute had a rough time upon entering the second main corridor. The scoundrel looted a record ten coins.
The diviner at last had lots of fun with her rift tokens as now they can be moved and used to attack. Plus they dealt out some nice curses blesses and one occasion proved very valuable in this scenario by teleporting the blAdeswarm into the penultimate room.
The bladeswarm went first into the last room and finished on one hit point but in the end had looted three of the necessary chests . The Brute pushed the annoying shaman onto a trap thus leaving him easy prey to the bladestorms attack.
The team scored a victory and with just one more technology required are headed to the clockwork cove. We can expect less use of Summons this next time perhaps .
We played some games of Blue Max and Downforce. Phil, Alex, Bruce, Darryl and the Two Mikes. Was good. Lots of shooting downs and burning planes in the first. In the second Phil came first and won in the first race and then Darryl did the same in the second (despite his betting on Alex).
A big push on our Gloomhaven campaign. We unlocked 2 new characters with envelope X and previously Forgotten circles. We are playing on TTS now for obvious reasons.
We got the team together for the final Gloom scenario which was good. We then did some adventuring with the team: Doom, Sun, Diviner and Brute. We mainly focused on getting Sun finished with the Envelope X personal goal quests which was tough. We did the final one last night and that was lots of fun and a great challenge. Doom nipped in and out to grab the last chest whilst the two tanks were completely beaten down to their last hit points. Brute would have exhausted on a start tile if we had not finished on turn 11 of 12. Definitely one of my favourite scenarios ever. Doom was so busy grabbing chests and even doing some tanking he hardly actually got to use his Dooms or the prepared Doom trigger effect cards he had prepared.
Any way we now have a new class unlocked and Alex has chosen to take a Scoundrel who has not really been used, so we started him another one from scratch. So oddly we now have X, Diviner, Scoundrel and Brute ready to go off adventuring.
I think a warm up with a Sulfur mine and then we need to get going again with the Diviner Quests from Forgotten circles.
Scenario two mission one. Gwalchmai and Link set out in pursuit of the mysterious tracks. They come across a spider infested forest…
Man at arms and the Recruit head out to the left skirting the briar patch. Gwalchmai presses forward and rescues a survivor. Swordsman is diseased and link advises he stay back to defend the bridge and protect the survivor. Panther keeps up with gwalchmai whilst Link heads to the right.
A zombie appears and crosses the bridge but Swordsman fends it off. A spider nest is spotted in a nearby tree as a spider crawls out and sets upon the swordsman. Man at arms presses forward to burn the trees at the far end whilst gwalchmai draws them forwards towards him and Panther. Panther is poisoned but the spiders are defeated.
The recruit heads back to burn the new nest by the bridge. Swordsman is once again set upon by zombies and he and dog defend the villager. Panther returns to aid them whilst gwalchmai presses on alone. All this time link has been fighting off spiders and zombies alone to the right .
Gwalchmai teleports passed the spider guarding the final tree and Link rushes forward to engage and distract it whilst his fellow ranger sets it alight.
However to the rear swordsman and dog are defeated by the zombie and the survivor appears in peril until the brave Recruit rushes on to dispatch it . The heroes gather once more at the bridge to regroup whilst an enraged Link rushes to his dog’s side. Fortunately both are alive but badly wounded.
Our heroes return to the Kings castle and return the magic sword. No rest though they find as orders swiftly find them and once more they must set out together .
A Ranger had been sent to investigate but never returned so our two heroes and their companions are sent to investigate.
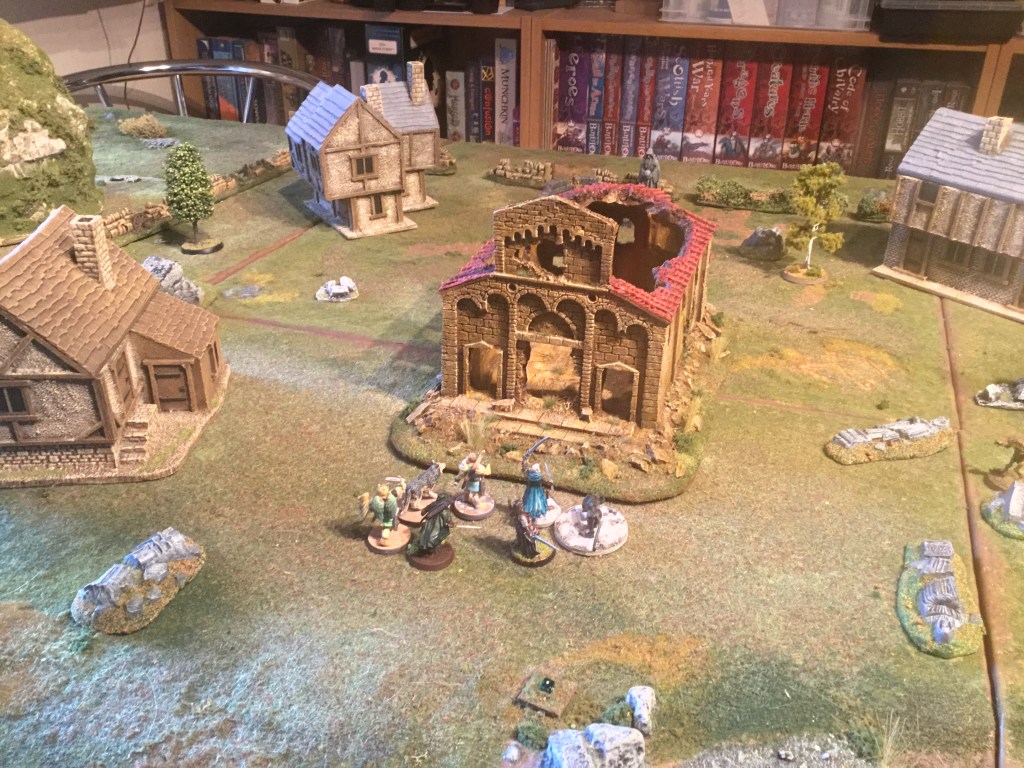
Our heroes inspect the ruined Church and the village- what has gone on here?
The heroes rushed towards the clue tokens whilst the companions attempted to deal with rapidly arriving Zombies and Giant Rats.
Gwalchmai found a healing potion and raced towards two clue tokens, one locked in a house, whilst his loyal Panther held off the foes.
Link also attacked the Giant Bats and Zombies supported by his Warhound and Recruit. His man at arms attempted to hold off the Zombies arriving from the rear. He took heavy hits and then when he investigated a clue token he was ambushed by another zombie and reduced down to 1 hit point. The rescued survivor rushed to help him but was dispatched and Gwalchmai’s swordsman soon suffered a similar fate. Eventually Man at Arms was able to defeat the Zombie with help from the returning Panther, Warhound and Recruit.
Having solved all the clues, finding a magic sword and narrowly avoiding a collapsing building our two heroes headed back to the group, using their bows to dispatch any pursuing rats.
They eventually held off the horde for the required time having found all the clues but had failed to solve the riddle of the bite marks or tracks. Claiming victory they each received 77 xp but Swordsman had an infected wound and nasty fever from his wounds received in the fight with the ambushing zombie.
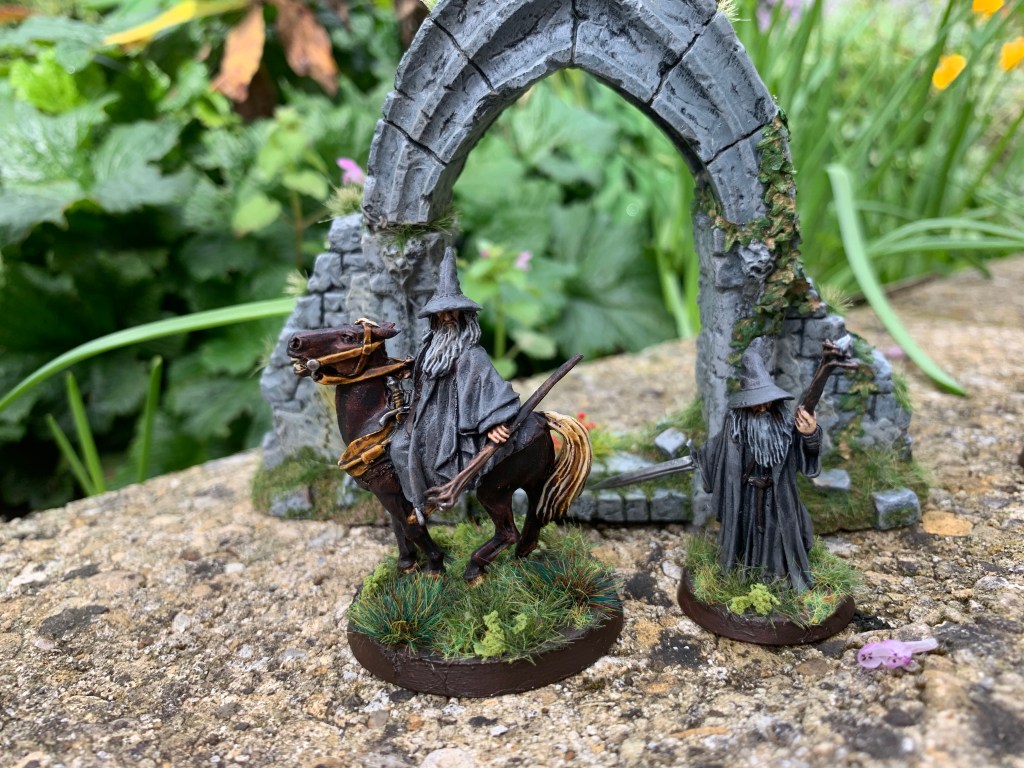
The ruined tower of Amon Sul by forge world. Had this a while and been waiting for a chance to paint it.
I found zorpazorp’s video guide on painting walls and forge world weather top quite helpful. Though for some reason he stops after the initial painting steps and before applying the wash in his live videos.
Type Zorpazorp and search youtube to find his channel.
Any way once I painted it and applied washes as instructed I then varnished it. I am not really sure I want to flock it as the flock might distract from it and of course ties it down to a grass effect. Here it can be used in any terrain from green grass to even desert or blasted wasteland. Also in the film it is indeed very grey to give that night effect and muted in the famous scene. So I have left it for the moment as it is. Maybe I will get round one day to making a hill with steps to put it on and decorate that piece.
Looking forward to using it someday, being quite excited by the announcement of a specific journey of the fellowship source book.