Author Archive
Our second battle in the Harondor campaign was fought with two large 200 point armies: Gondor led by Bruce and Phil against Mordor and Harad led by Darryl and Mike respectively.
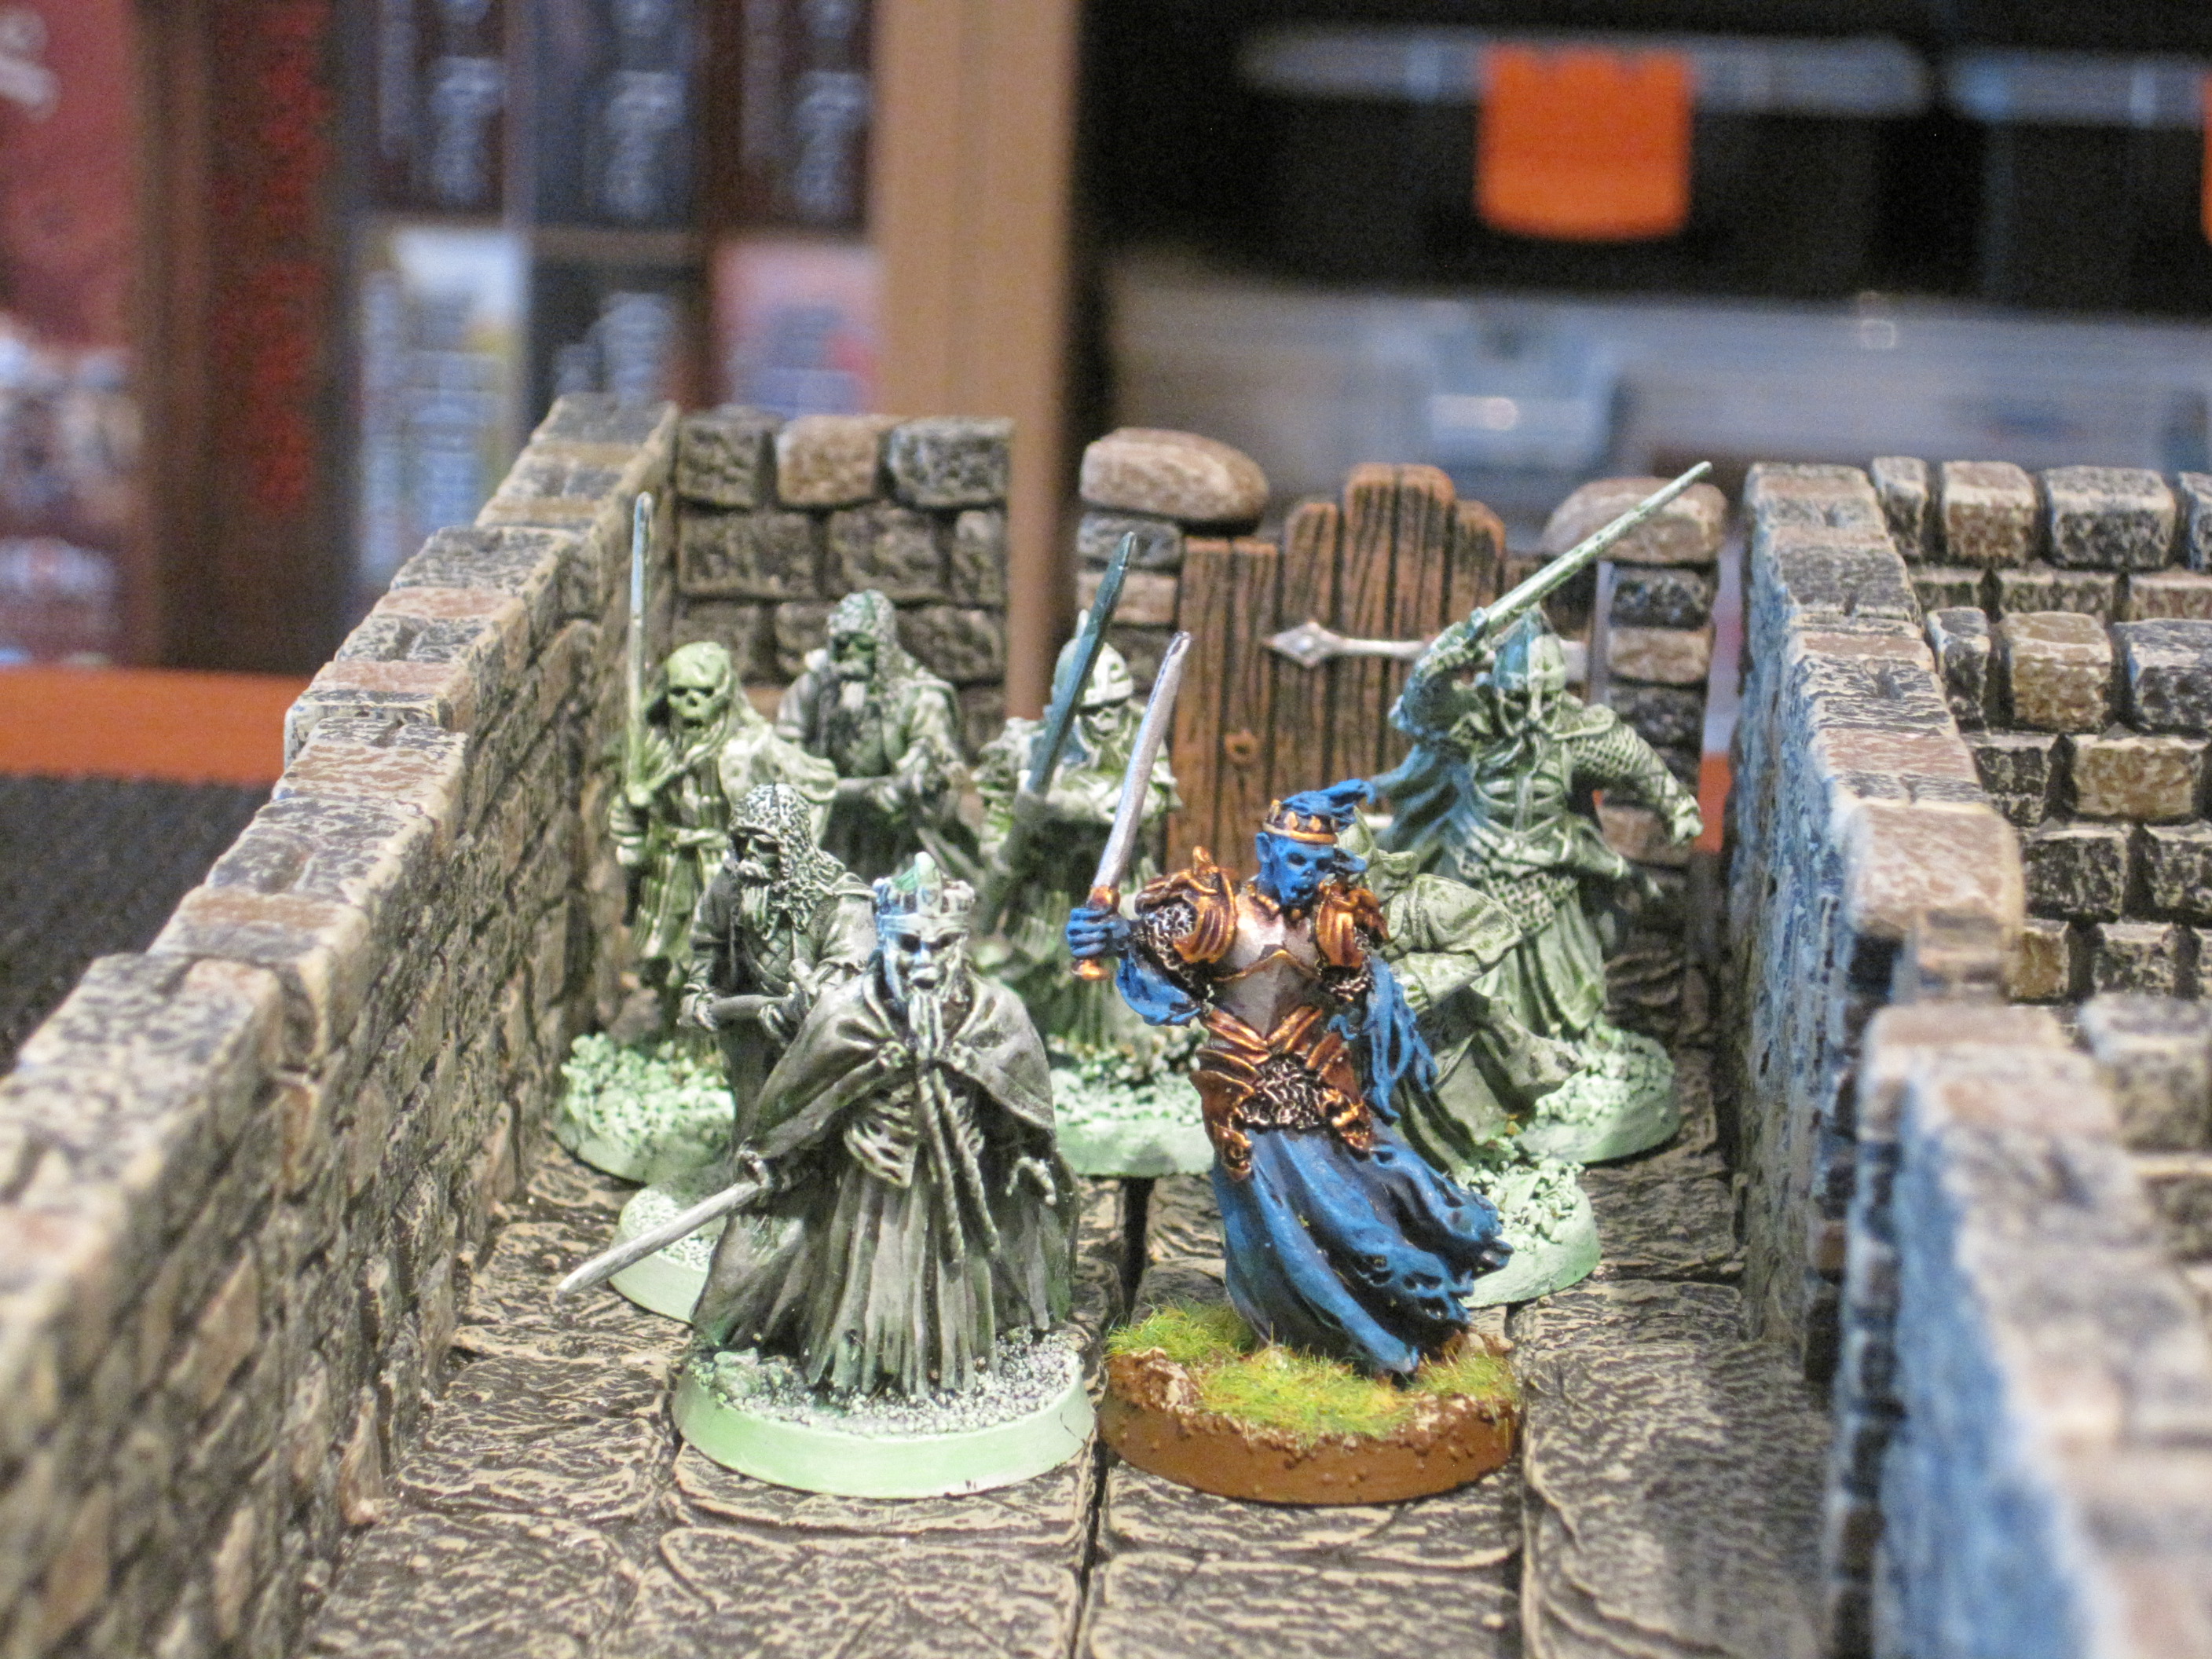
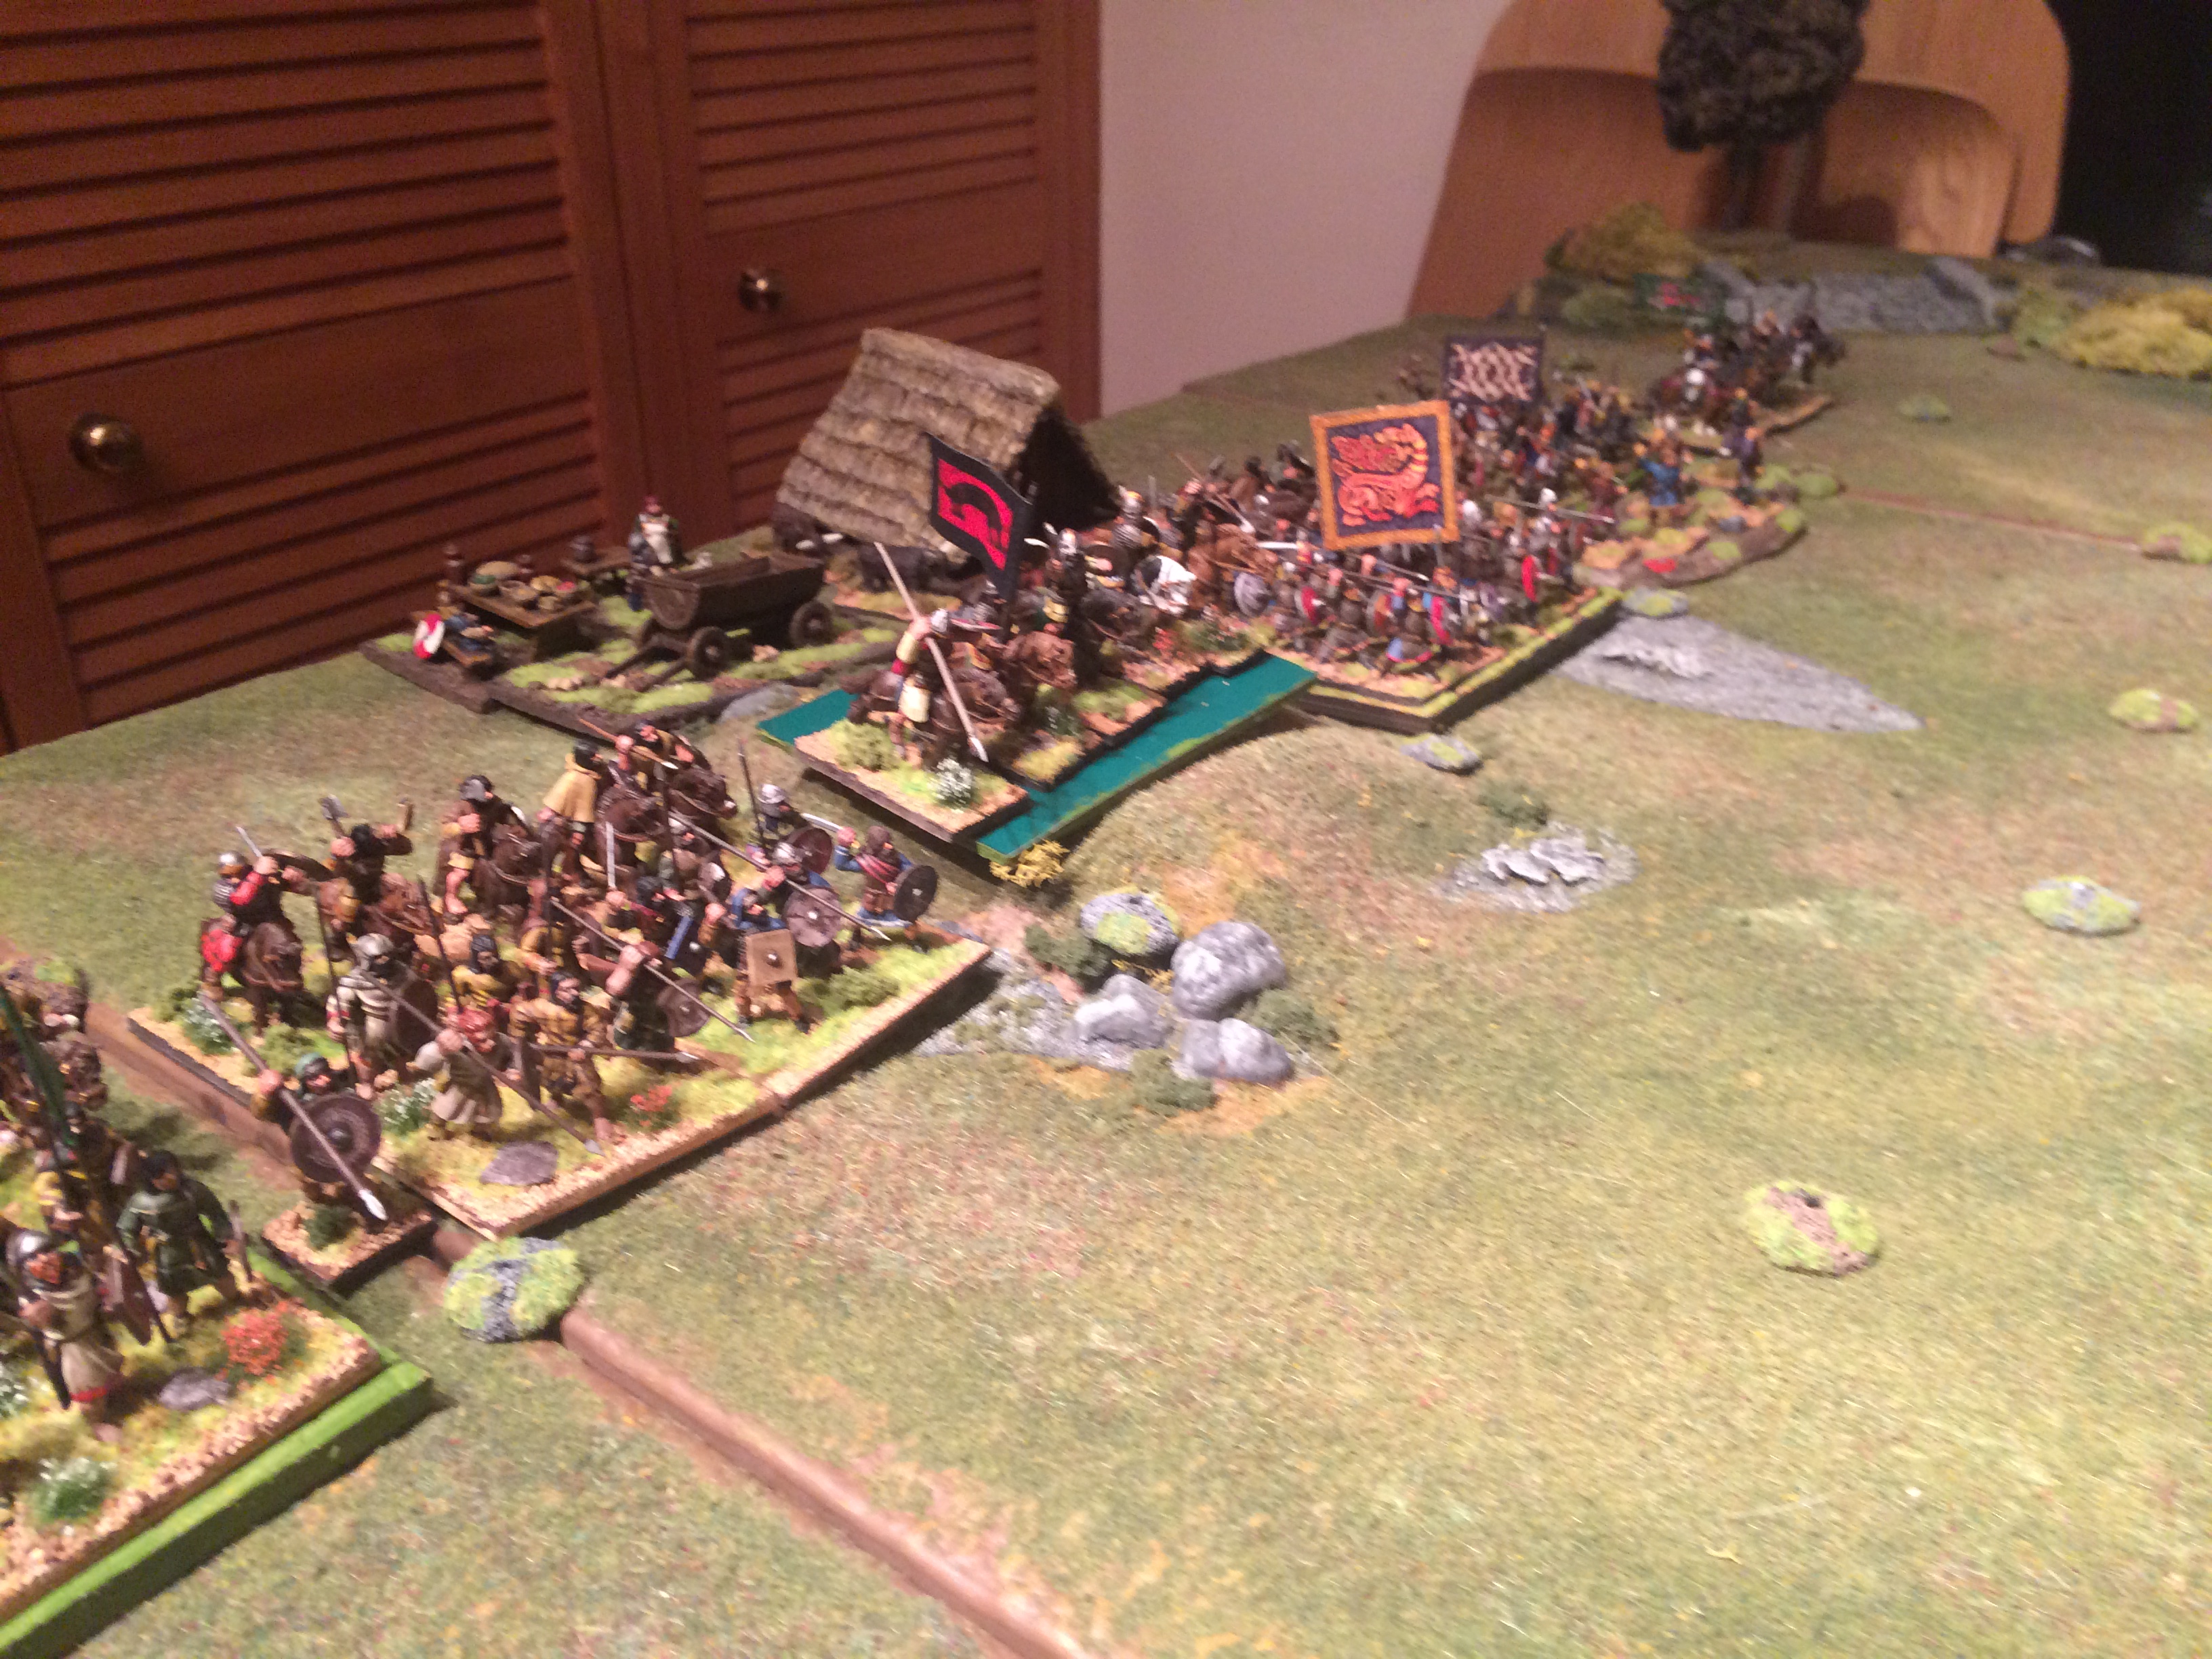
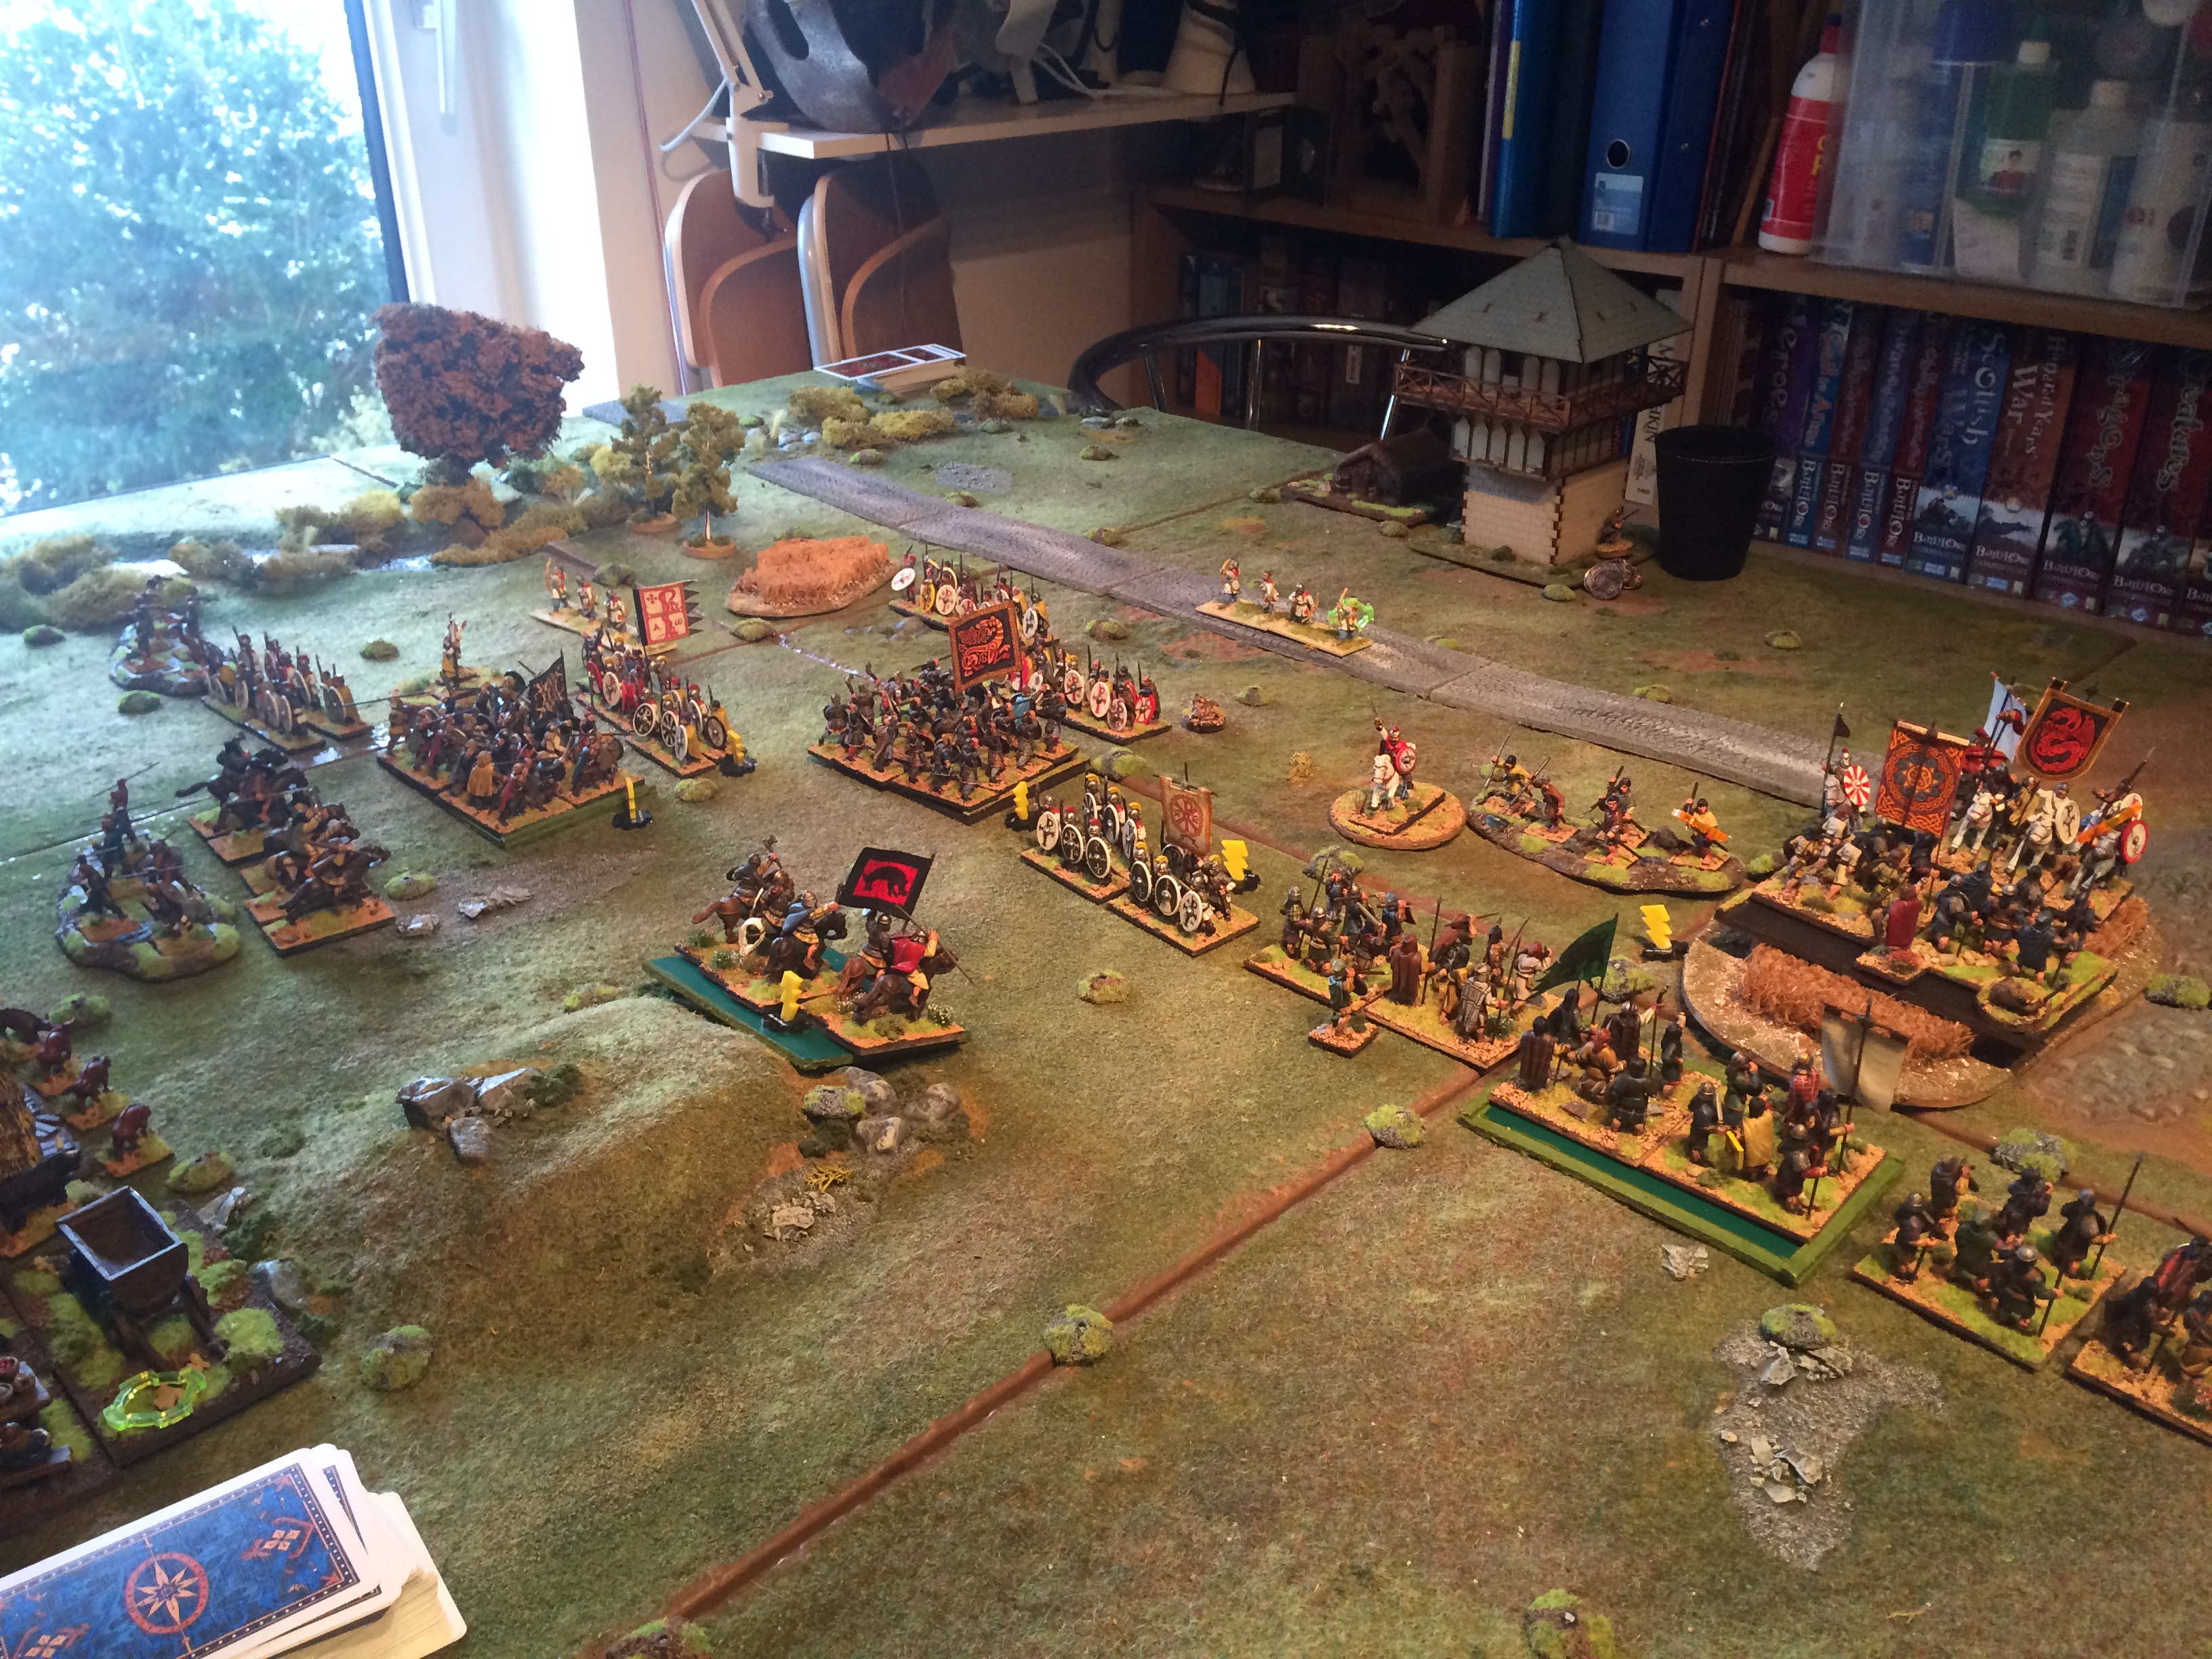
Bruce took charge of the Gondor Knights this time boosted by the presence of the Prince of Ithilien and his Royal Guard on the left flank. Phil was in charge of the infantry boosted by the Pelargir Citadel Guard and some artillery. Opposite: Mike was in charge of the Haradrim and Darryl the forces of Mordor boosted by some more Uruk Hai and artillery.
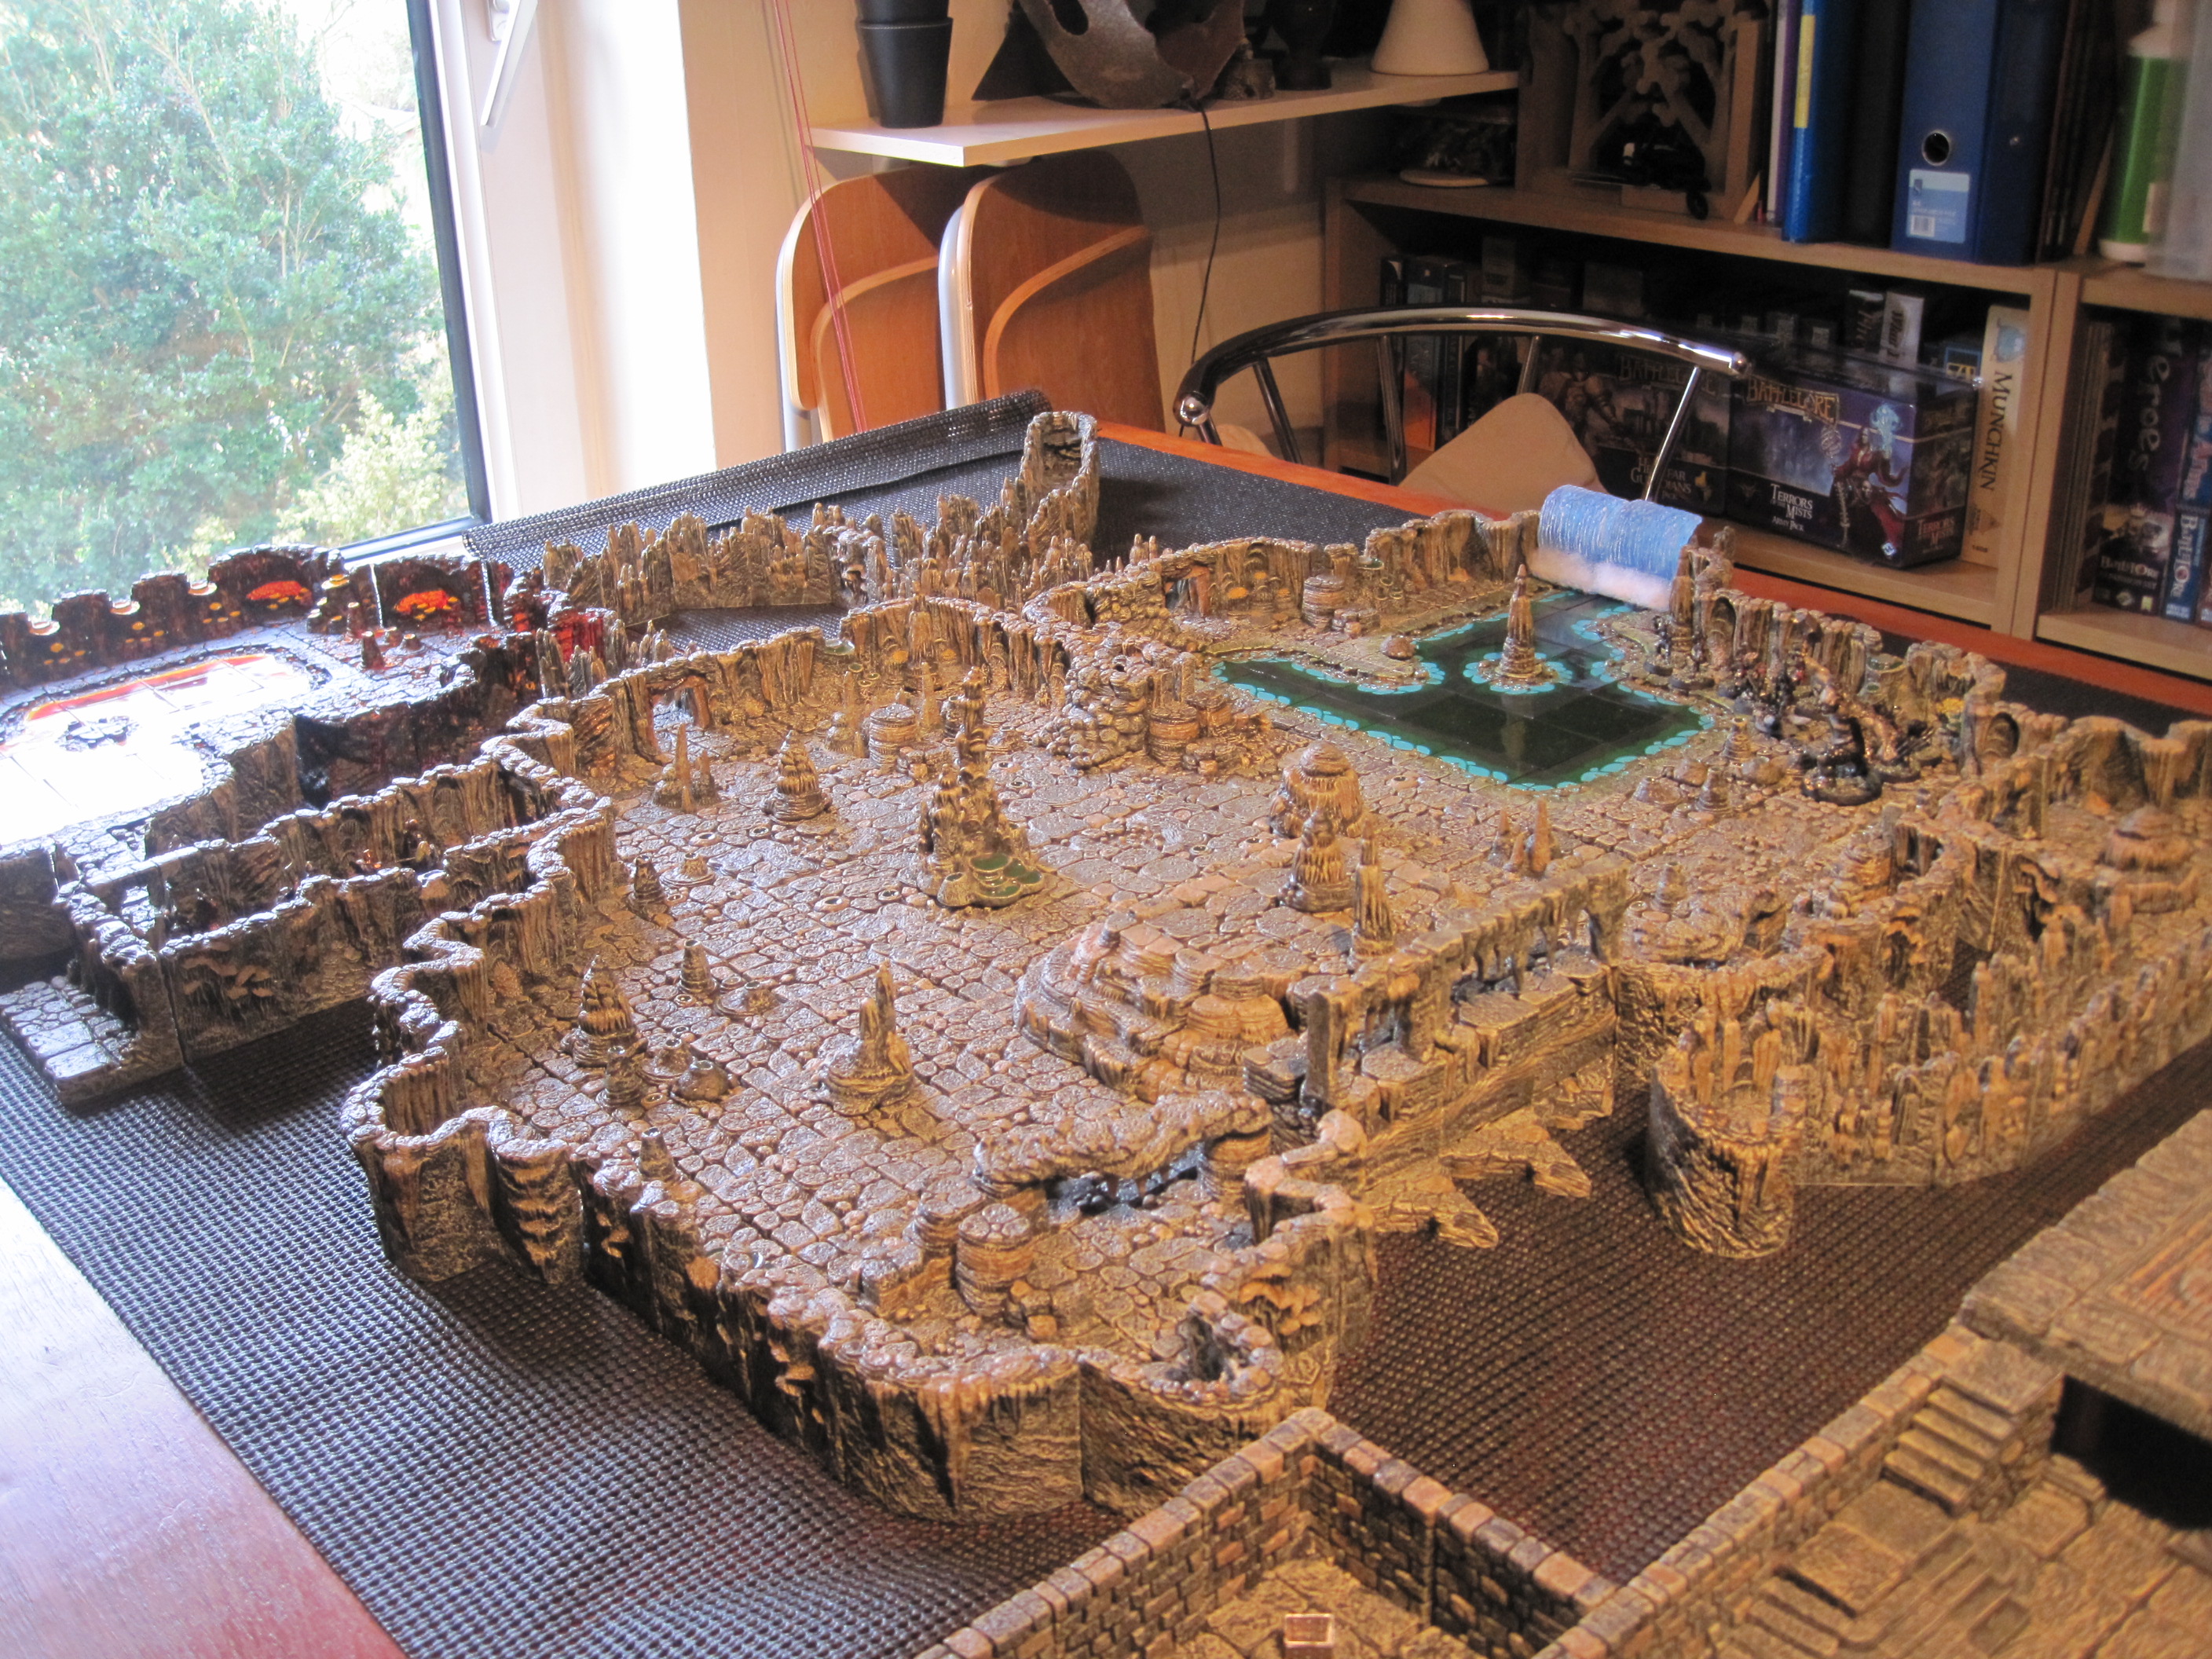
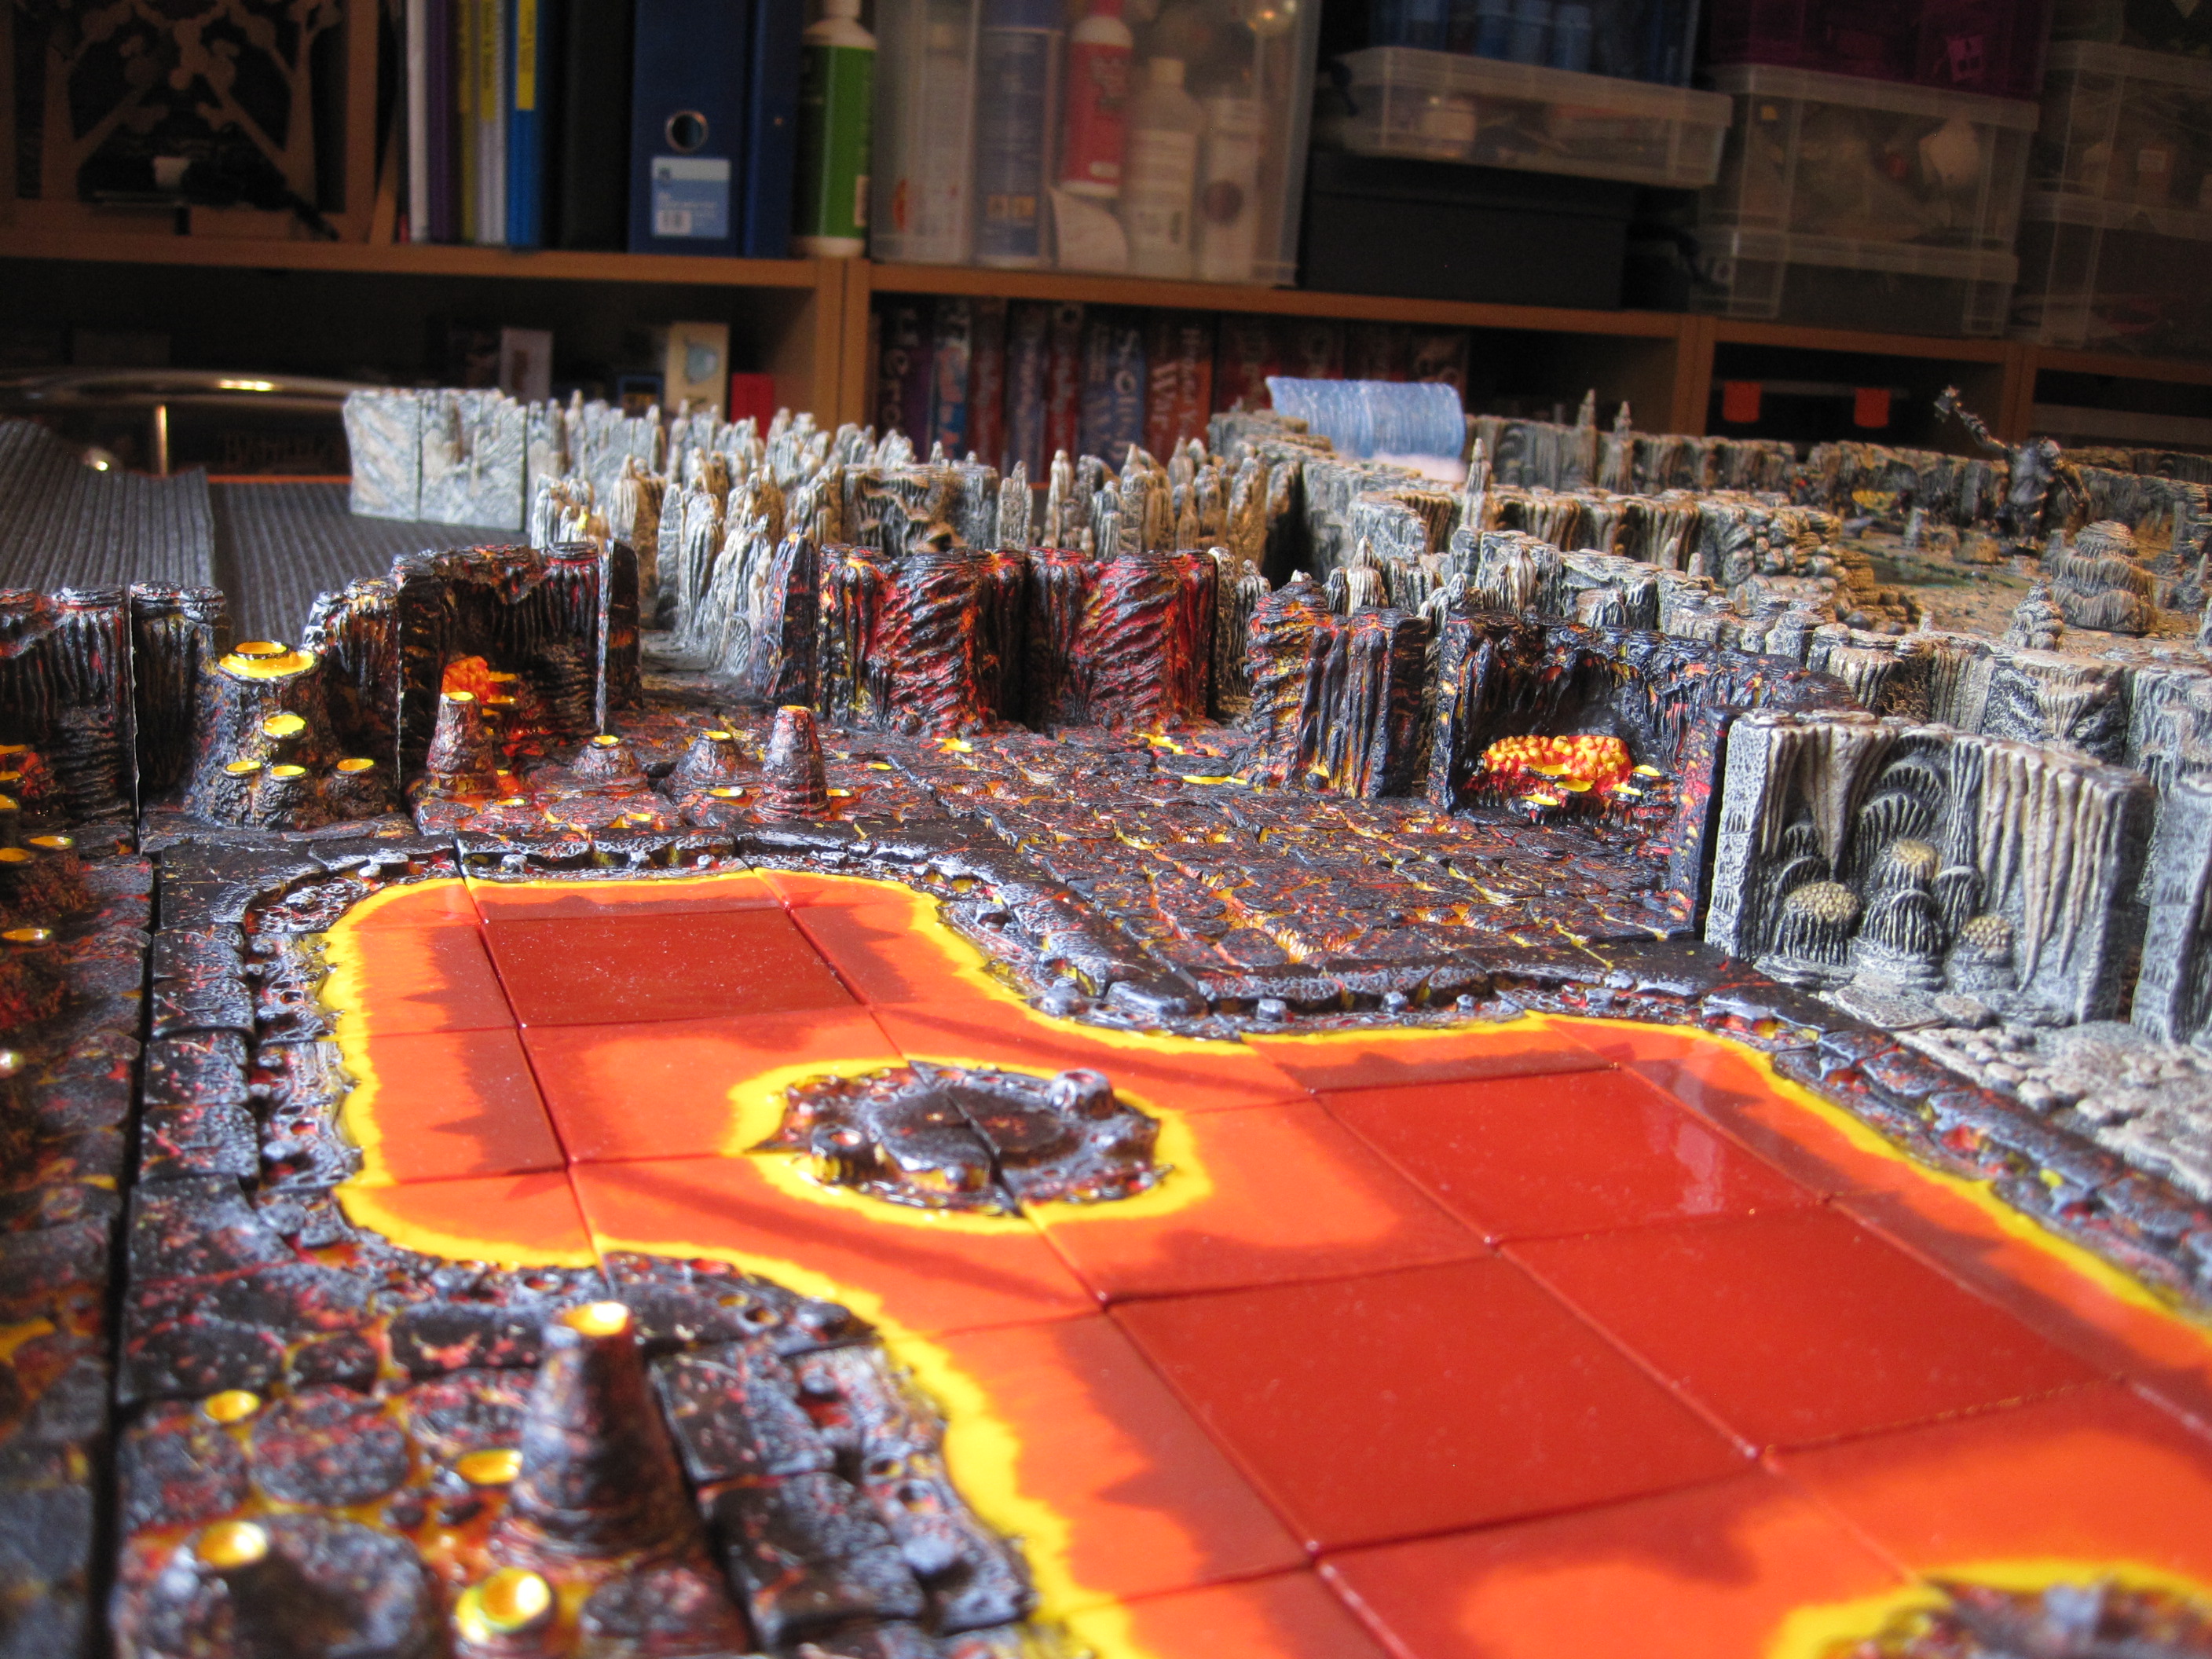
The battle began with Gondor advancing steadily, moving artillery onto the hill for a commanding view of the rough ground opposite and the infantry moved in to the buildings (ruined temple by the river). The light infantry rangers placed out of command on the far right did march forwards but then spent most of the game failing to activate.
Mordor attacked by sending in the elephants against the bowmen and spearmen of Gondor. The harad cavalry skirmished with the late knights but this time their armour saved the Knights from injury.
The Trolls (Elephants) took a lot of shots coming in but did manage to close with the enemy. The deep spearmen suffered a double disorder and the loss of their commander but they did manage to heroically kill the Troll. Another Troll faced a barrage of missile fire but was at last brought down by an artillery bolt from the hill. The only hit the artillery scored all game but a crucial one.
The Gondor infantry successfully occupied the buildings as the facing Uruk Hai proved very reluctant to advance. Then when ordered to charge and take the ground they consistently failed to activate with an ace card every time! On the far left flank the Gondor Knights pushed back and destroyed the Harad cavalry. However the Harad commander proved resilient and simply joined his light cavalry. Mike then moved his redoubtable javelinmen over to that flank and held the Knights up even defending against flank attacks before driving a unit off the board in disorder.
On the Gondor far right the Rangers failed to move. Whilst in the centre with the Trolls now dealt with the Gondorians were able to rally their forces just in time before the Morgul Knights charged into contact. Gondor held! The citadel Guard advanced towards hitherto immovable Half Trolls. The foolhardy Gondor infantry attempted to destroy the uruk Hai whom their archers had disordered but were soon sent scurrying back into the buildings in disorder. The Uruk Hai still kept drawing aces though so could not rally and push their advantage.
The Morgul Knights easily pulled back to the safety of the ground behind the hill and planned their next move. With the Knights pushing hard against the Haradrim to his right and his Uruk Hai stubbornly failing to advance on his left the Marshall of Umbar was in no hurry to attack the now rallied Gondor infantry in the centre. So the forces of Harad and Mordor retreated whilst the camel riders and Harad light horse archers held the Knights back long enough. Even the reluctant rangers had advanced in sight of the Uruk Hai but too late to have an effect. So victory was awarded to the forces of Gondor especially the Knights led by Bruce and the Prince of Ithilien.
After the battle we felt the Trolls had once again caused a lot of trouble and delay for the Gondorian infantry, even killing their commander but had failed to make any great impact in terms of destroying units. The Bowmen would probably be better deployed a box ahead of the shieldwall infantry to allow a retire and then swap places as opposed to being in the same box then stuck in front once the enemy close. Also Darryl felt the Harad cavalry wing with a lot of lights would be better deployed broken up and mixed with the infantry rather than attempting to face off against the superior Gondor Knights. The artillery did not really have a huge impact as their fire can easily be drawn towards light units in rough going but they did kill a Troll and save a unit of bowmen which was quite impressive. Artillery in a building (presumably placed on a tower or rooftop) would be even more useful as they can see over intervening troops more easily. The Mordor bolt thrower did not even shoot as it was killed by archers as soon as it was deployed on the hill but it did draw fire away from the Morgul Knights so that was important. Finally we could not work out what the defensive bonus for formed infantry in buildings was though it did not matter because the Uruk Hai never did manage to activate. If they had then they probably would have captured the buildings. Placing formed units out of command in a maze of rough ground is not a good idea as the Rangers found out. All in all another good game of To the Strongest and everyone enjoyed it with Bruce soon capturing the essence of the rules and activation mechanisms.
Using the To the Strongest rules Mike and Phil introduced Darryl to the To the Strongest Rules. Gondor against Mordor and the Southrons with Phil playing as Gondor. This was to be the first battle in our Harondor mini-campaign. Harondor a debatable and desert land.
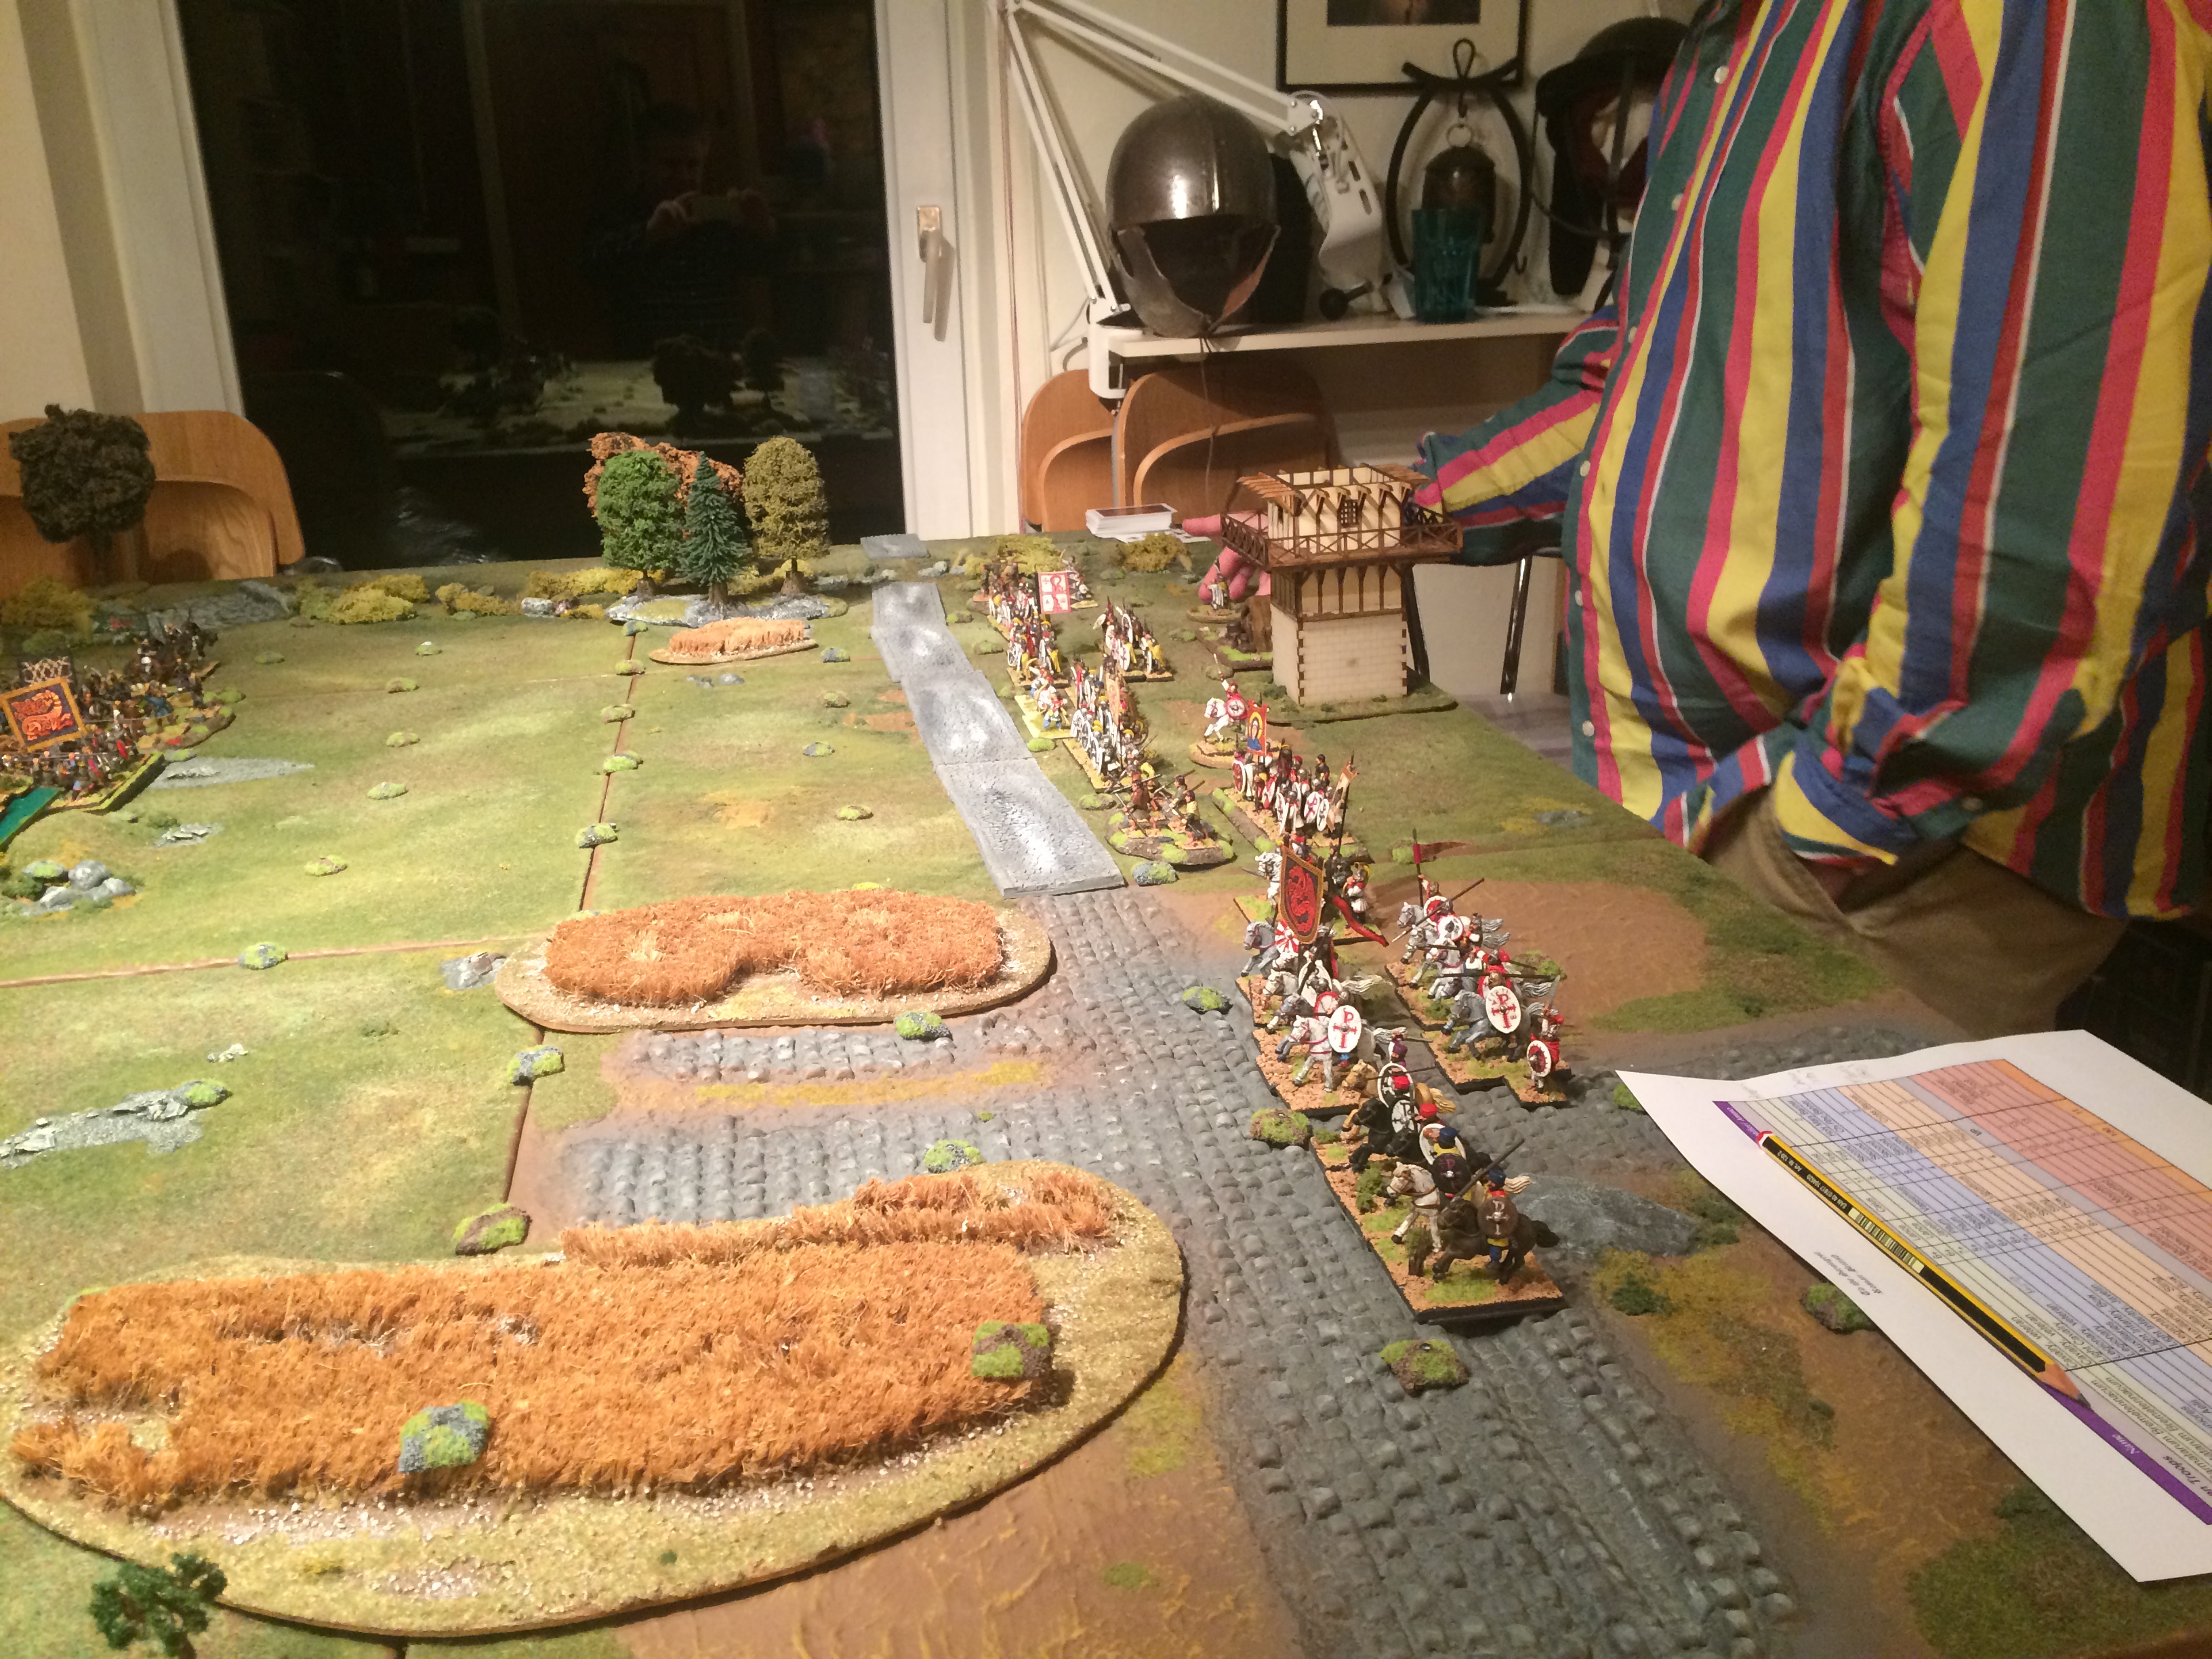
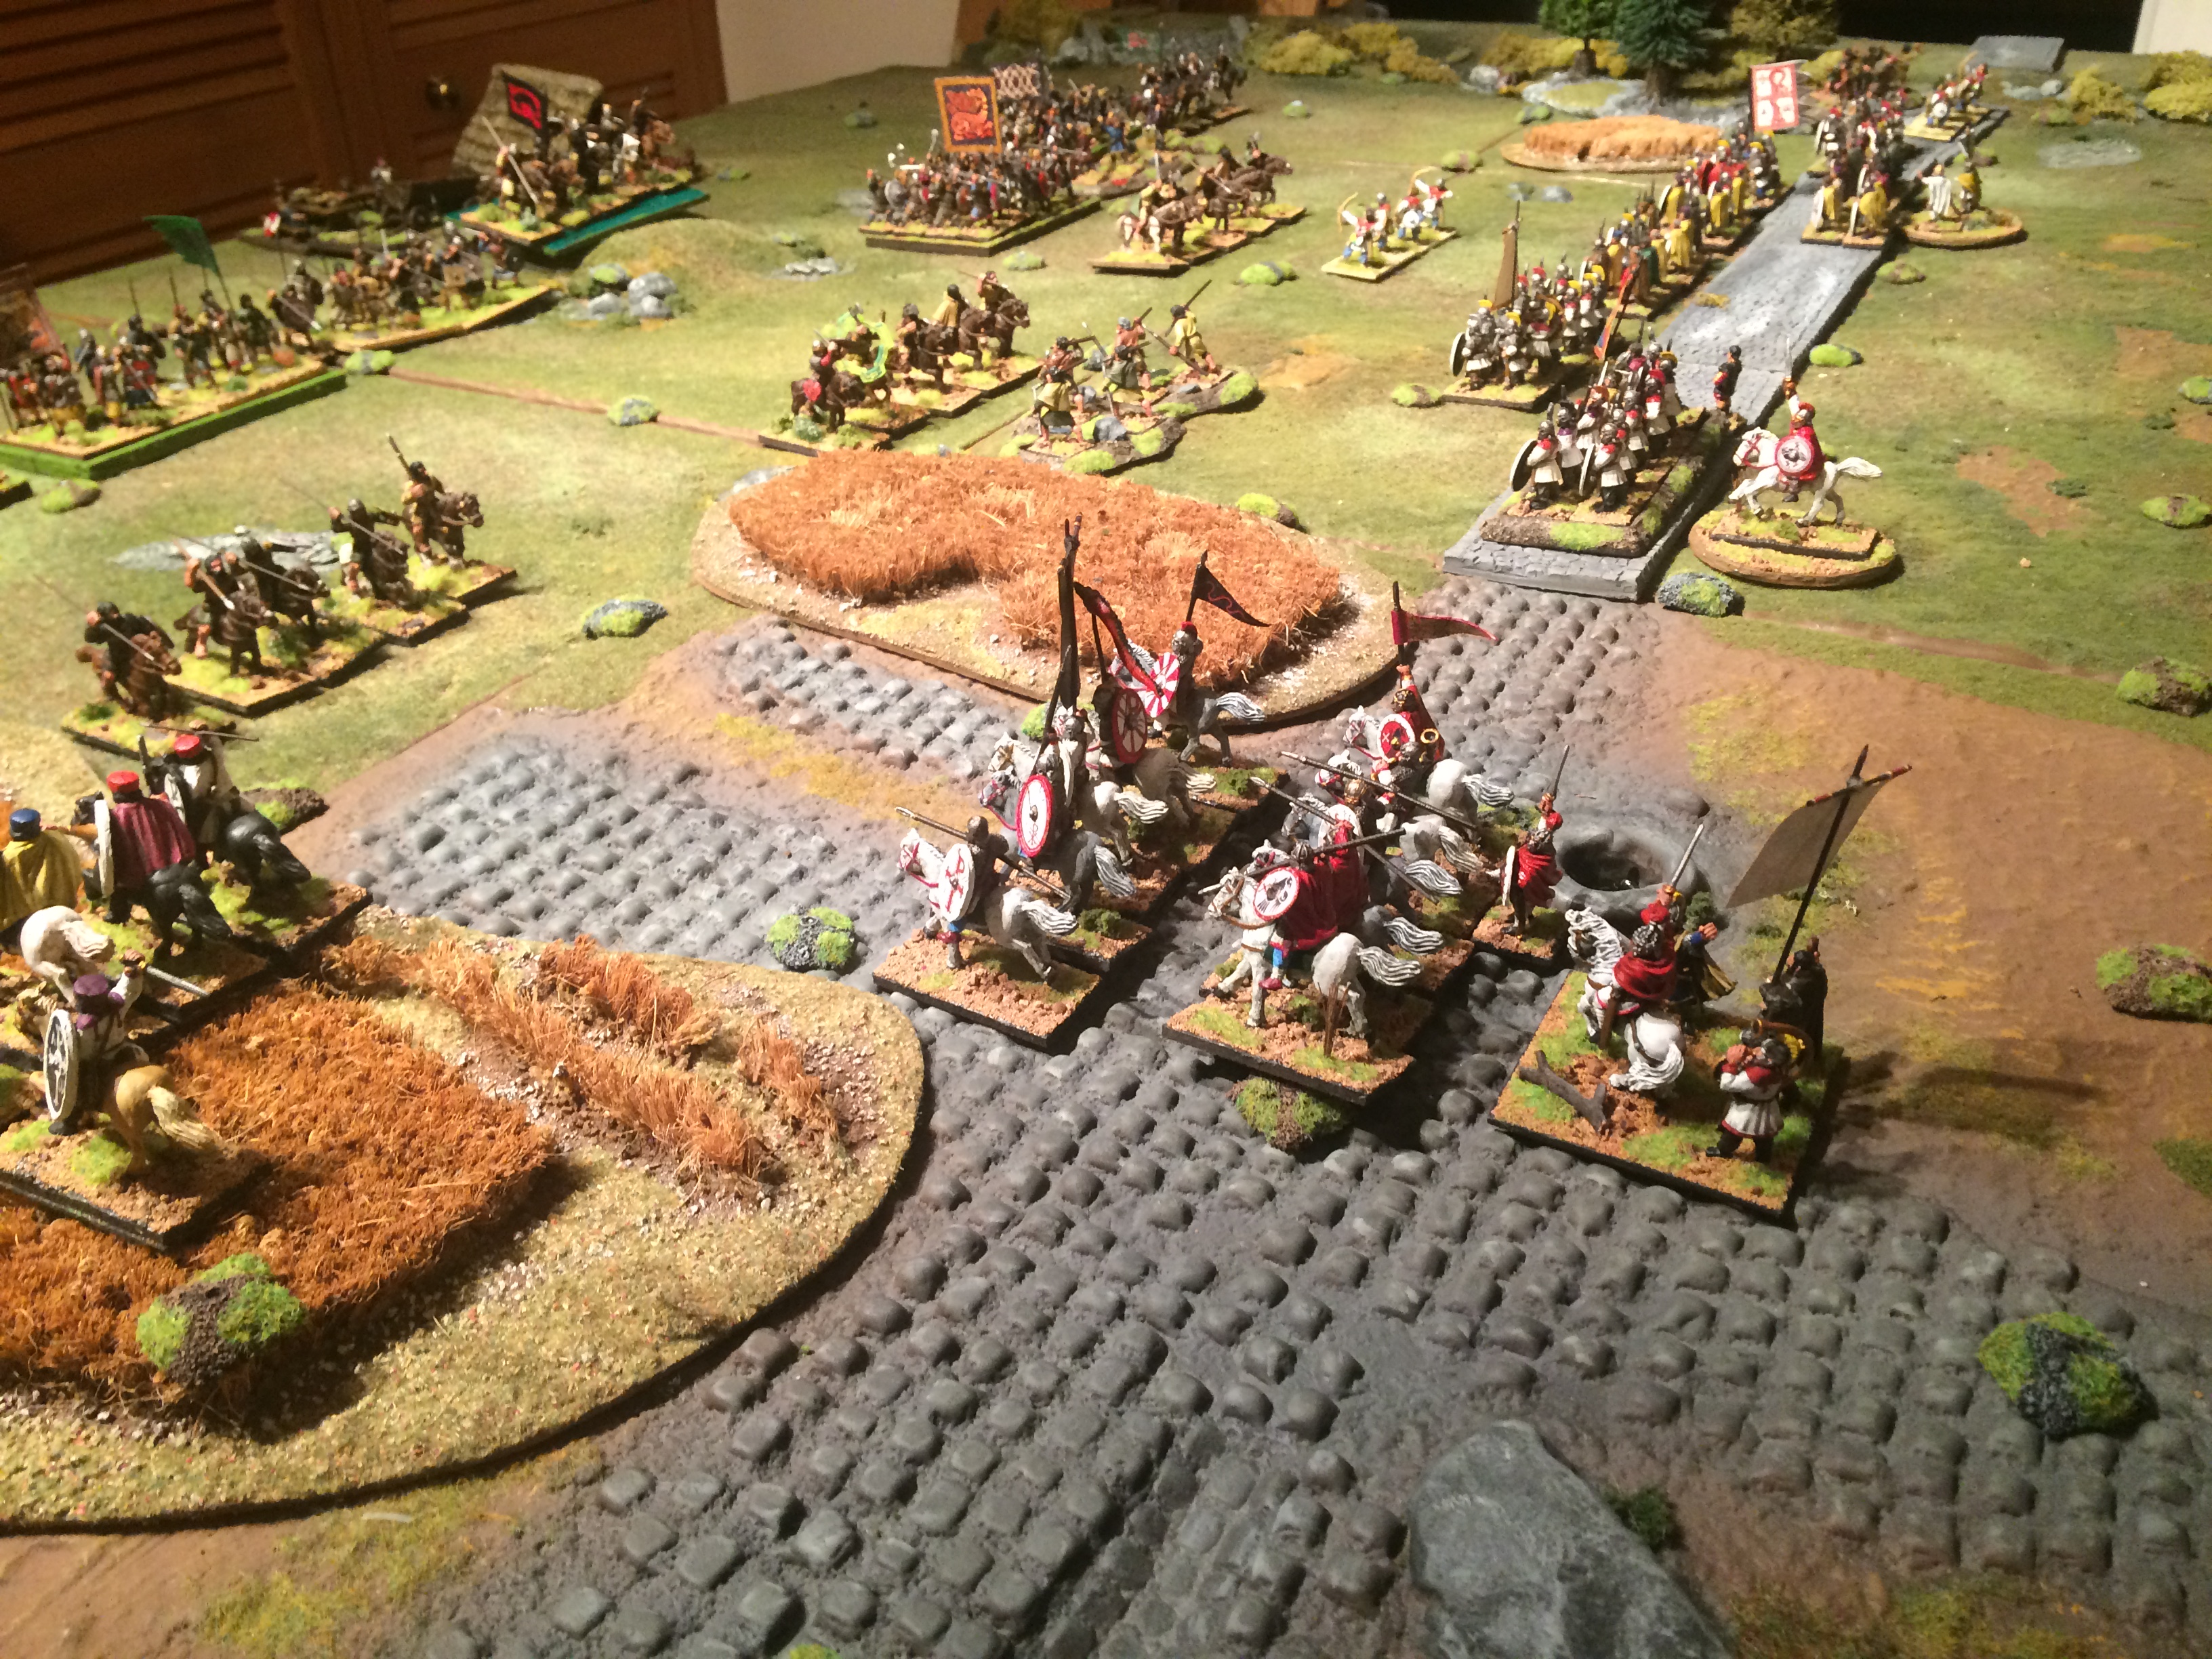
First of all we set out the terrain using the rules. We thought we had placed quite a bit but when the cards were drawn almost all the terrain was removed so the armies faced across an open plain as the Sun rose in the harsh arid lands of South Harondor. The Prince of Ithilien hoped to force the enemy back as they headed up the old Harad Road North to Pelargir.
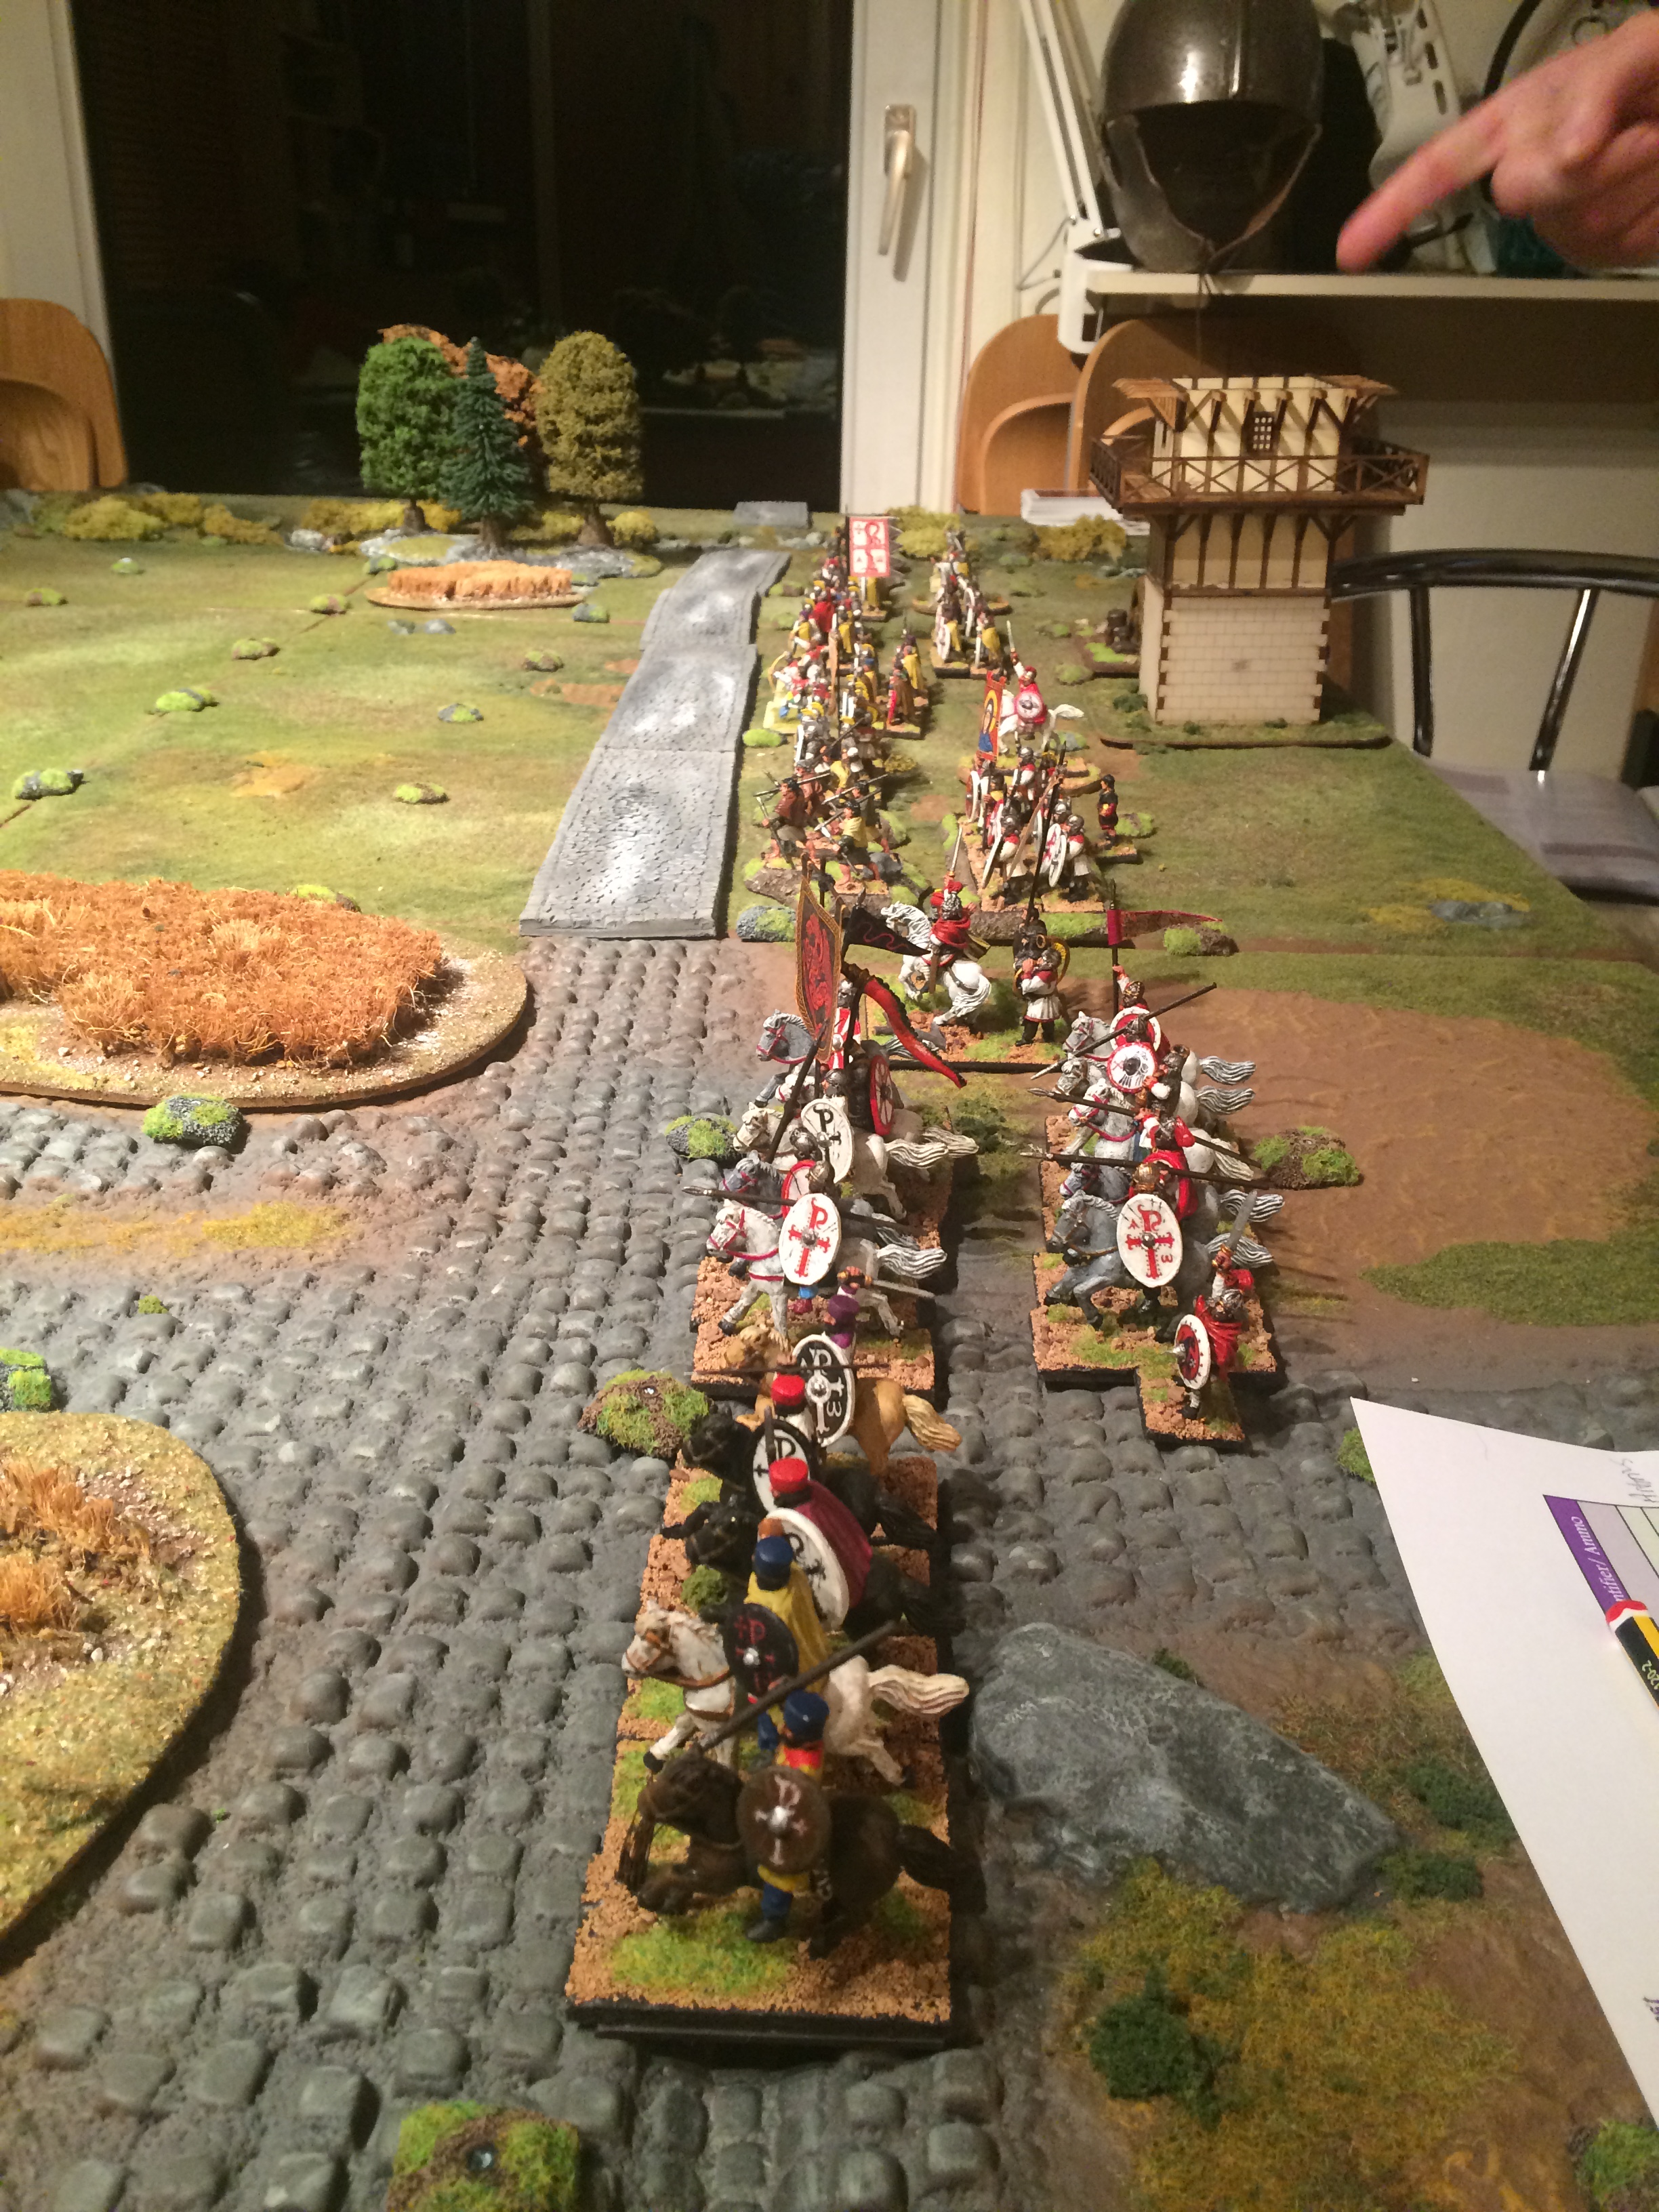
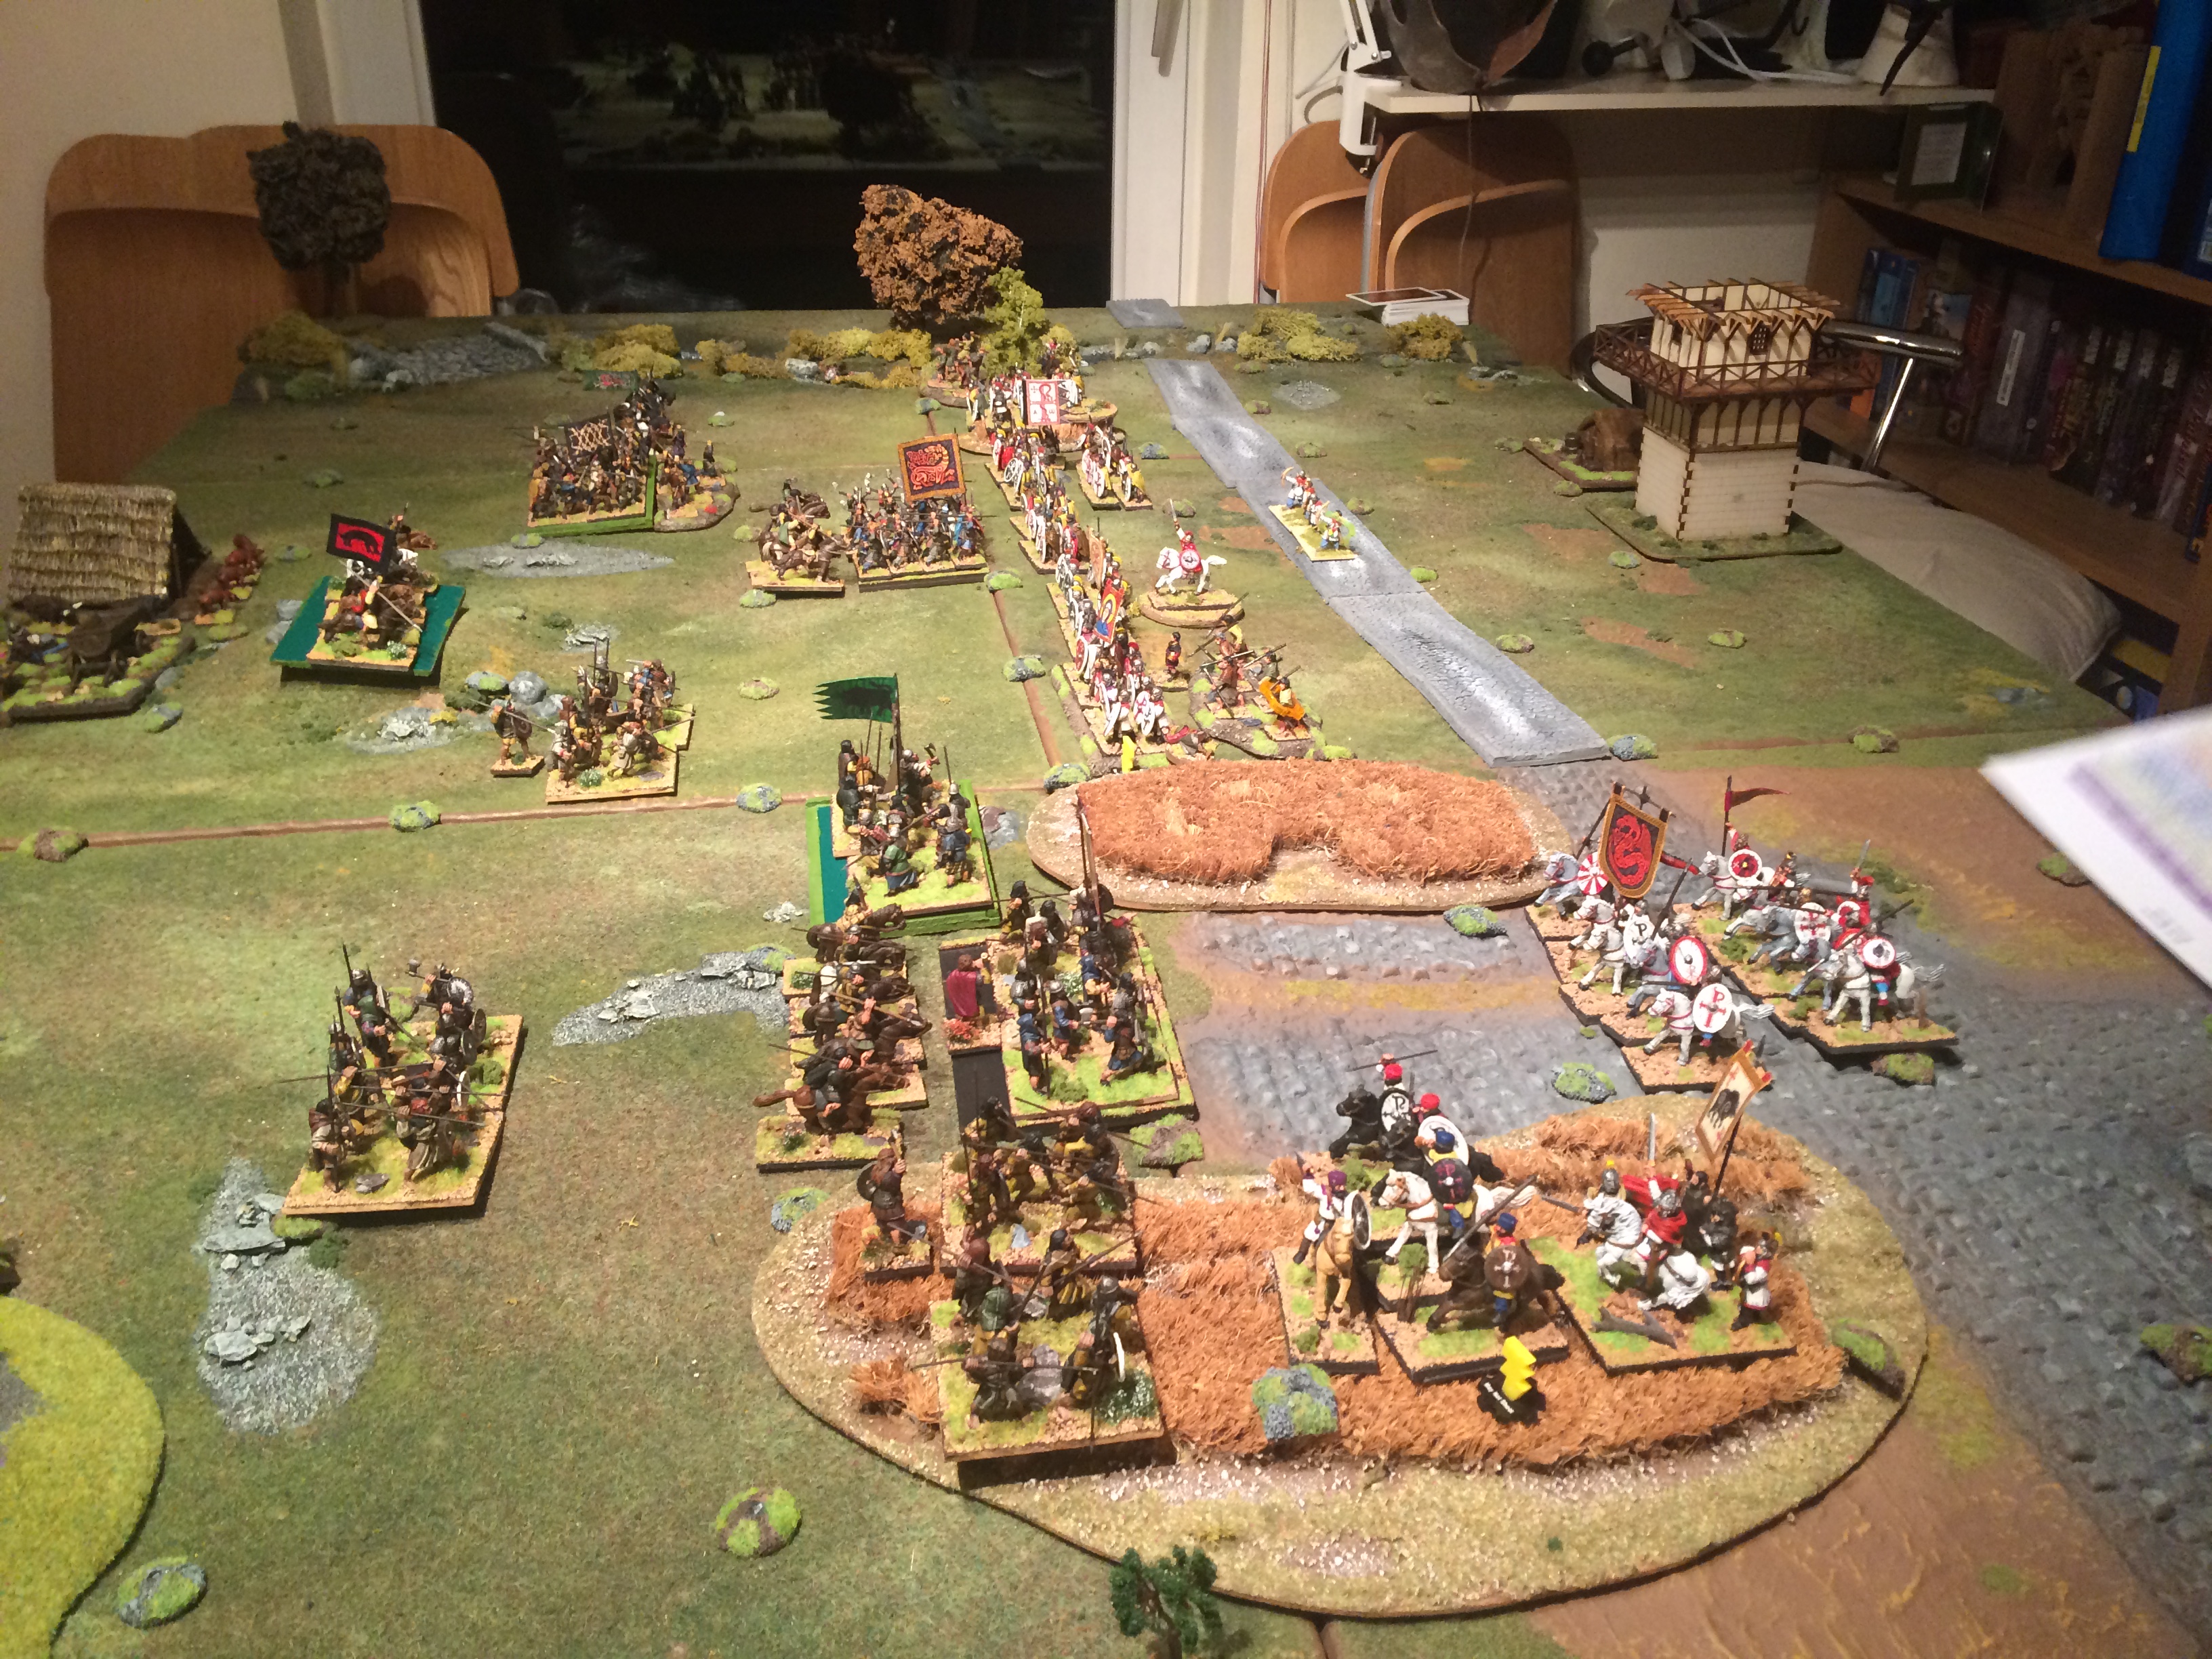
The battle began with the Gondor army advancing forwards rapidly to take the Middle ground. The Knights to the left flank, infantry centre and the Prince’s infantry and Guard cavalry to the right. The right flank infantry failed to advance. In response the Far Harad infantry advanced towards the Knights and the Trolls (Elephants) down the centre. The Harad cavalry opposite the Gondor right advanced and harried them with horse archers with little success.
On the Gondor left however events unfolded rapidly badly as the Javelinmen brought down Findegil the Commander and disordered his Knights. He was led from the field gravely wounded unlikely to ever be able to ride again. The Knights in disorder and without a commander would find it difficult to make much progress from now on.
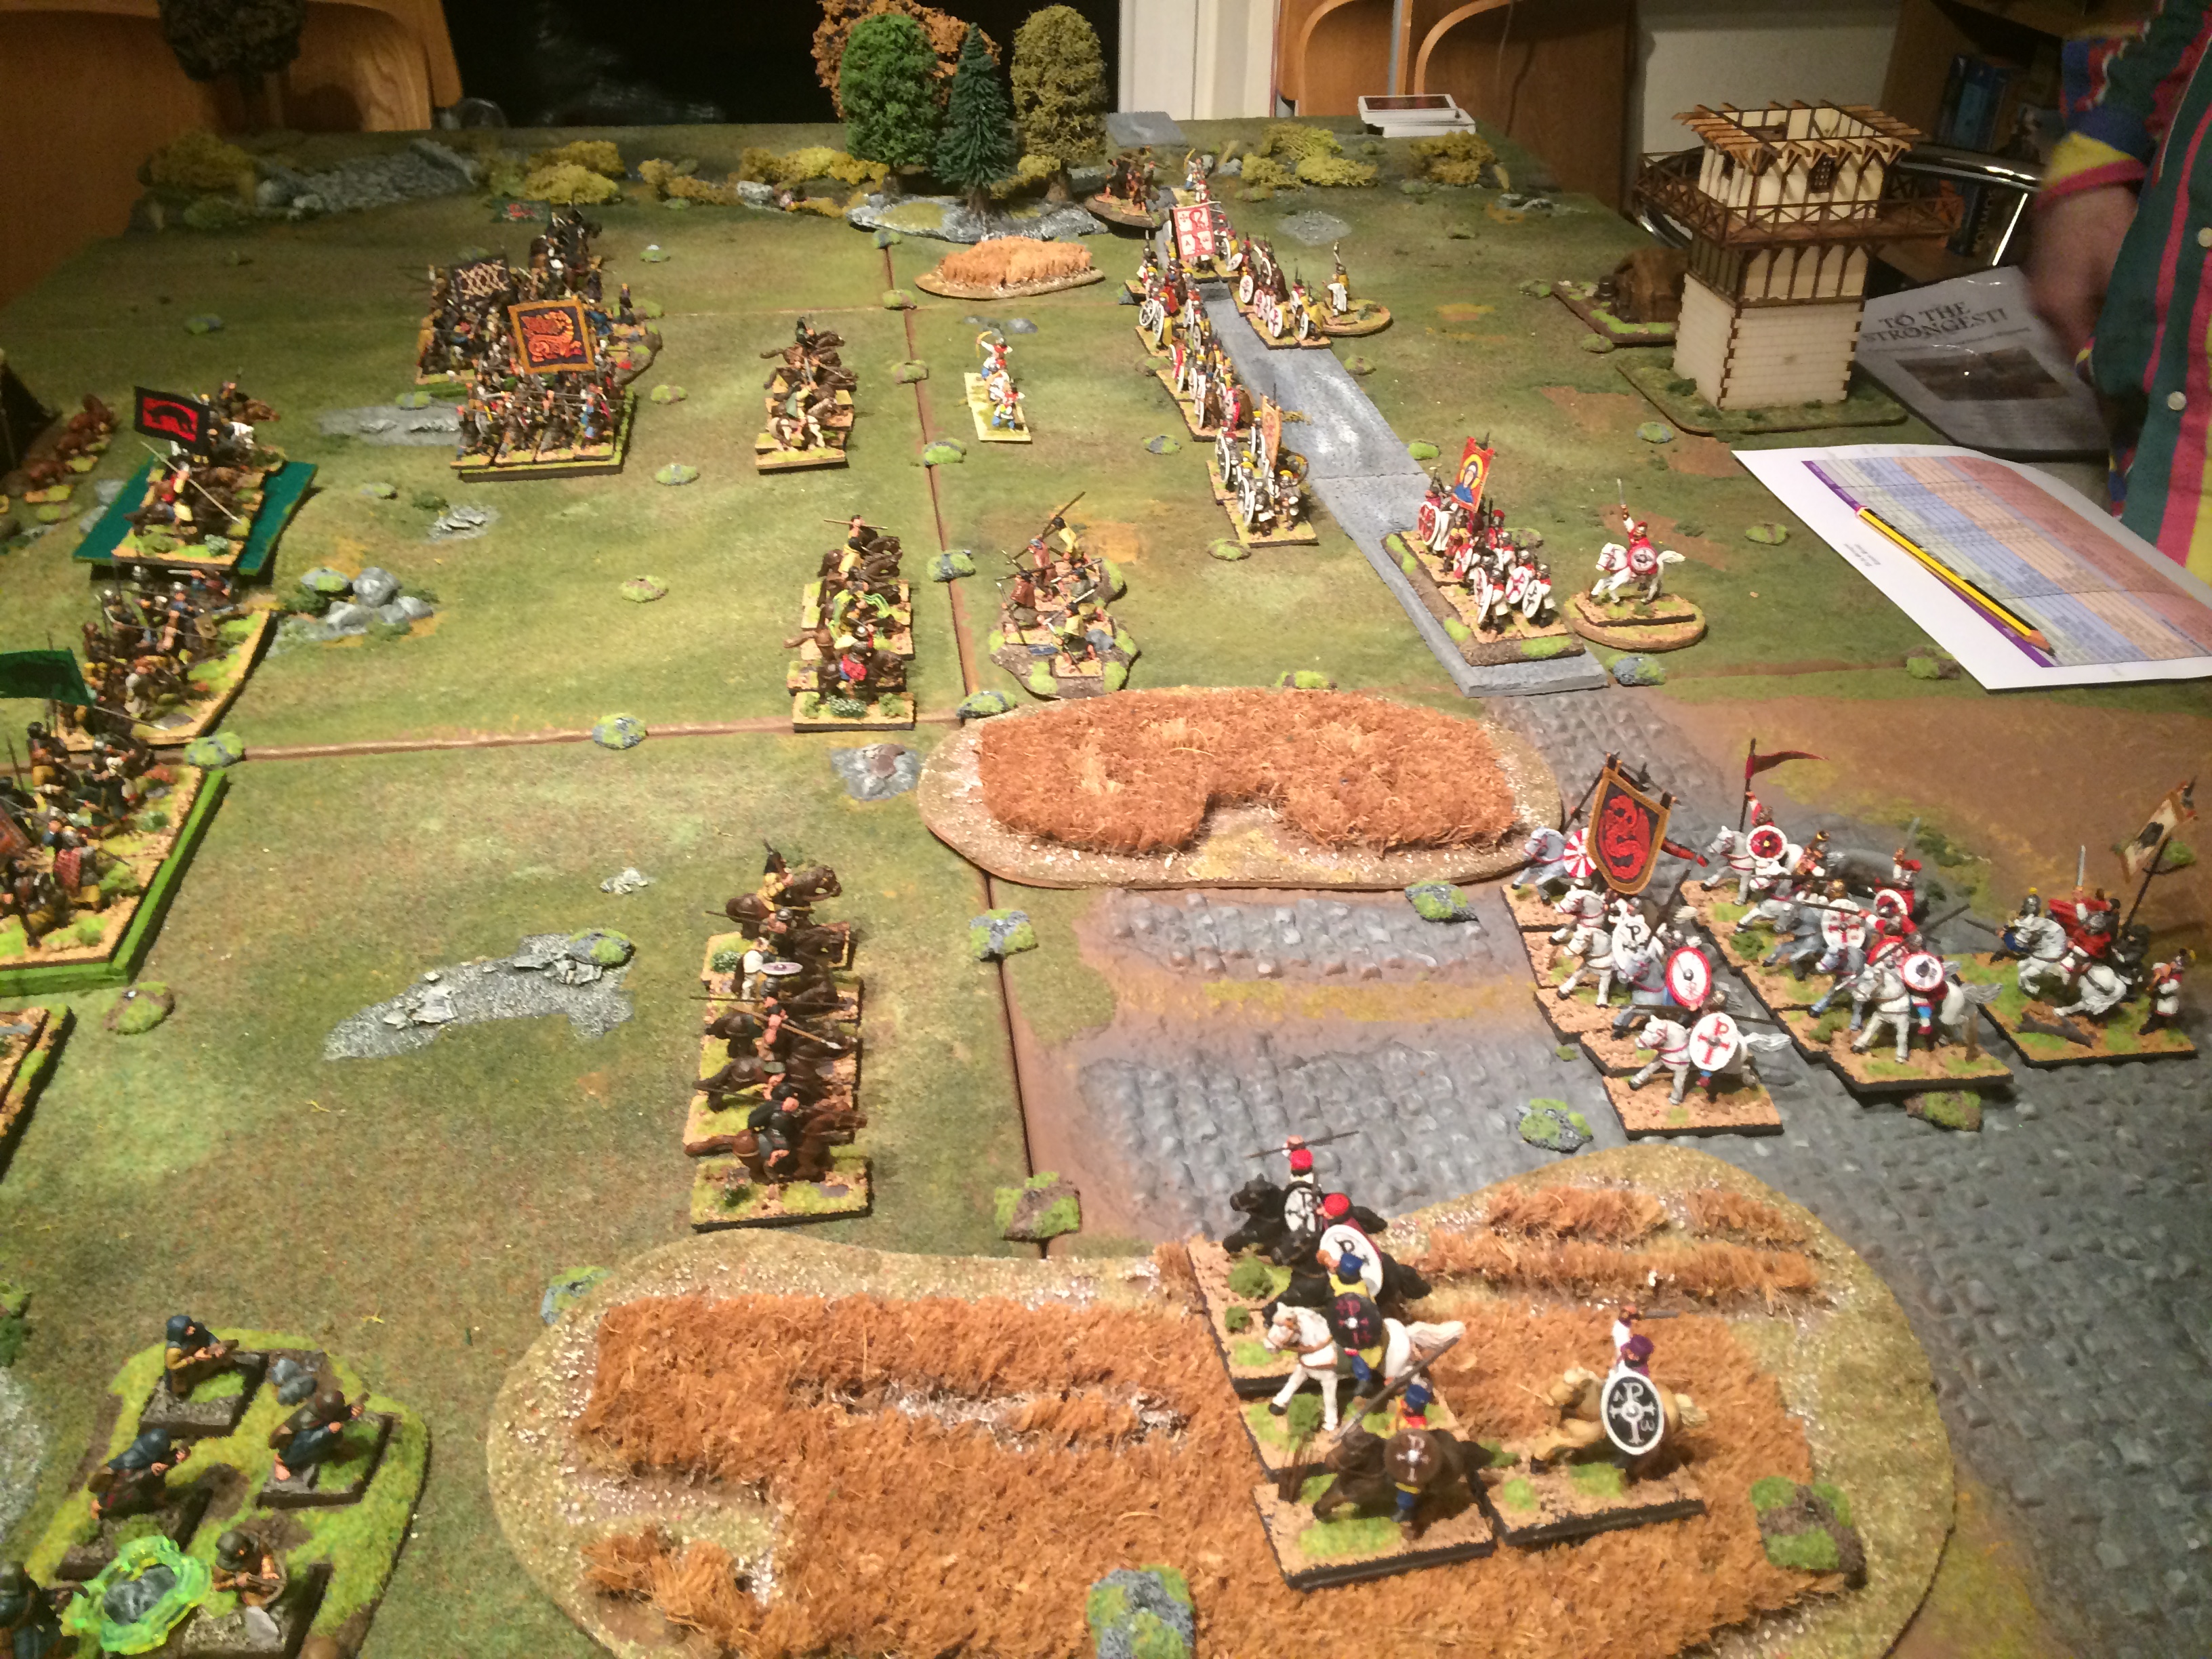
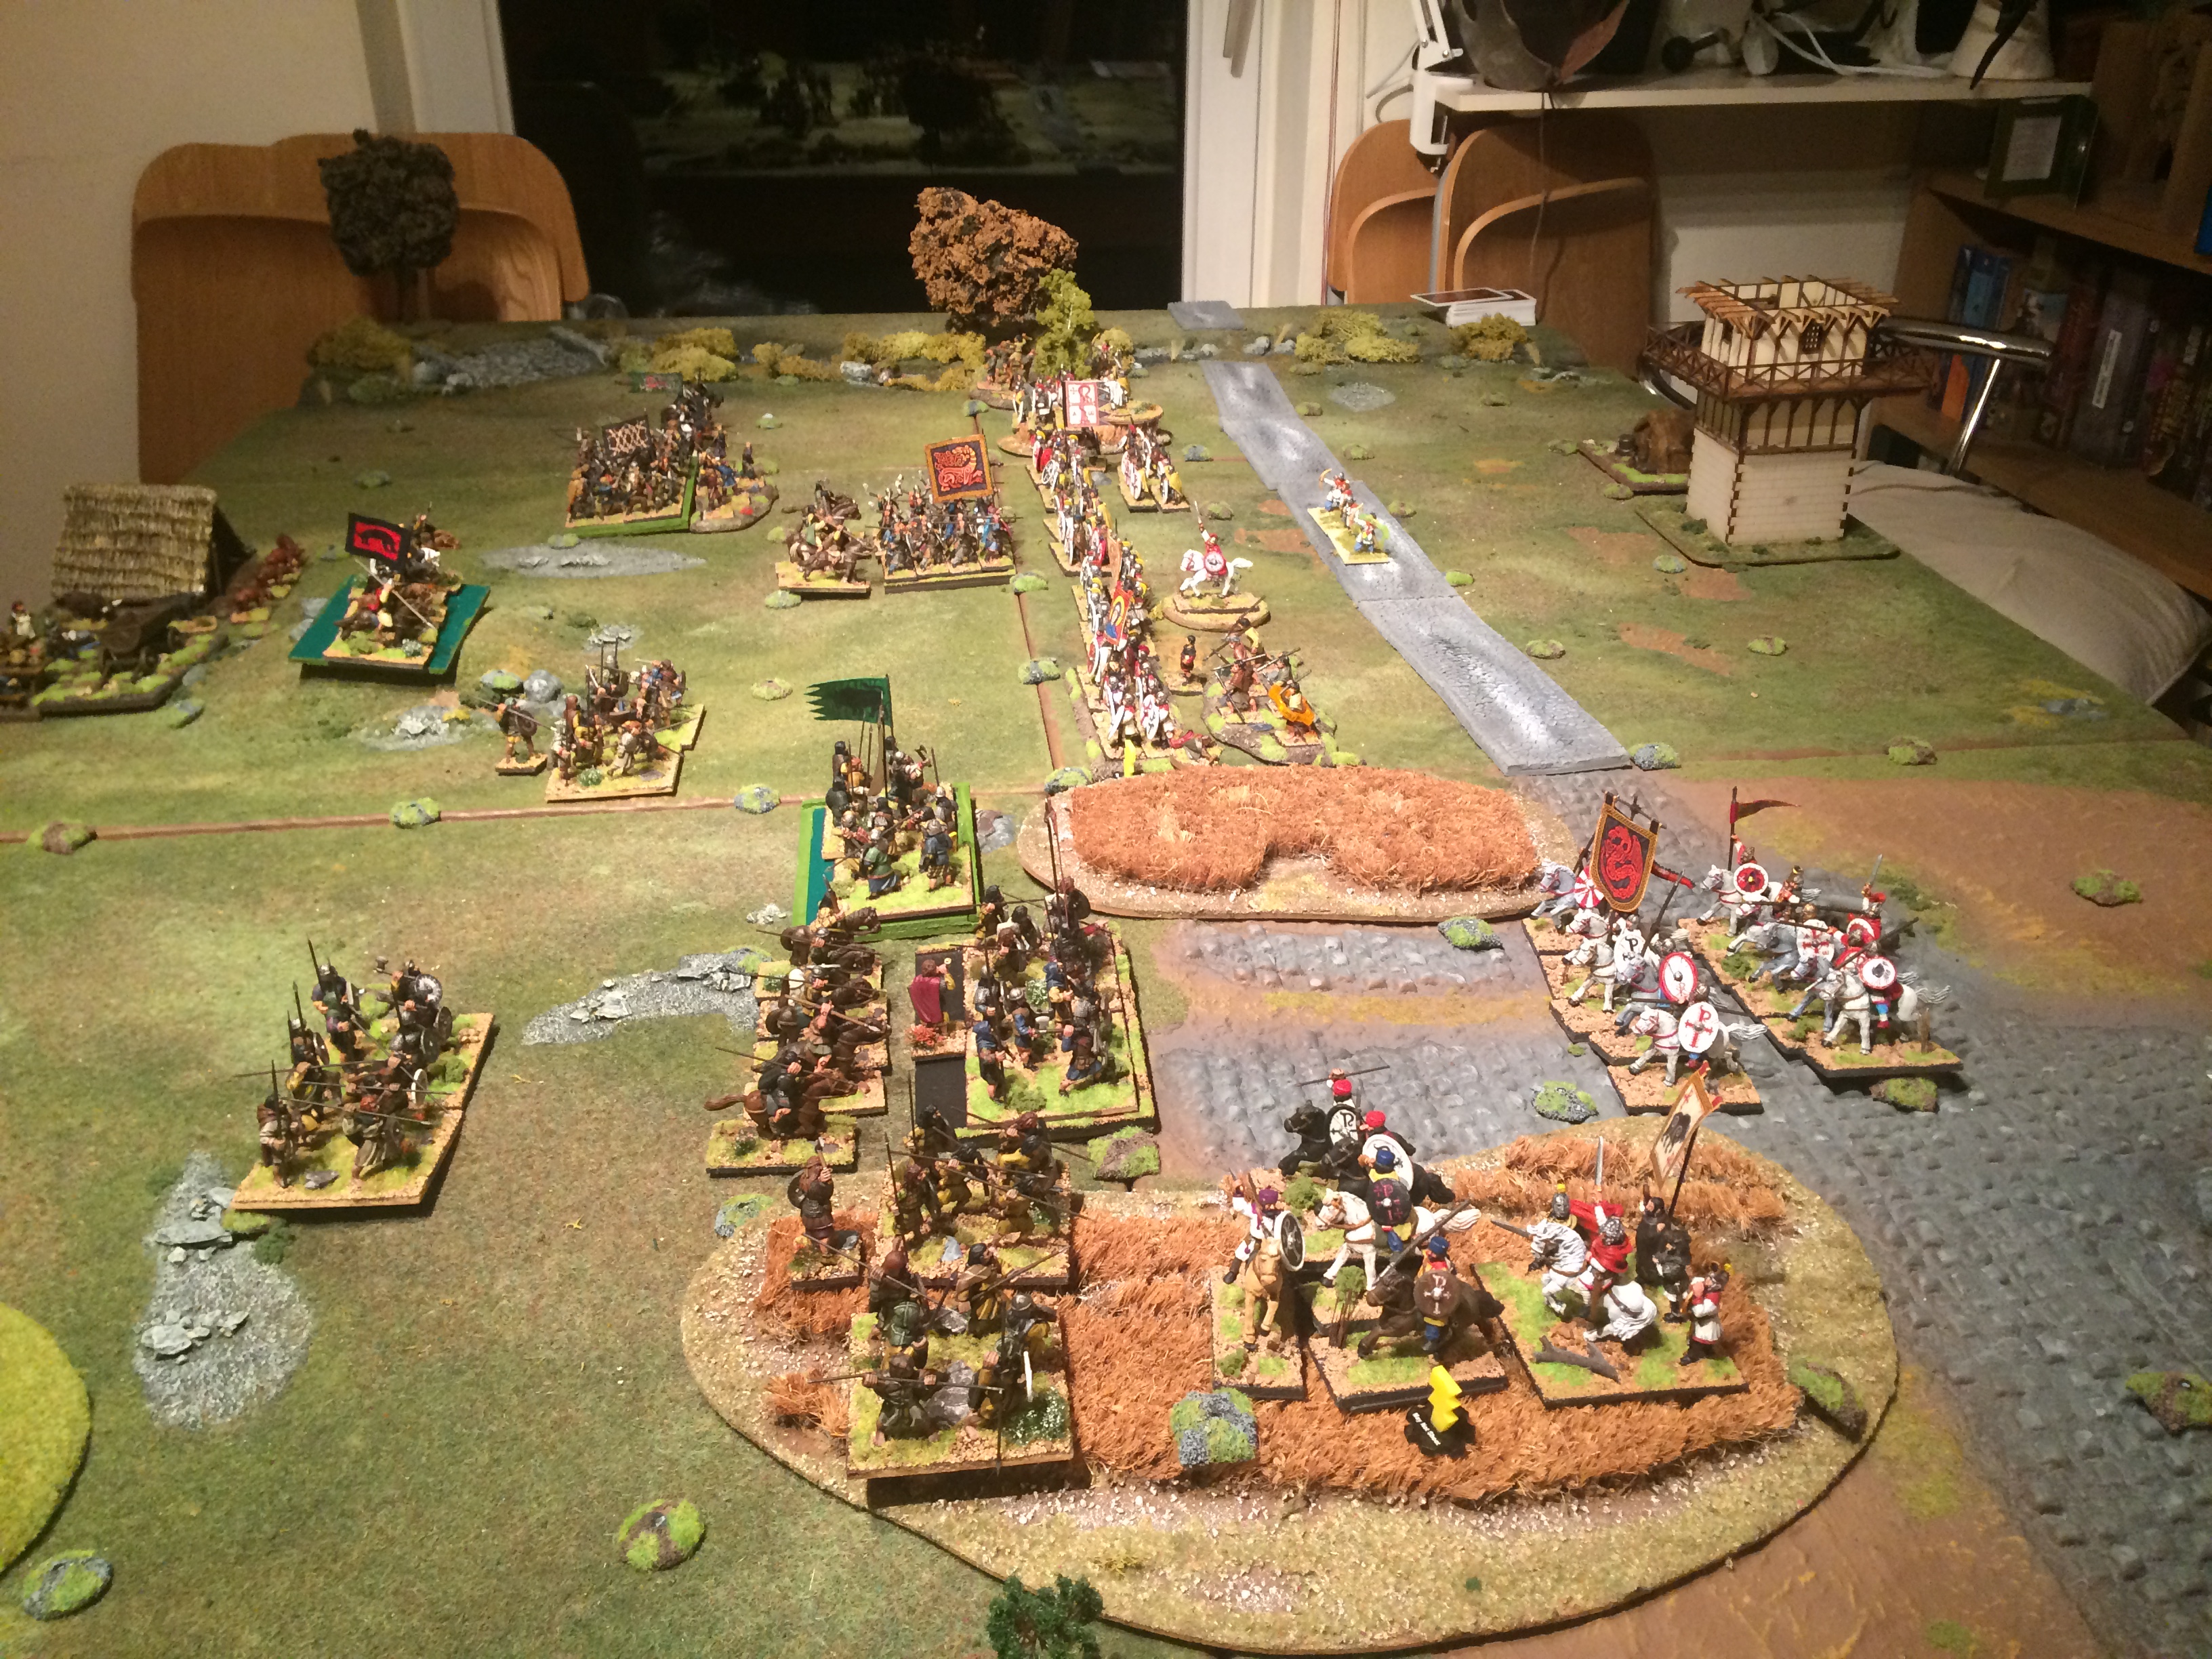
In the centre the trolls struck the Large Units hard and heavily disordered them. They proved impossible to injure and the infantry struggled just to avoid destruction.
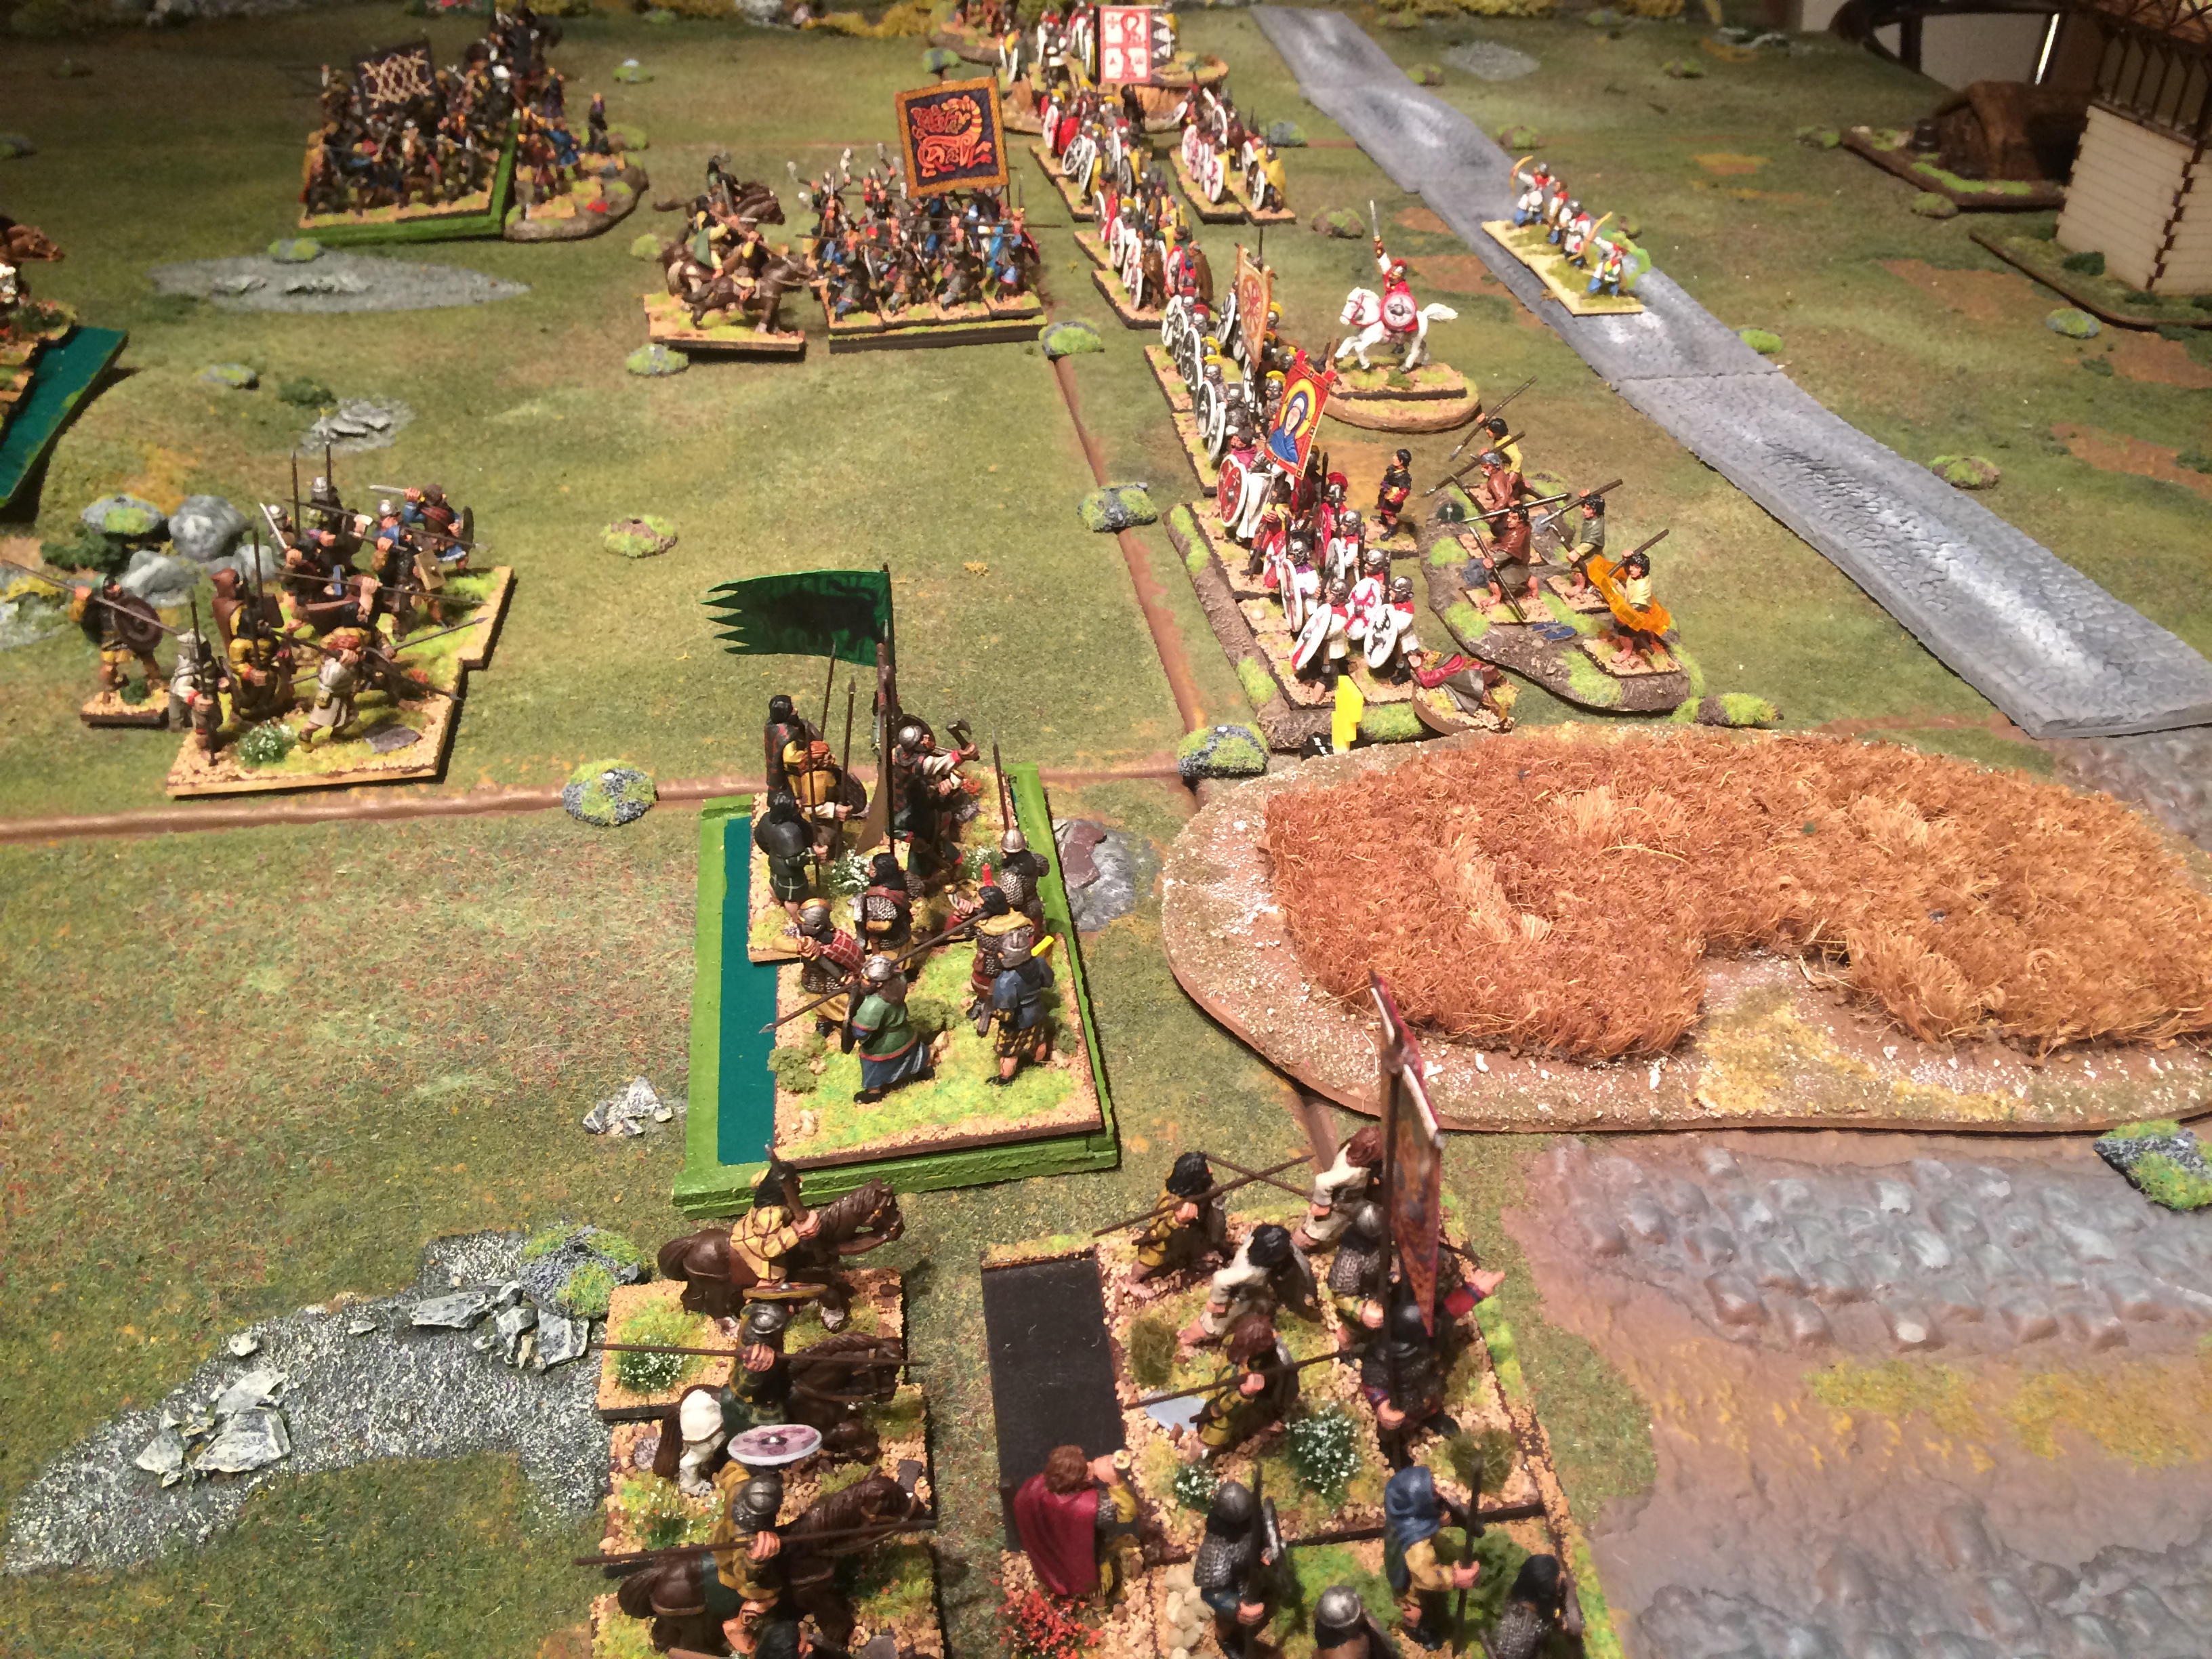
Eventually the Gondor Knights were slowly pushed back but continued to hold the left flank. In the centre one Troll was slain and rampaged towards the Marshall of Umbar with little effect. The others proved indestructible and the Gondor centre was buckling with a couple of units on 2 disorder. On the Gondor right flank the Prince had by now advanced his forces and was pushing the Harad cavalry back. The Serpent Guard lost a unit and the Black Serpent himself had to flee and join the second unit as the infantry pushed forwards. The Harad counterattack though was deadly and a whole large unit of infantry was destroyed. The Knights held their own and pushed back the skirmishing cavalry to the baseline but were disordered in the process.
At this point seeing that the day was lost and before his centre collapsed the Prince of Ithilien withdrew his forces and victory was awarded to the forces of Mordor and Harad. Well done Mike and Darryl.
The Trolls proved especially effective. This was helped when Phil drew an ace when trying to activate his division as they closed thus failing to shoot at a crucial moment. The deep units with extra bow proved very resistant but the extra bow was not so effective when compared with a separate unit of formed archers of course. The fact that they could never seem to hit a Troll and then when they did they always saved caused problems for Gondor. This was compounded by a bad start down the left flank with the early loss of their commander there.
Spent some time researching for a battle using the To the Strongest Rules to be fought in Harondor. Thus it will be Gondor against the Southrons. Hopefully will get to fight it in the next few weeks.
Link to the page here.
Phil, Alex, Bruce and Alex decided to enter the Temple and investigate cult activities having been ambushed on the way to town. Bravely they left the Cleric to guard the horses. Fighter, Ranger, Wizard and Thief barely made it two tiles before they found themselves with three players down and only two surges to heal with. Game over.
Regroup. This time Alex’s thief led the way backed up by Phil’s cleric for healing. he required lots including a potion. Mike’s Fighter and Bruce’s Ranger dealt with lots of monsters. Every time the players got treasure it was stolen by the invisible stalker who had amassed quite a hoard by the end. The players did so well this time they required no healing surges. The Wizard this time was left behind to guard the horses and is consequently the richest fifth player if we ever have more for the second or later adventures in the series. Definitely will be taking the Thief and the Cleric for every scenario now !
Next we played Thunderbirds. we only had two turns before Mike announced we had been defeated by Hood. Oh well!
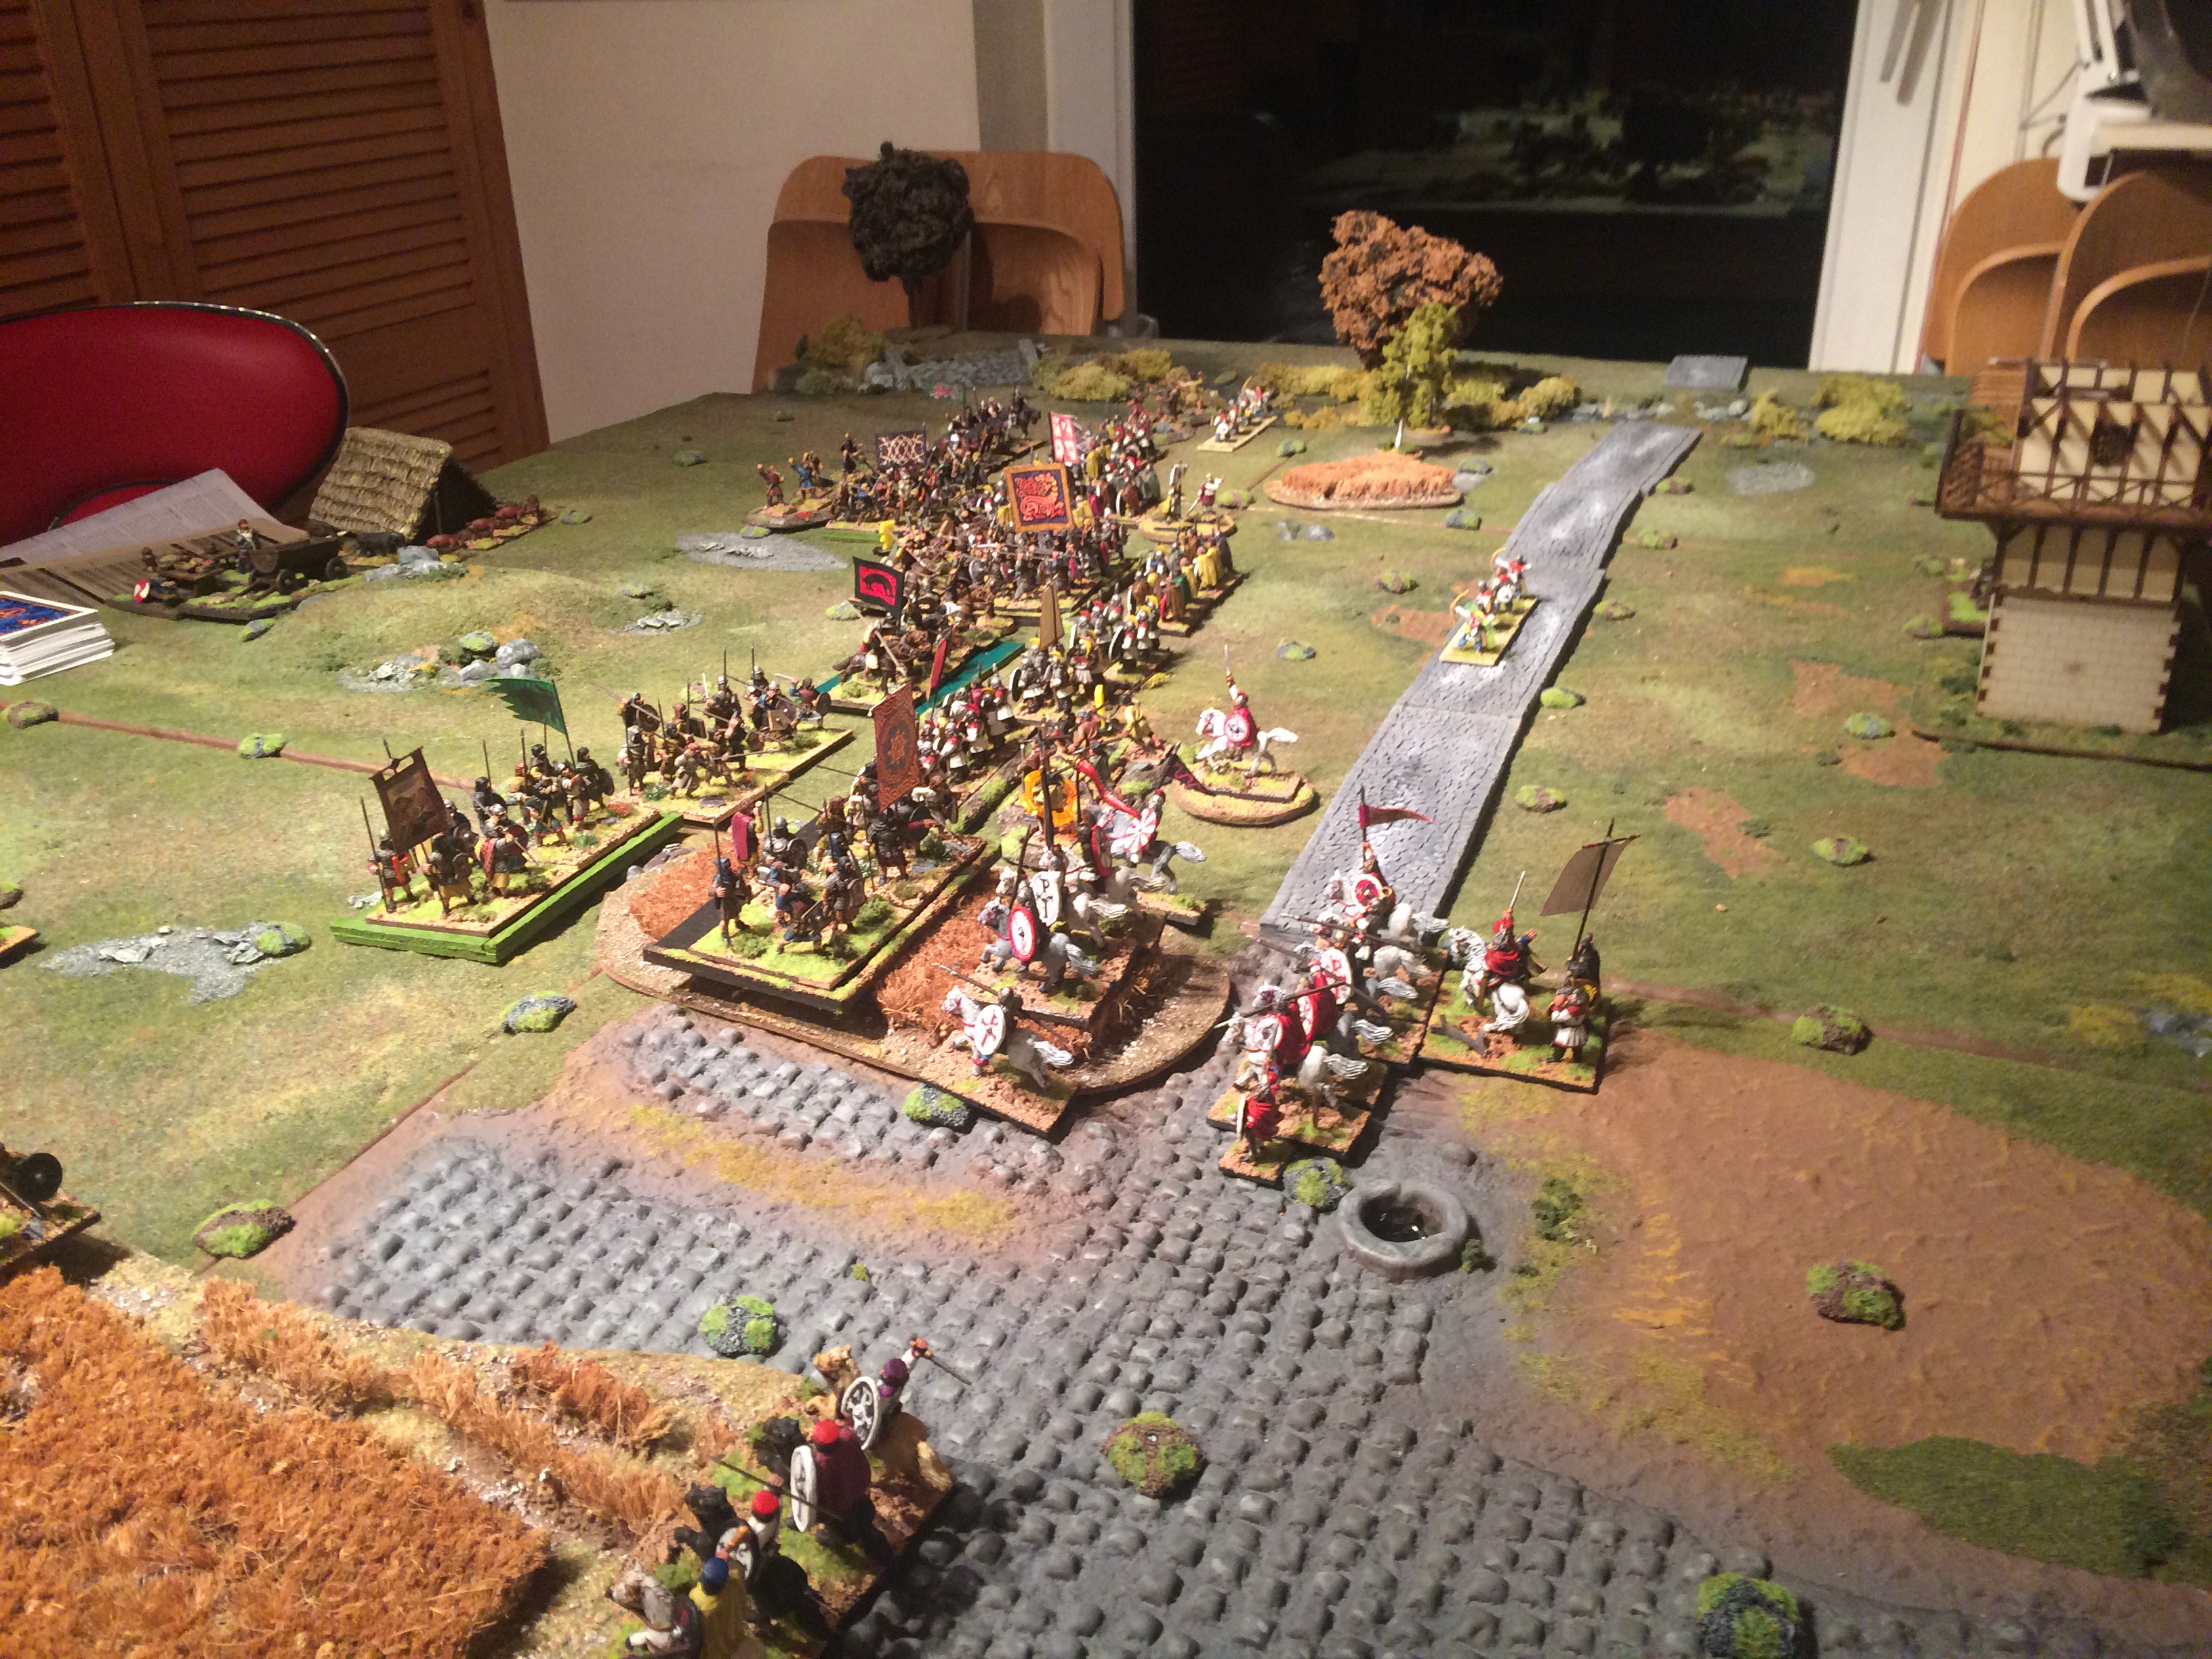
Another Battle in our Campaign. Mike’s Romano British yet again took on Phil’s Picts and Angles in another of Arthur’s battles. This time it was another one of the Twelve Battles of King Arthur: on the River Tribruit.
We used Mike’s official To the Strongest Battlemat and wooden counters. Excellent.
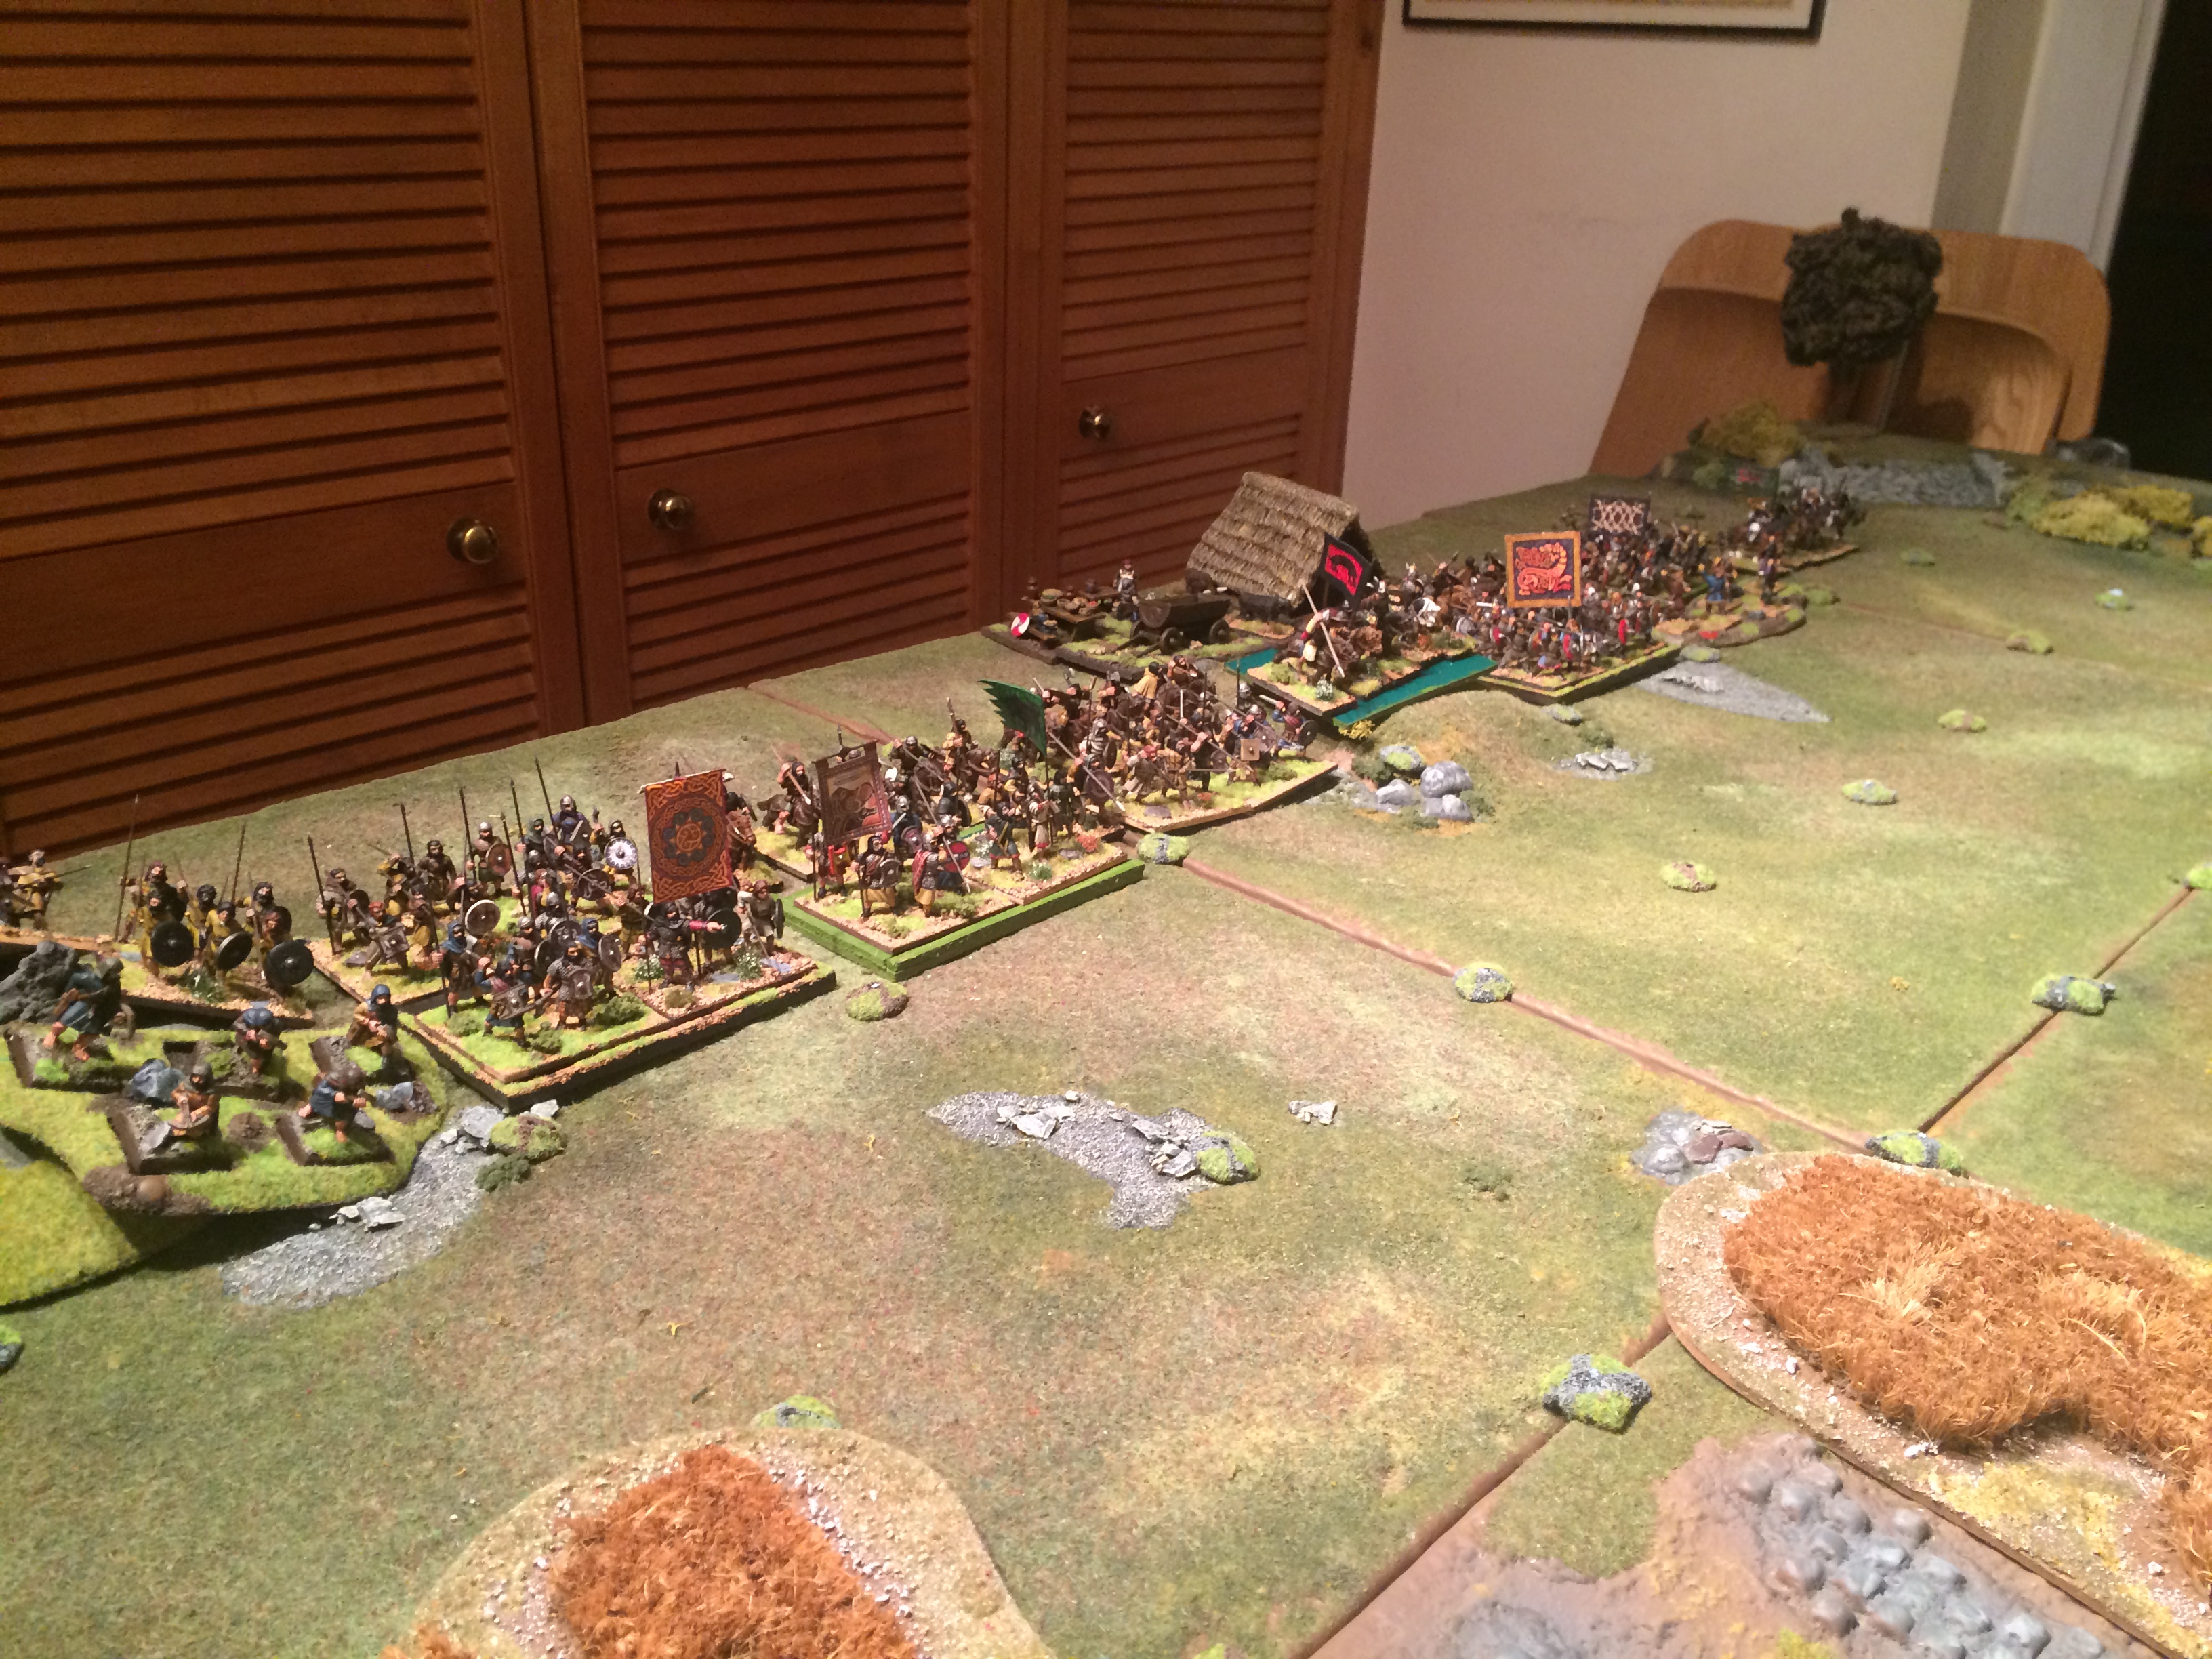
The Romano-British deployed first with Arthur’s cavalry appearing on the right flank as soon as the East Angles had deployed opposite the Romano-British infantry. This meant the Pict spearmen had to deploy behind the East Angles in a long line starting from the far left flank. One unit was left out of command and hardly moved all battle whilst another ended up drawing it’s in command status from the Senior general himself so as to support the East Angles flank.
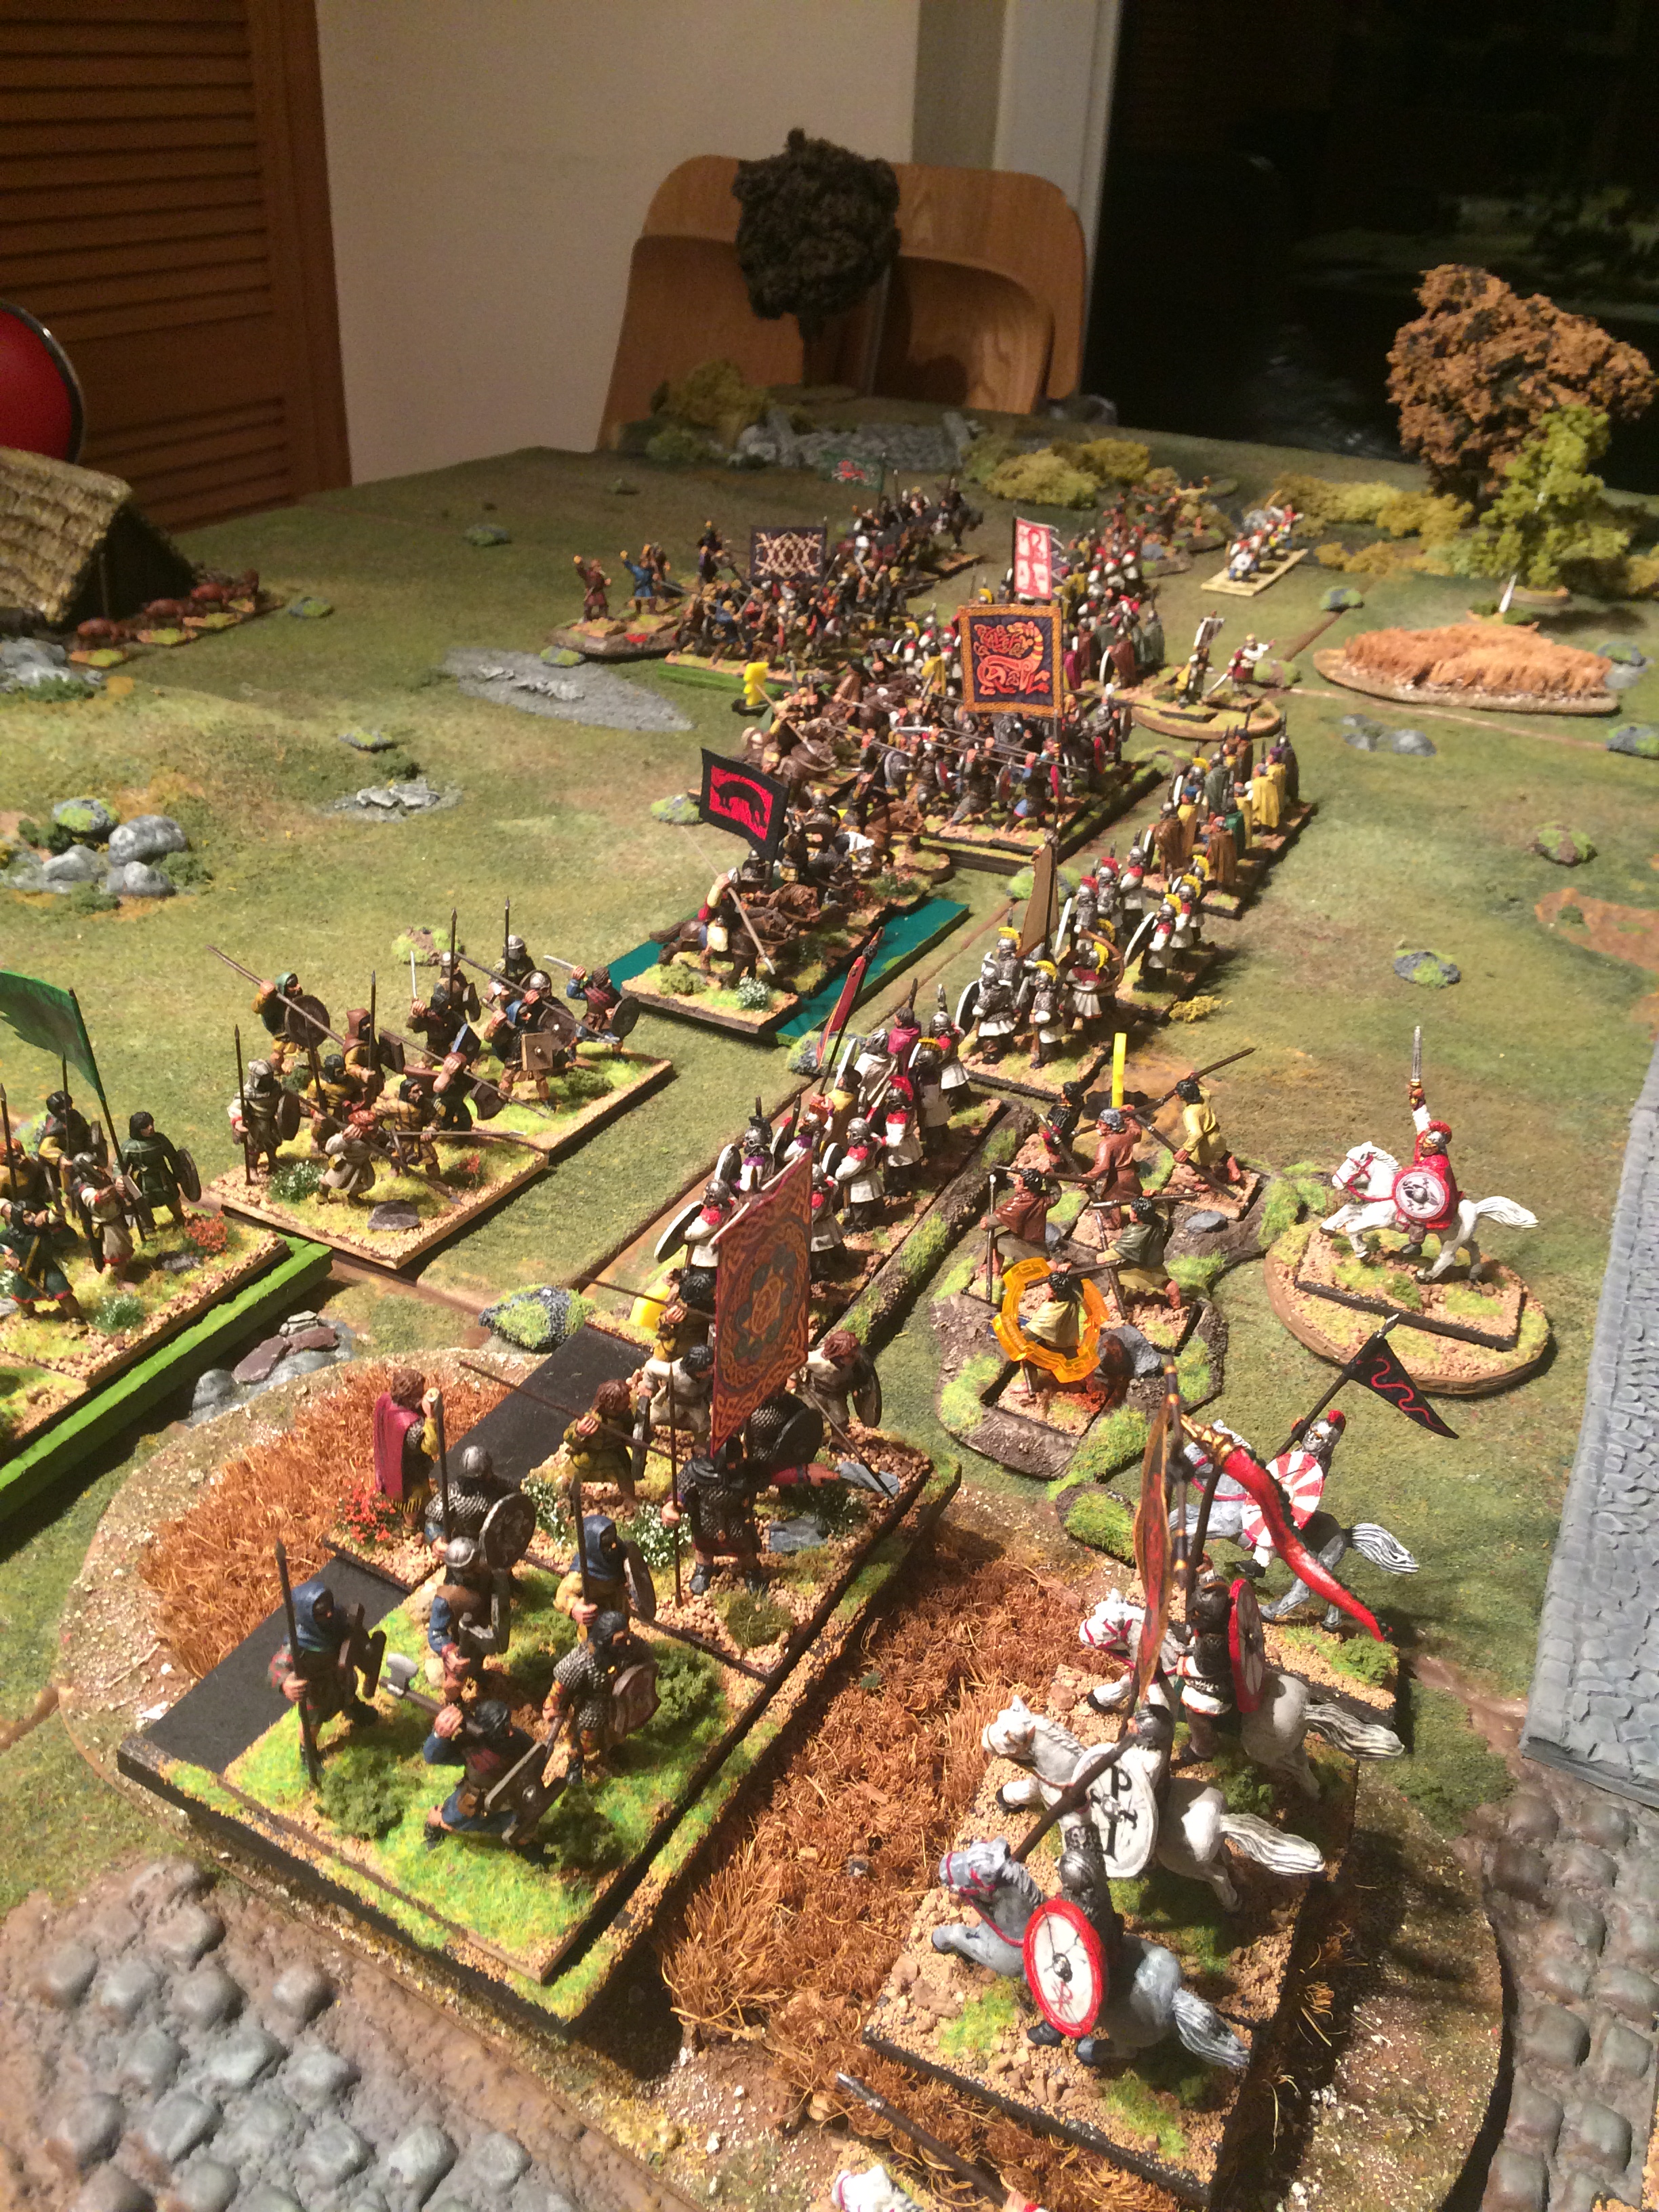
The East Angles and Picts advanced rapidly towards the Romano-British who kept a tight line and a skirmish screen of infantry. Then Arthur’s cavalry surged forwards but the Pictish spearmen held their ground. They then pushed the cavalry back who evaded in disorder whilst the infantry lines closed.
Arthur was able to rally his cavalry just before they were pushed off the baseline at spear point and they in turn charged the spearmen. This time the spearmen were in disorder as reinforcements raced to close any potential gaps. Javelin armed Angle skirmishers slowed the cavalry enough to give the spearmen some time to rally.
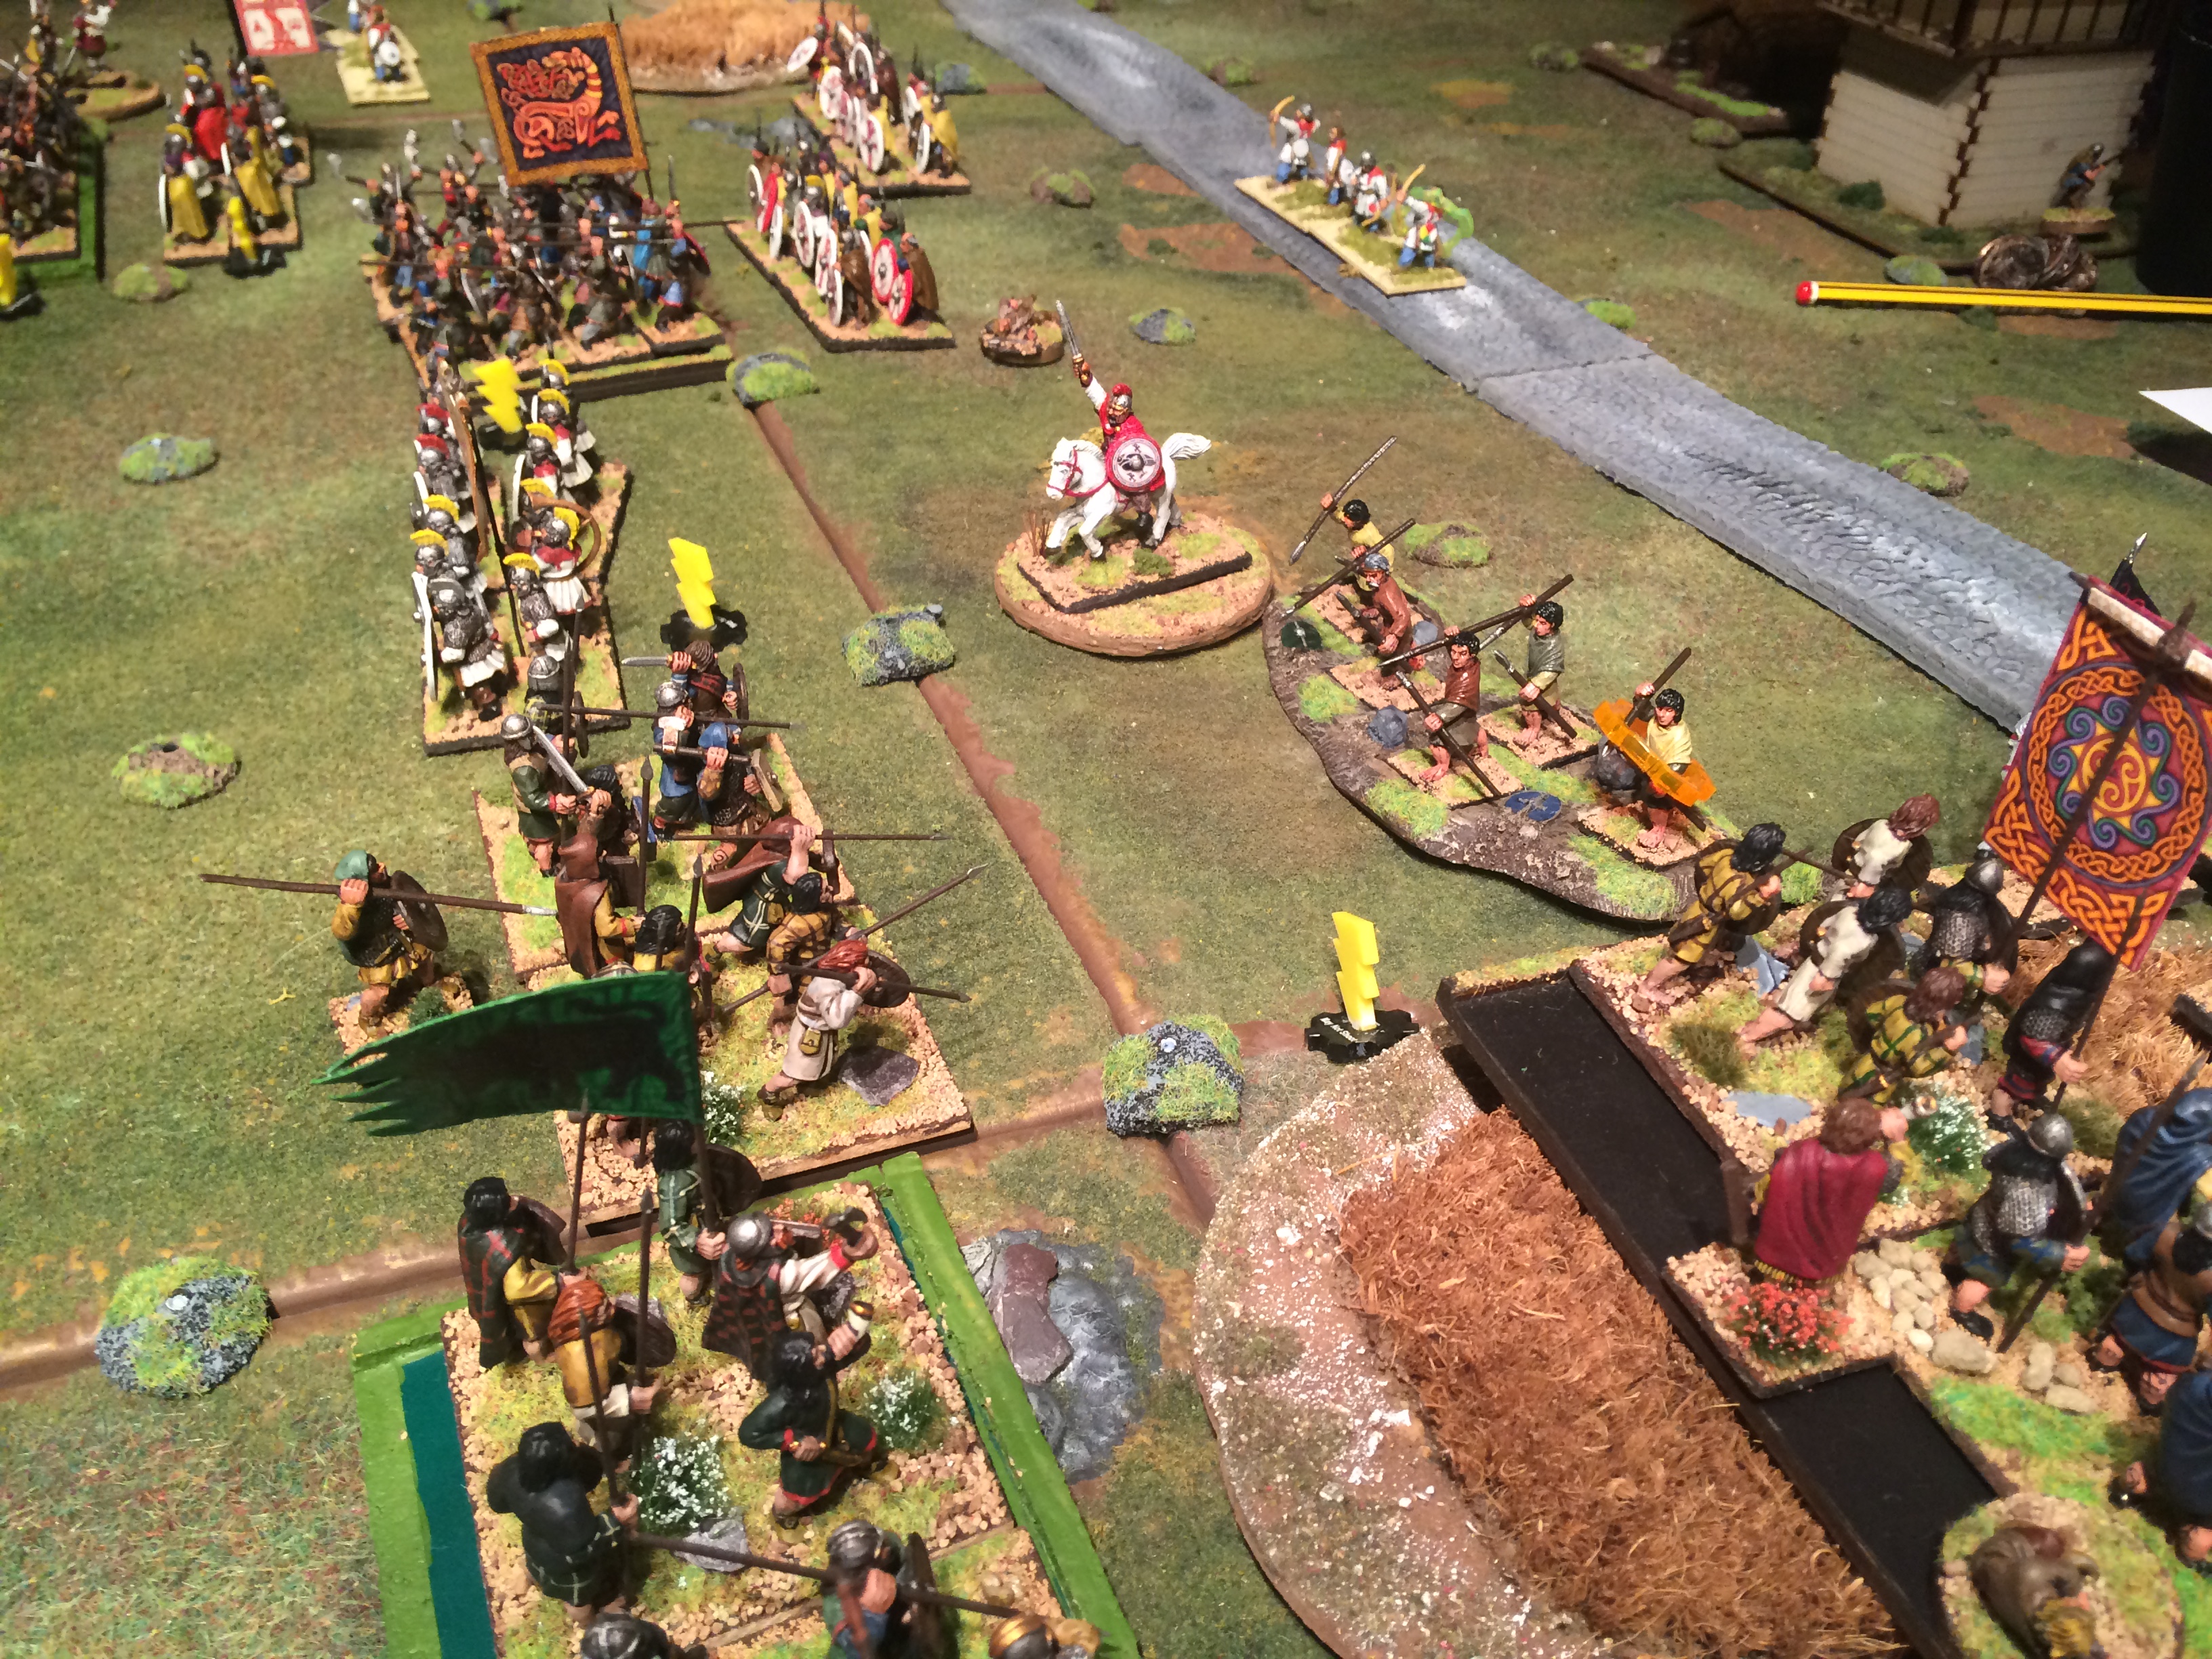
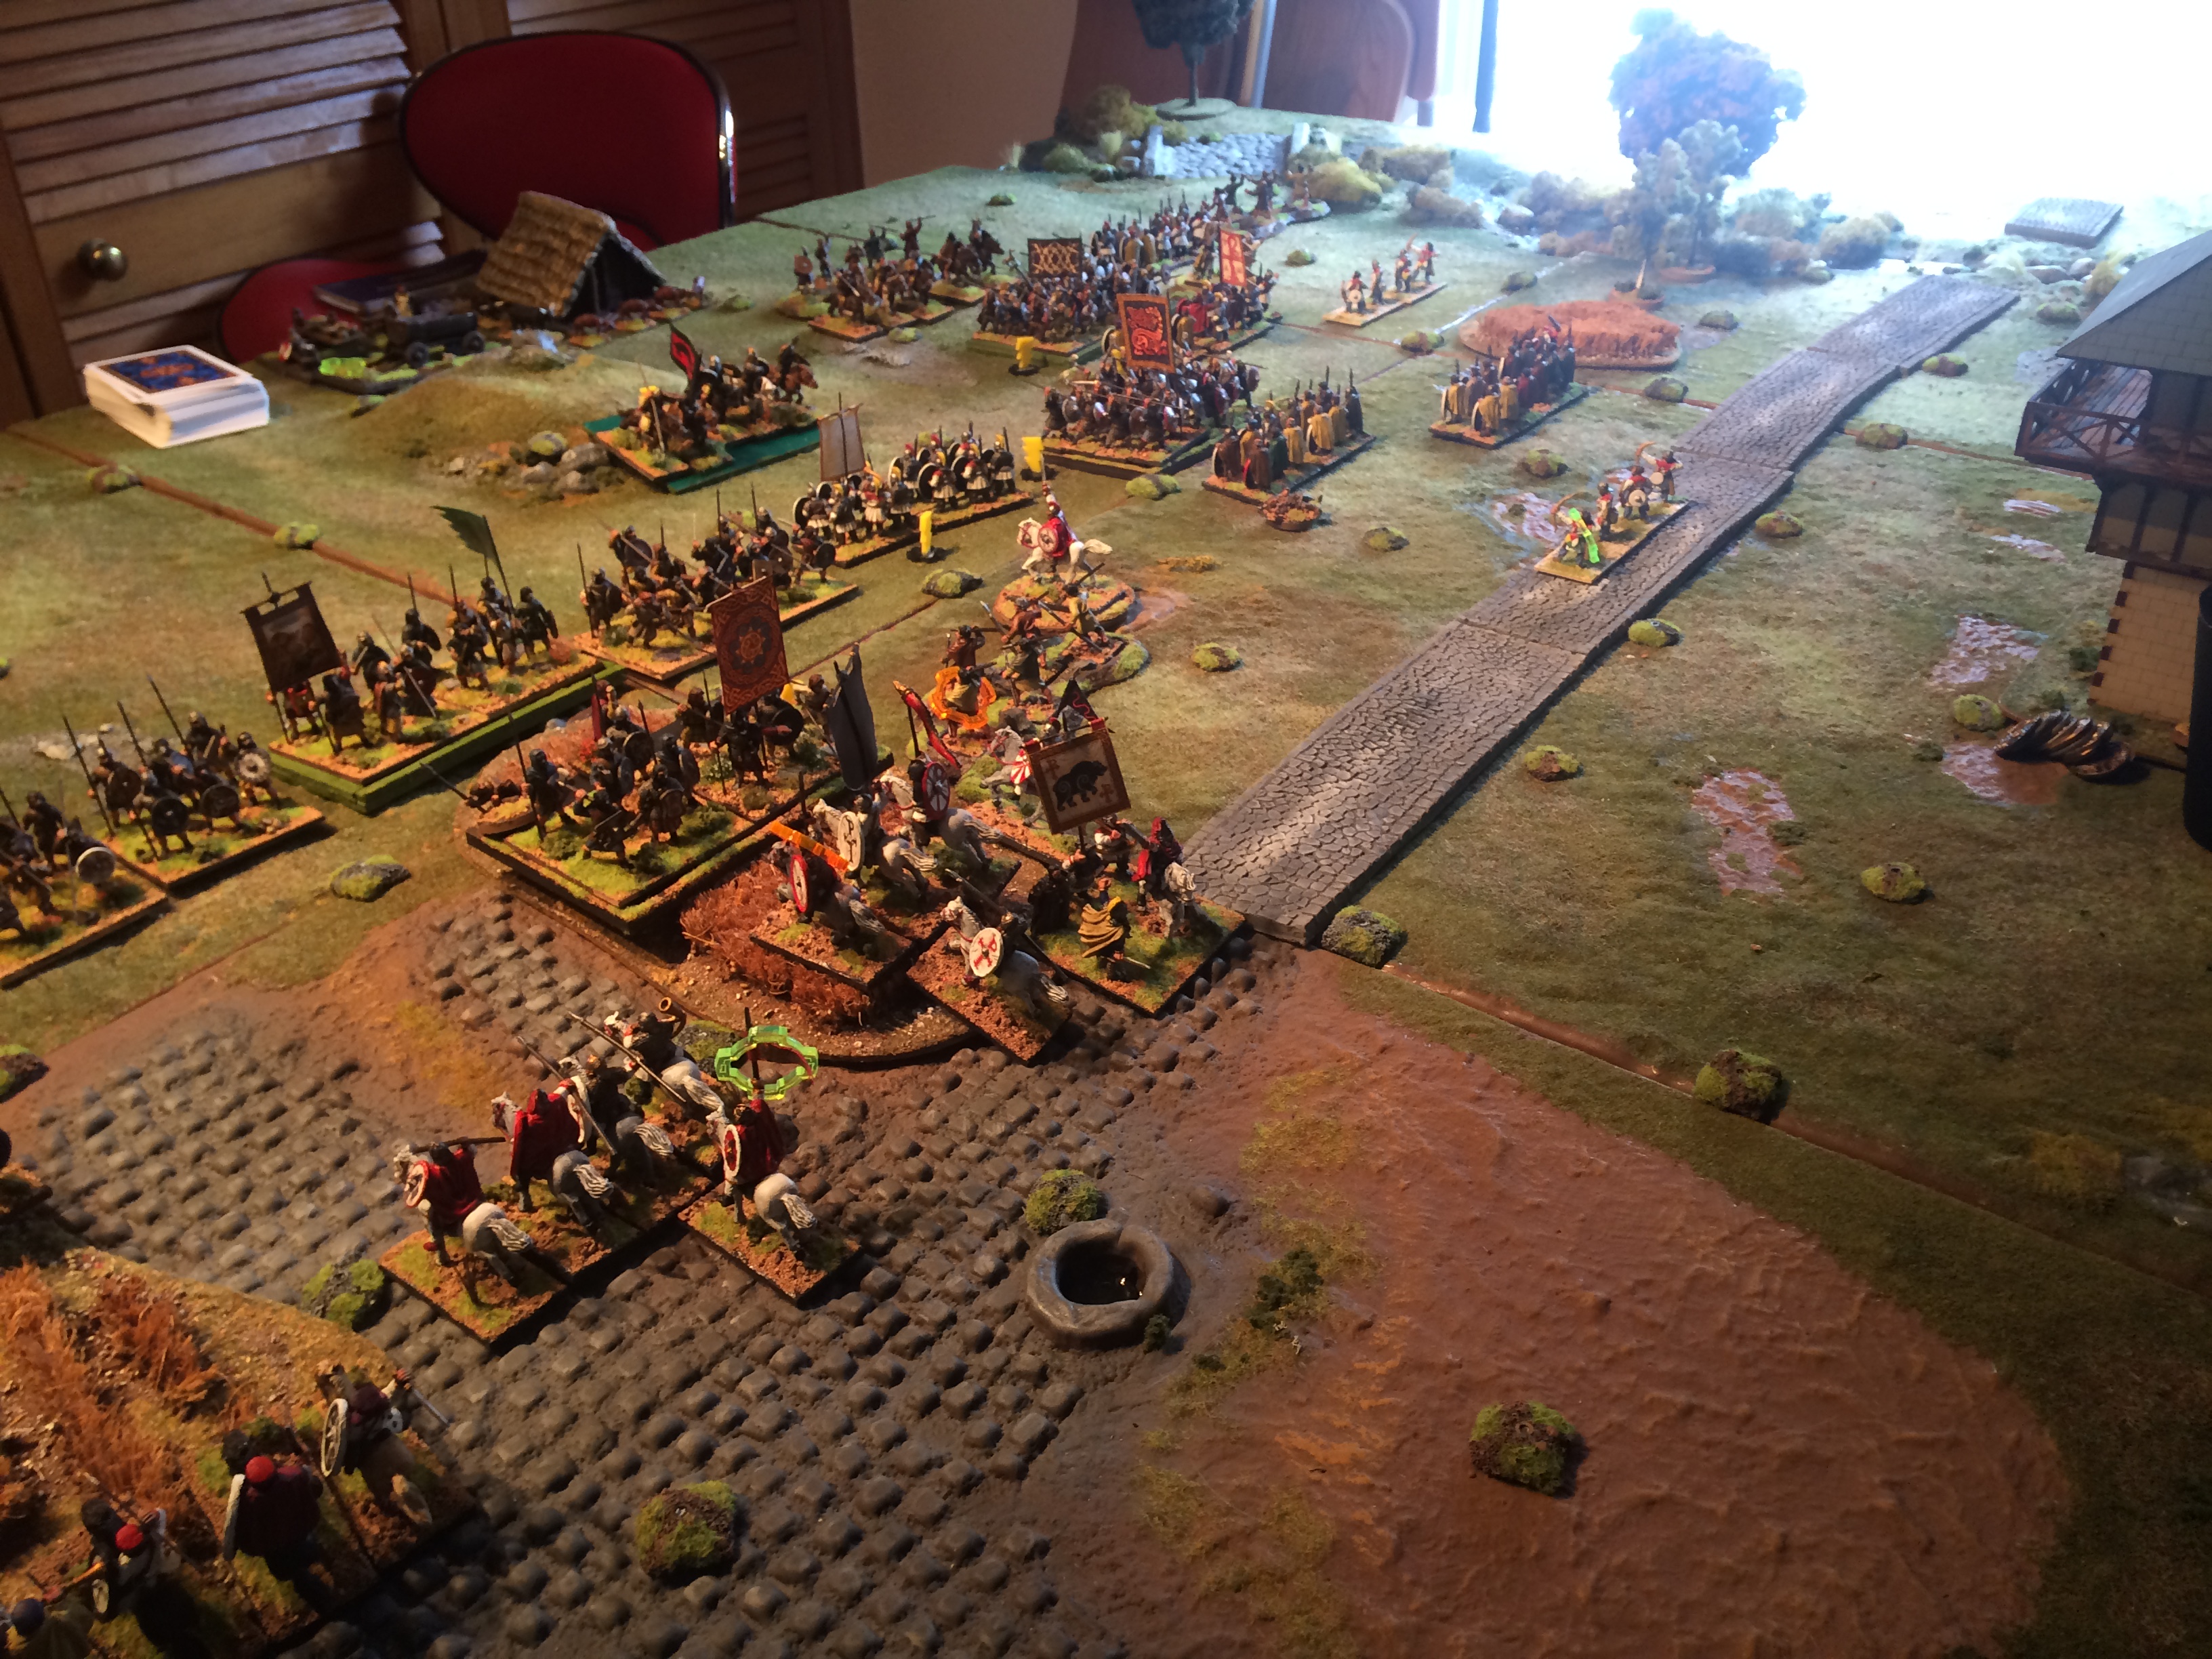
In the centre the East Anglian Warband Hearthtroop smashed through the Roman lines, slaughtering the proud First Legion and threatened the camps. To the far Roman left the Pictish cavalry had been skirmishing and harassing all this time supported by the King and his Noble cavalry. Eventually a break through came when the infantry became disordered from javelin fire and the Pictish cavalry finally stopped evading and charged. The British held but the cavalry could now move around to the rear and threaten the Roman camps too.
As dusk fell Arthur withdrew his shattered infantry forces and victory was awarded to the Picts who now had even more booty to take North as they turned towards Eboracum itself intent on further plunder.
Notes: The Army Lists used were based more on the Late Roman or Post Roman Gallic lists than those in To the Strongest. This was based on my reading for example the Warhammer Age of Arthur Supplement, the idea being a force inspired by a Leader of Battles and Professional soldiers still existing in some form along the wall in Coel Hen, Northern Britain. So they were classed as Legions and Auxilia having some military training, living in Forts or Garrisons with access to old Roman methods and Manufacturing skills to provide arms and armour plus trade with Roman or post Roman Western Europe. I would not have classed them the same should they be fighting the professional soldiers from the Eastern Empire or the height of Roman Britain prior to Macsen Wledig.
However I think this better describes them compared to untrained/ poorly drilled militia troops who are correctly described as just Javelinmen. This makes quite a difference in the battle as saving on a 6 is much easier especially when facing cavalry and the extra manoeuvrability of the Legionaries also comes to play when making diagonal, sideways or rearward moves. Compare this to the difficulties faced by the Spearmen or Warbands especially. This led to a better game at least than simply brushing aside lots of militia with Elite Shock Armed Deep Warbands and Veteran Spearmen. Next time however it maybe that the citizens of the Roman North need to defend their lands alongside Arthur’s Cavalry, especially with the loss of the First Legion in the Battle of the River Tribruit described above!
This clash of arms game tracks the life and times of grognards as they hopefully rise through the ranks during the 20 years of Napoleon’s wars in Europe. Mike, Phil, Bruce and Darryl played.
We started in 1805 as Chef de Brigade just as the wars in Austria began and went straight into the campaign. Bruce heroically challenged the Austrian duellist champion, a true giant of a man and expert fencer to a duel. Unfortunately he was gravely wounded and missed the forthcoming battles. Phil and Mike fought at the front lines whilst Darryl was placed in charge of supplies at the rear. Mike took a bad wound.
Next Bruce and Mike recovered whilst Phil contracted lung fever and watched his already poor health fall further. Later Phil was the only one to take a wife, the daughter of a wealthy and influential French Aristocrat. The others chose to take mistresses except Mike who had little success with the fair sex unless of course he paid for which he contracted the Pox.
Darryl went carousing gloriously but then lost face when he overhead a fat merchant insulting the Emperor and simply slinkedaway.
Darryl by now had certainly earned the reputation of a cad and a bounder Chef Blackadder being his name but he was strong and healthy plus an expert duelist after some lessons. Also wherever he went he caught the notice of Napoleon and was successful in his military endeavours.
Phil in contrast caught the eye of Napoleons female relatives but had bad luck with his health. Plus he suffered an unlucky wound in the build up to the next campaign missing out on the ensuing action, catching more lung fever and falling from his horse. However thanks to his marriage he soon became the wealthiest Grognard.
Mike concentrated on military matters and was always in the thick of the action though he too fled from the fat merchant. Bruce though continued to be promoted to positions such as the Staff and the Reserve always gaining glory and experience wherever he went, being in the right place at the right time to capture Napoleon’s notice without fail. His expolits duelling the famous Austrian Champion preceeding him in fame and honour and then his success at the capitulation of Danzig being especially a highlight. Darryl of course excelled at the peace negotiants at Tilsit and generally avoided any risk whatsoever. Phil missed out on the Christmas Party being wounded.
Finally the heroes gathered for the final campaign of the session. Phil took part in a famous duel as a second and challenged the cheating opponent’s second to a duel. Unfortunately it turned out to be Darryl himself just returned from fencing lessons and in excellent health. He made short work of Phil who also earnt Napoleon’s displeasure for his troubles. Fortunately it was just a scratch. As this was a peaceful turn not much happened and all the players managed to be promoted to the rank of Major with Darryl of course being the Senior Grognard at the end. Both Darryl and Bruce looked well on the way to reaching the rank of Colonel whilst Mike wa not far behind. Phil too was close but his ailing health would require him to spend yet another year at the health spa with his wife away from Paris thus slowing his progress again.
Another successful game of this narrative campaign in the Napoleonic era.
Game data from Mike:
Most played game on a Sat night for 2015 was Imperial Assault – 6 playings.
A whole load of games had 3 outings – Libertalia, Thunderbirds, K2 and Love Letter to name a few.
Most played miniatures game was Sword and Spear with 4 appearances.
Blog Data:
The concert hall at the Sydney Opera House holds 2,700 people. This blog was viewed about 9,400 times in 2015. If it were a concert at Sydney Opera House, it would take about 3 sold-out performances for that many people to see it.
There were 132 pictures uploaded, taking up a total of 257 MB. That’s about 3 pictures per week.
The busiest day of the year was April 16th with 220 views. The most popular post that day was barbarica conspiratio ; The Great Conspiracy 367AD.
Arthur’s 11th Battle (Battle of Bregouin).

Using the To the Strongest rules I played a learning solo game of this Battle, which I set at Ribchester in Northern England in the Romano-British period.

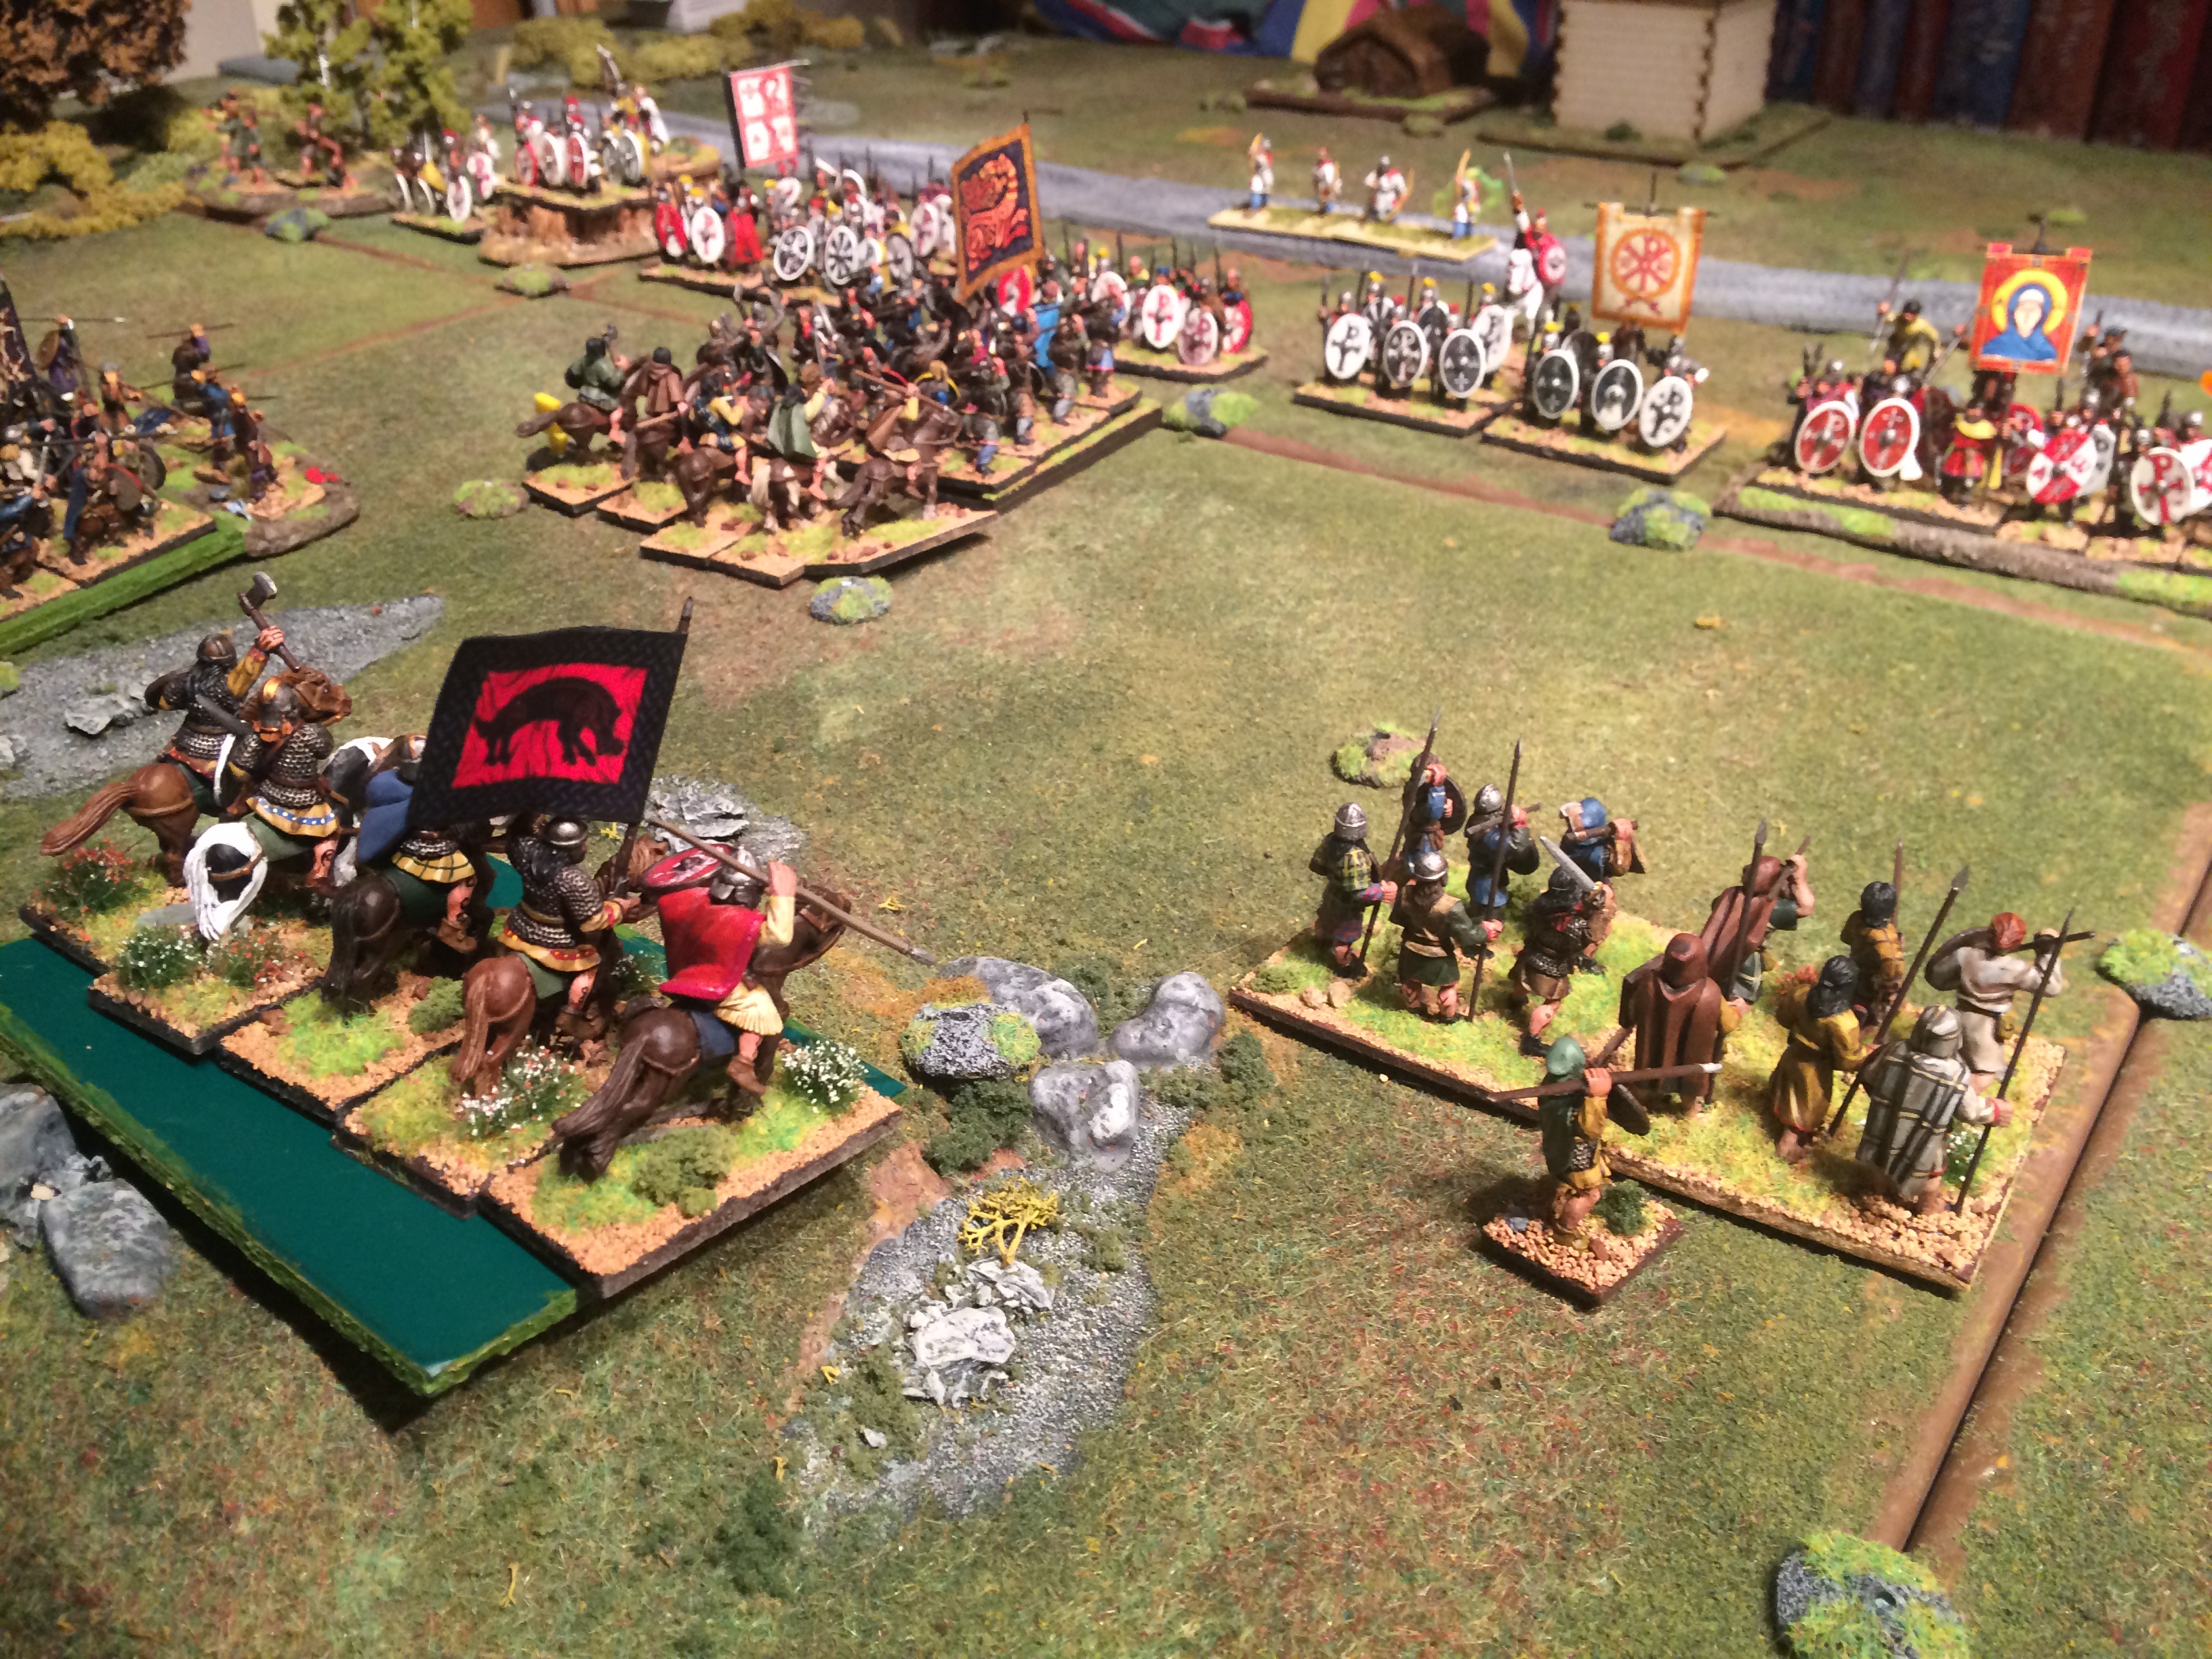
The forces set out for battle. Picts and Angles to the East and British to the West. The road runs from North to South with the Watch tower to the North.

The Romano-British.

The Picts with the Angles on the Southern flank and the Pictish King and his cavalry held in reserve, light cavalry to the flanks.

The Roman line advances steadily. A unit of light archers gets carried away with its enthusiasm but fails to fire.

The Elite Romano-British veterans beneath the Banner of the Virgin Mary.

Artorius beneath the bear banner with his cavalry.

The Picts also advance rapidly. The unit of archers has succeeded in drawing out one unit ahead of the line of spears (being caught and Lost doing so).

The Pictish King rides to fill the gap and the Angle cavalry fail to move at all. A theme that gets oft repeated throughout the battle!

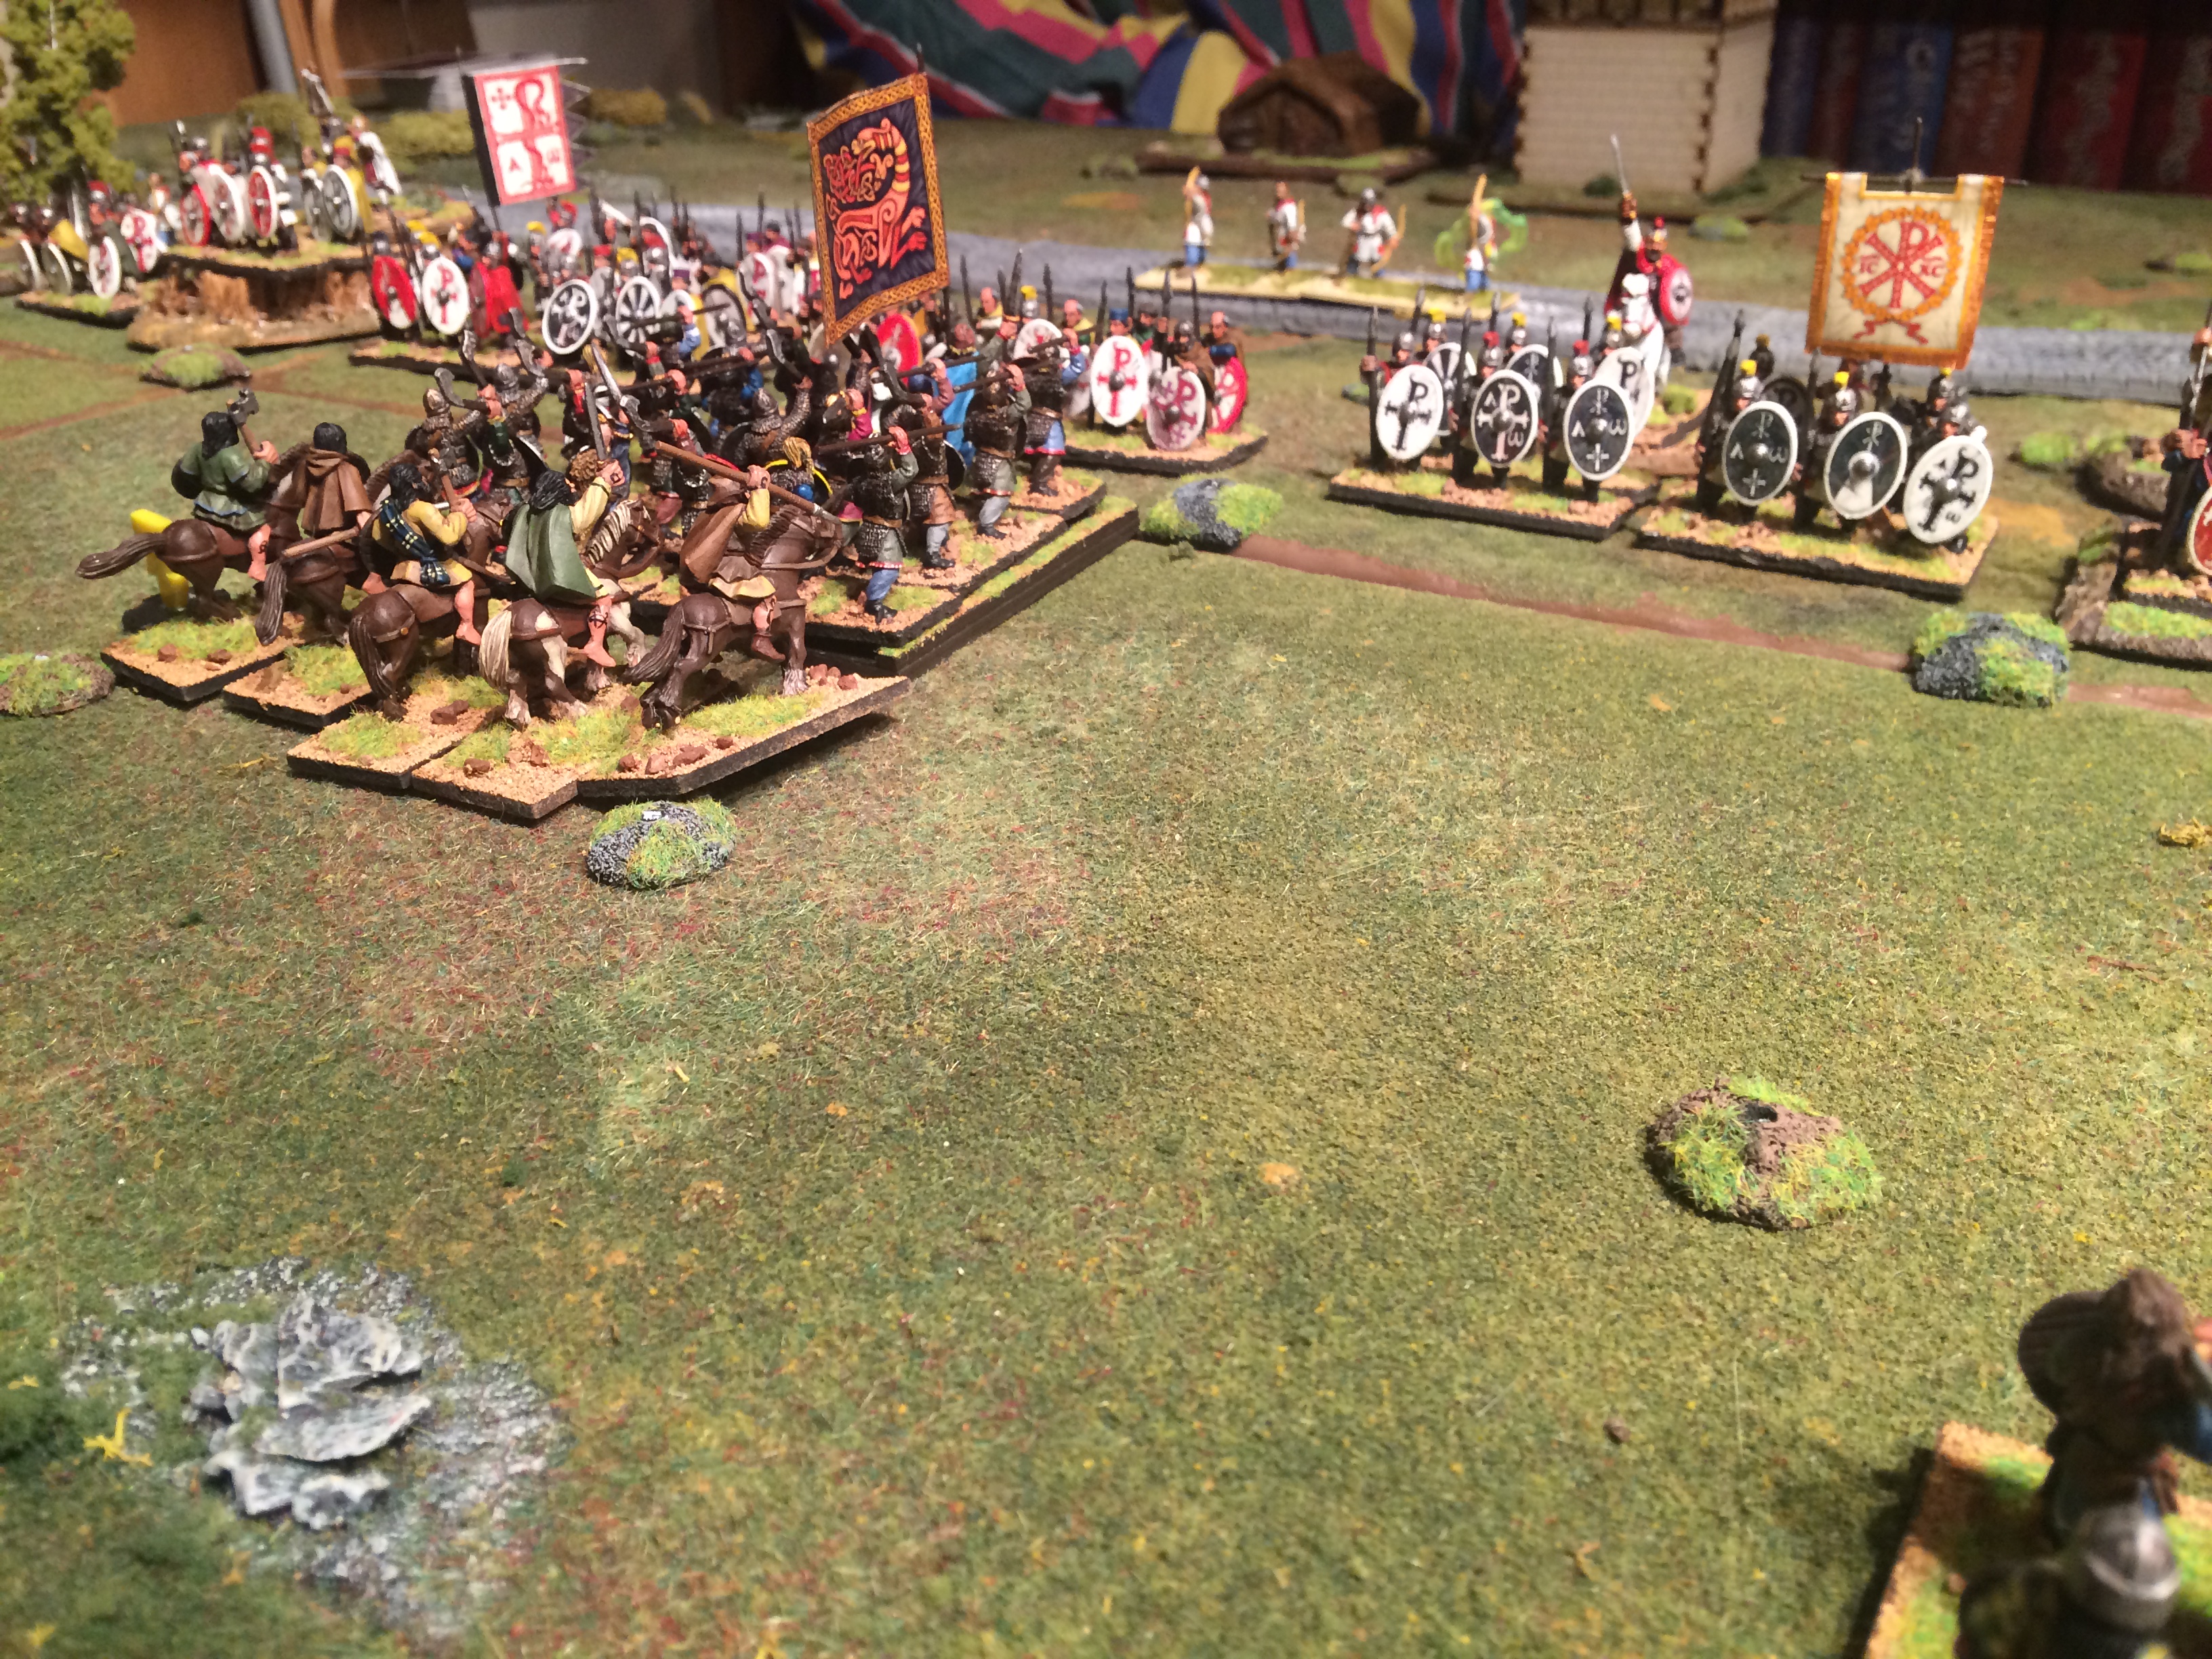
The lines close to the North as the British cavalry advance to the South.

As the spearmen clash with the Romano-British infantry a gap opens in the British line.

The British Elite though stand firm beneath their Holy Banner.

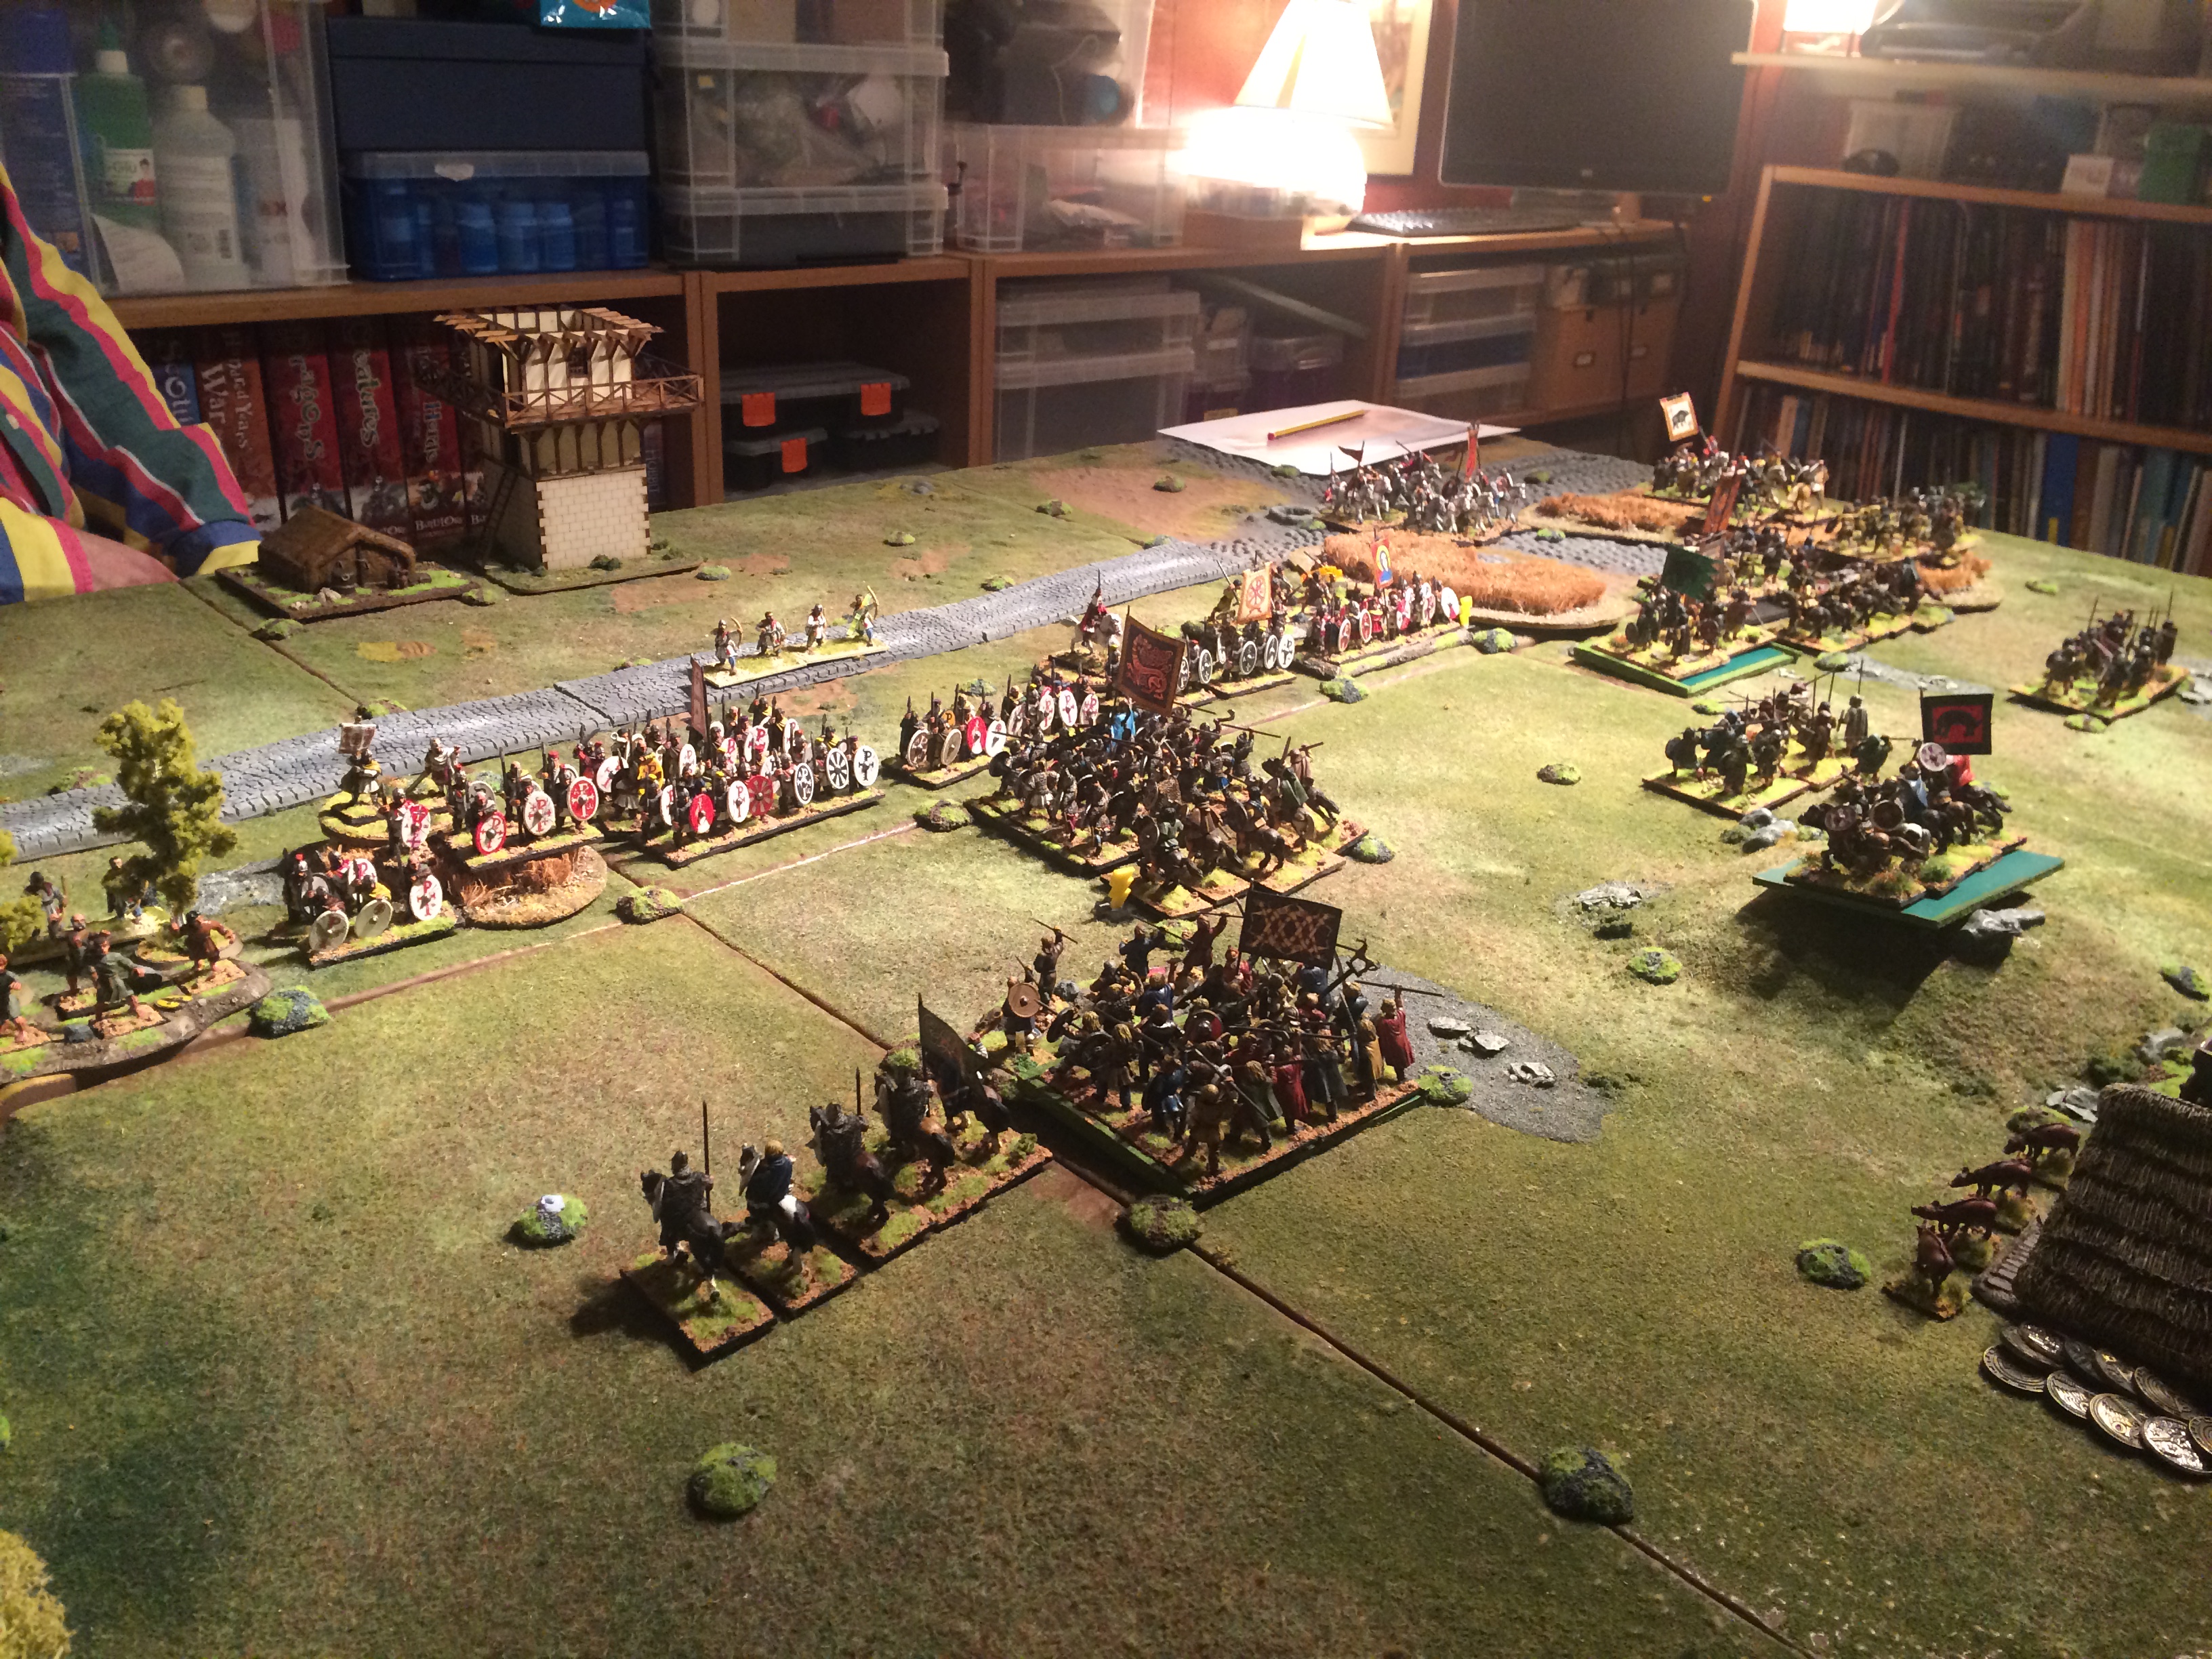
The British cavalry drive away the Barbarian cavalry (who evade). The Angle cavalry remain motionless whilst all this goes on around them.
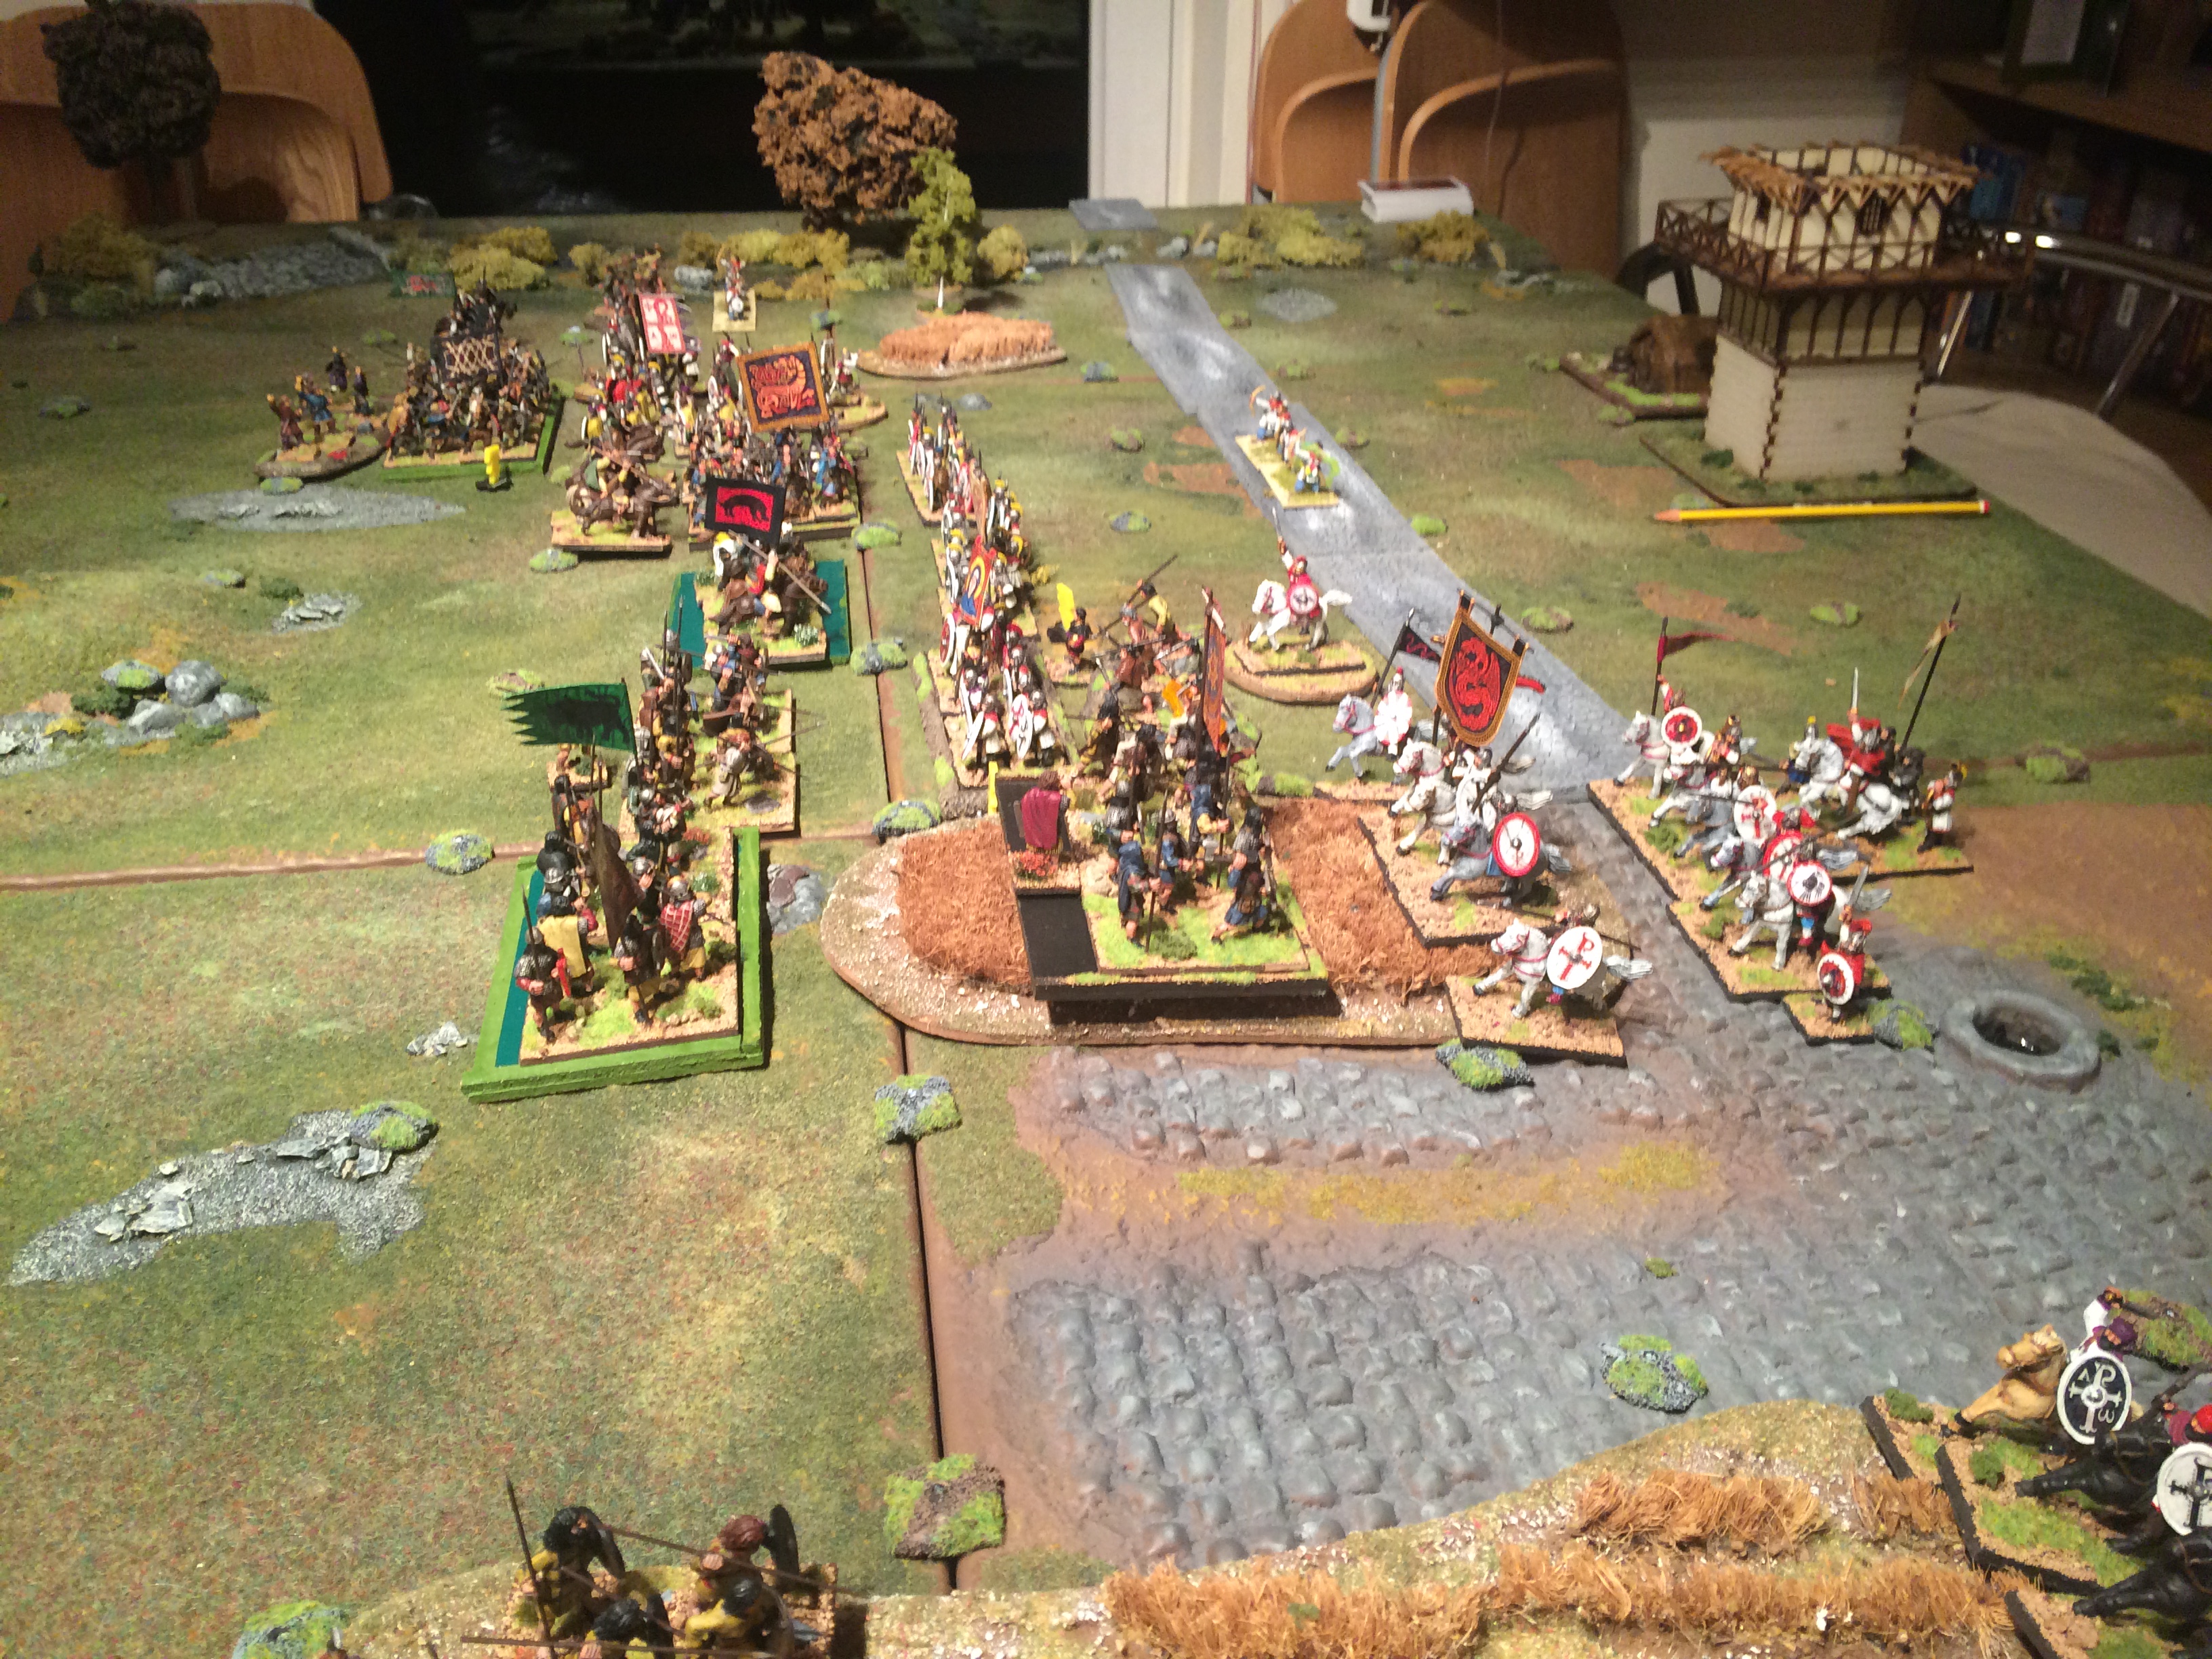
Subsequently the Romano-British clashed with the Angle and Pictish cavalry destroying the former and driving off the Picts who evaded. The Picts returned once on the Southern flank but then switched to the Northern flank once they were forced to evade again. As the Romano-British infantry and cavalry turned North and began to envelop them the Angles turned to stave off this advance but were eventually surrounded. To the North the British infantry advanced towards the camp but fearing encirclement by the Pictish Light cavalry retreated again until a gap appeared which they exploited to turn the flanks on the Pictish spearmen. With both flanks now threatened and with the losses mounting up the Pictish King retired from the field one last time: no doubt leaving the Angles to their fate with little thought other than it will give him more time to make good his escape.
I really enjoyed this learning game of To the Strongest. The card driven system works well especially for solo games. I had ordered Blue and Red Dragon decks which I really needed as I kept mixing them up after each turn!
The Barbarians had attached leaders whilst the Romano-British were detached and this gave the latter a greater ability to be present when required as one would expect. This actually makes a difference as the fighting starts up in earnest and towards the end it was Arthur’s presence alone which kept the infantry in place against the Angle Warriors. I had not initially realised that warriors were deep in case those eagle eyed amongst the reader’s notice and again fixing this towards the end made an interesting difference. The Angles with 3 hits stood a long time but were quite hard to move. Of course the Angle’s constant ability to fail to activate even with their leader is present (Two Aces seems to come up a lot) did not help. Their cavalry only moved at the end when the Picts had run away just in time to get hit in the flank by the Roman-British light cavalry who had travelled through the far North of the board and across the bridges to get there. The combat played quickly and though I did need to look up a few rules like evade, interpenetration and diagonal moves a few times I think it will be fairly straight forward to play once familiar. Both Arthur and the Pictish King took wounds in the fighting (being Heroic) but will live to fight again another day.
Certainly this campaign is not over as Artorius will now need to drive the main force of the Picts away from Eboracum and back across Hadrian’s and then the Antonine wall before the year is over and order is restored to the North.
StrongestRomanBarbarian2 Click to read the Army Lists.