Archive for the ‘Miniatures’ Category
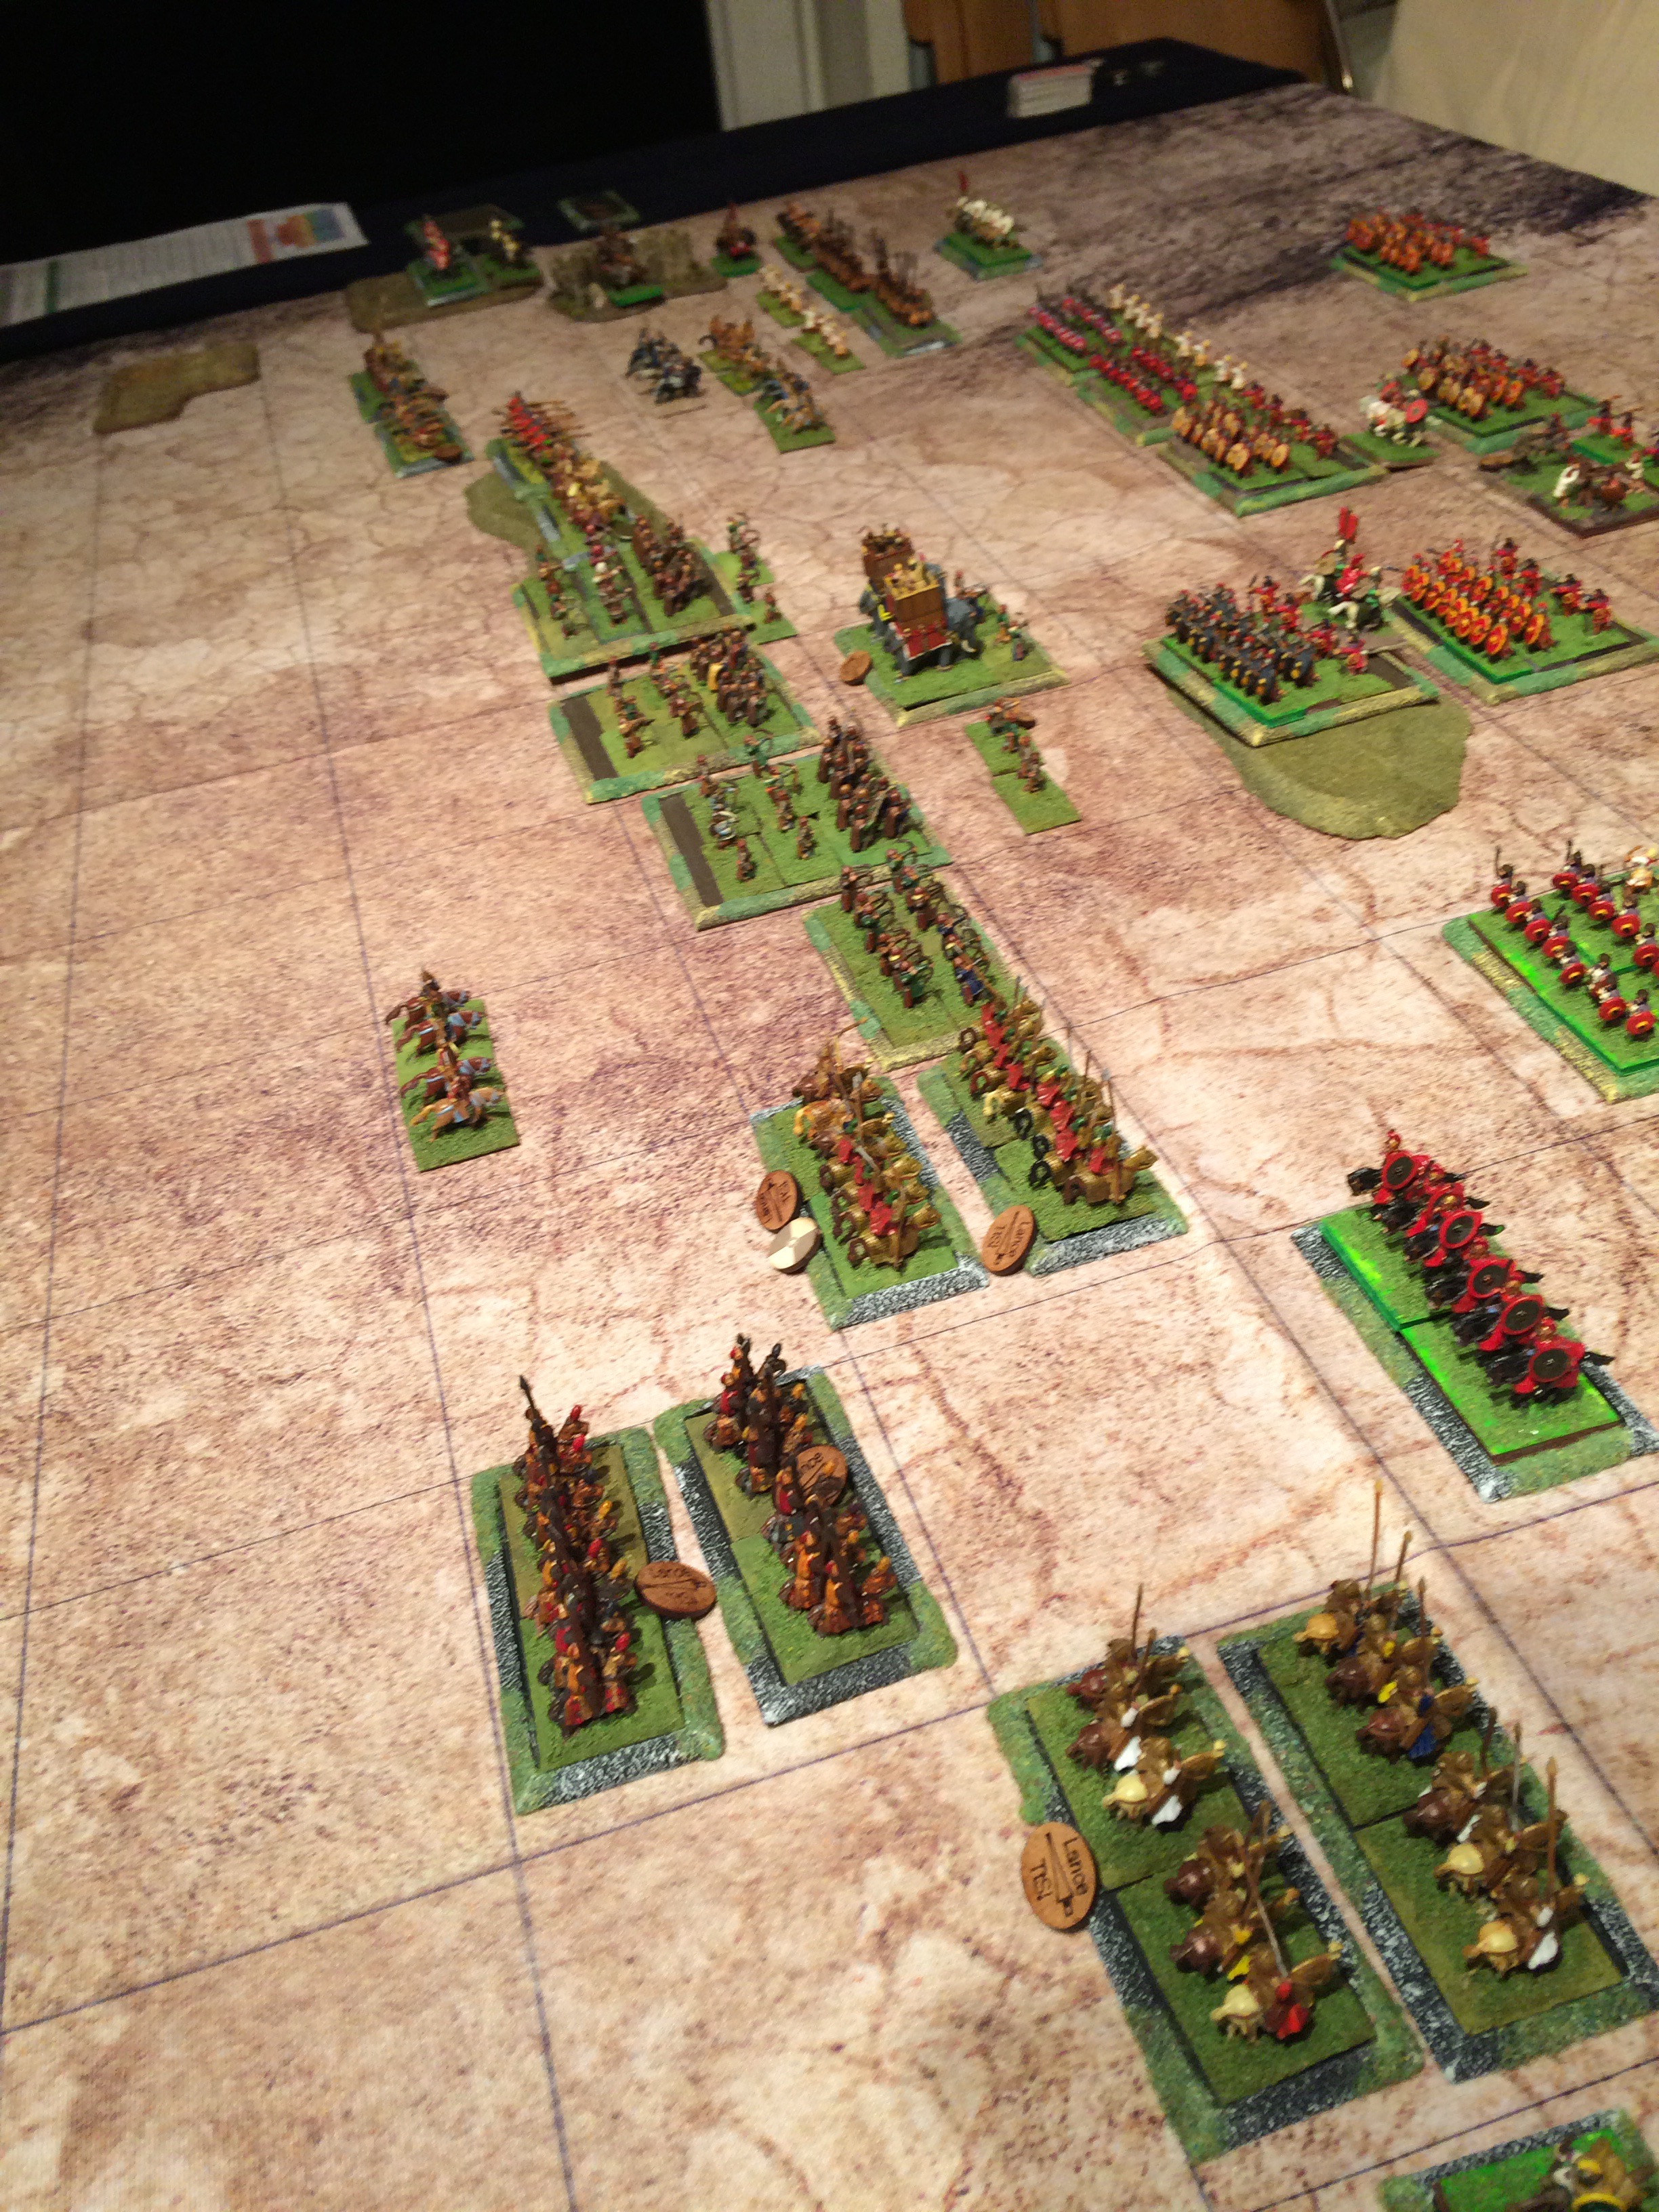
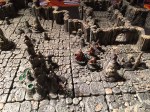
We played the big battle of Edessa as mentioned in the earlier blog post below. Here is how it went. Click on the gallery to read the captions and the battle report.

The Roman Army march out of camp and deploy for battle. DARRYL takes the right wing with Succesianus and the Legions whilst Phil takes the left and centre with Valerian and the Auxiliaries

The armies close as battle commences

Valerian and his guard

Succesianus and the Legionnaires

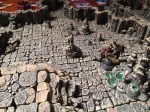
The Persian cavalry close with the Roman left wing having driven away the camel light troopers

Mike is in charge of the Persian left wing whilst Alex takes the right

The Roman Army

The Auxilia are disordered in their advance by punishing archery from the Persian infantry

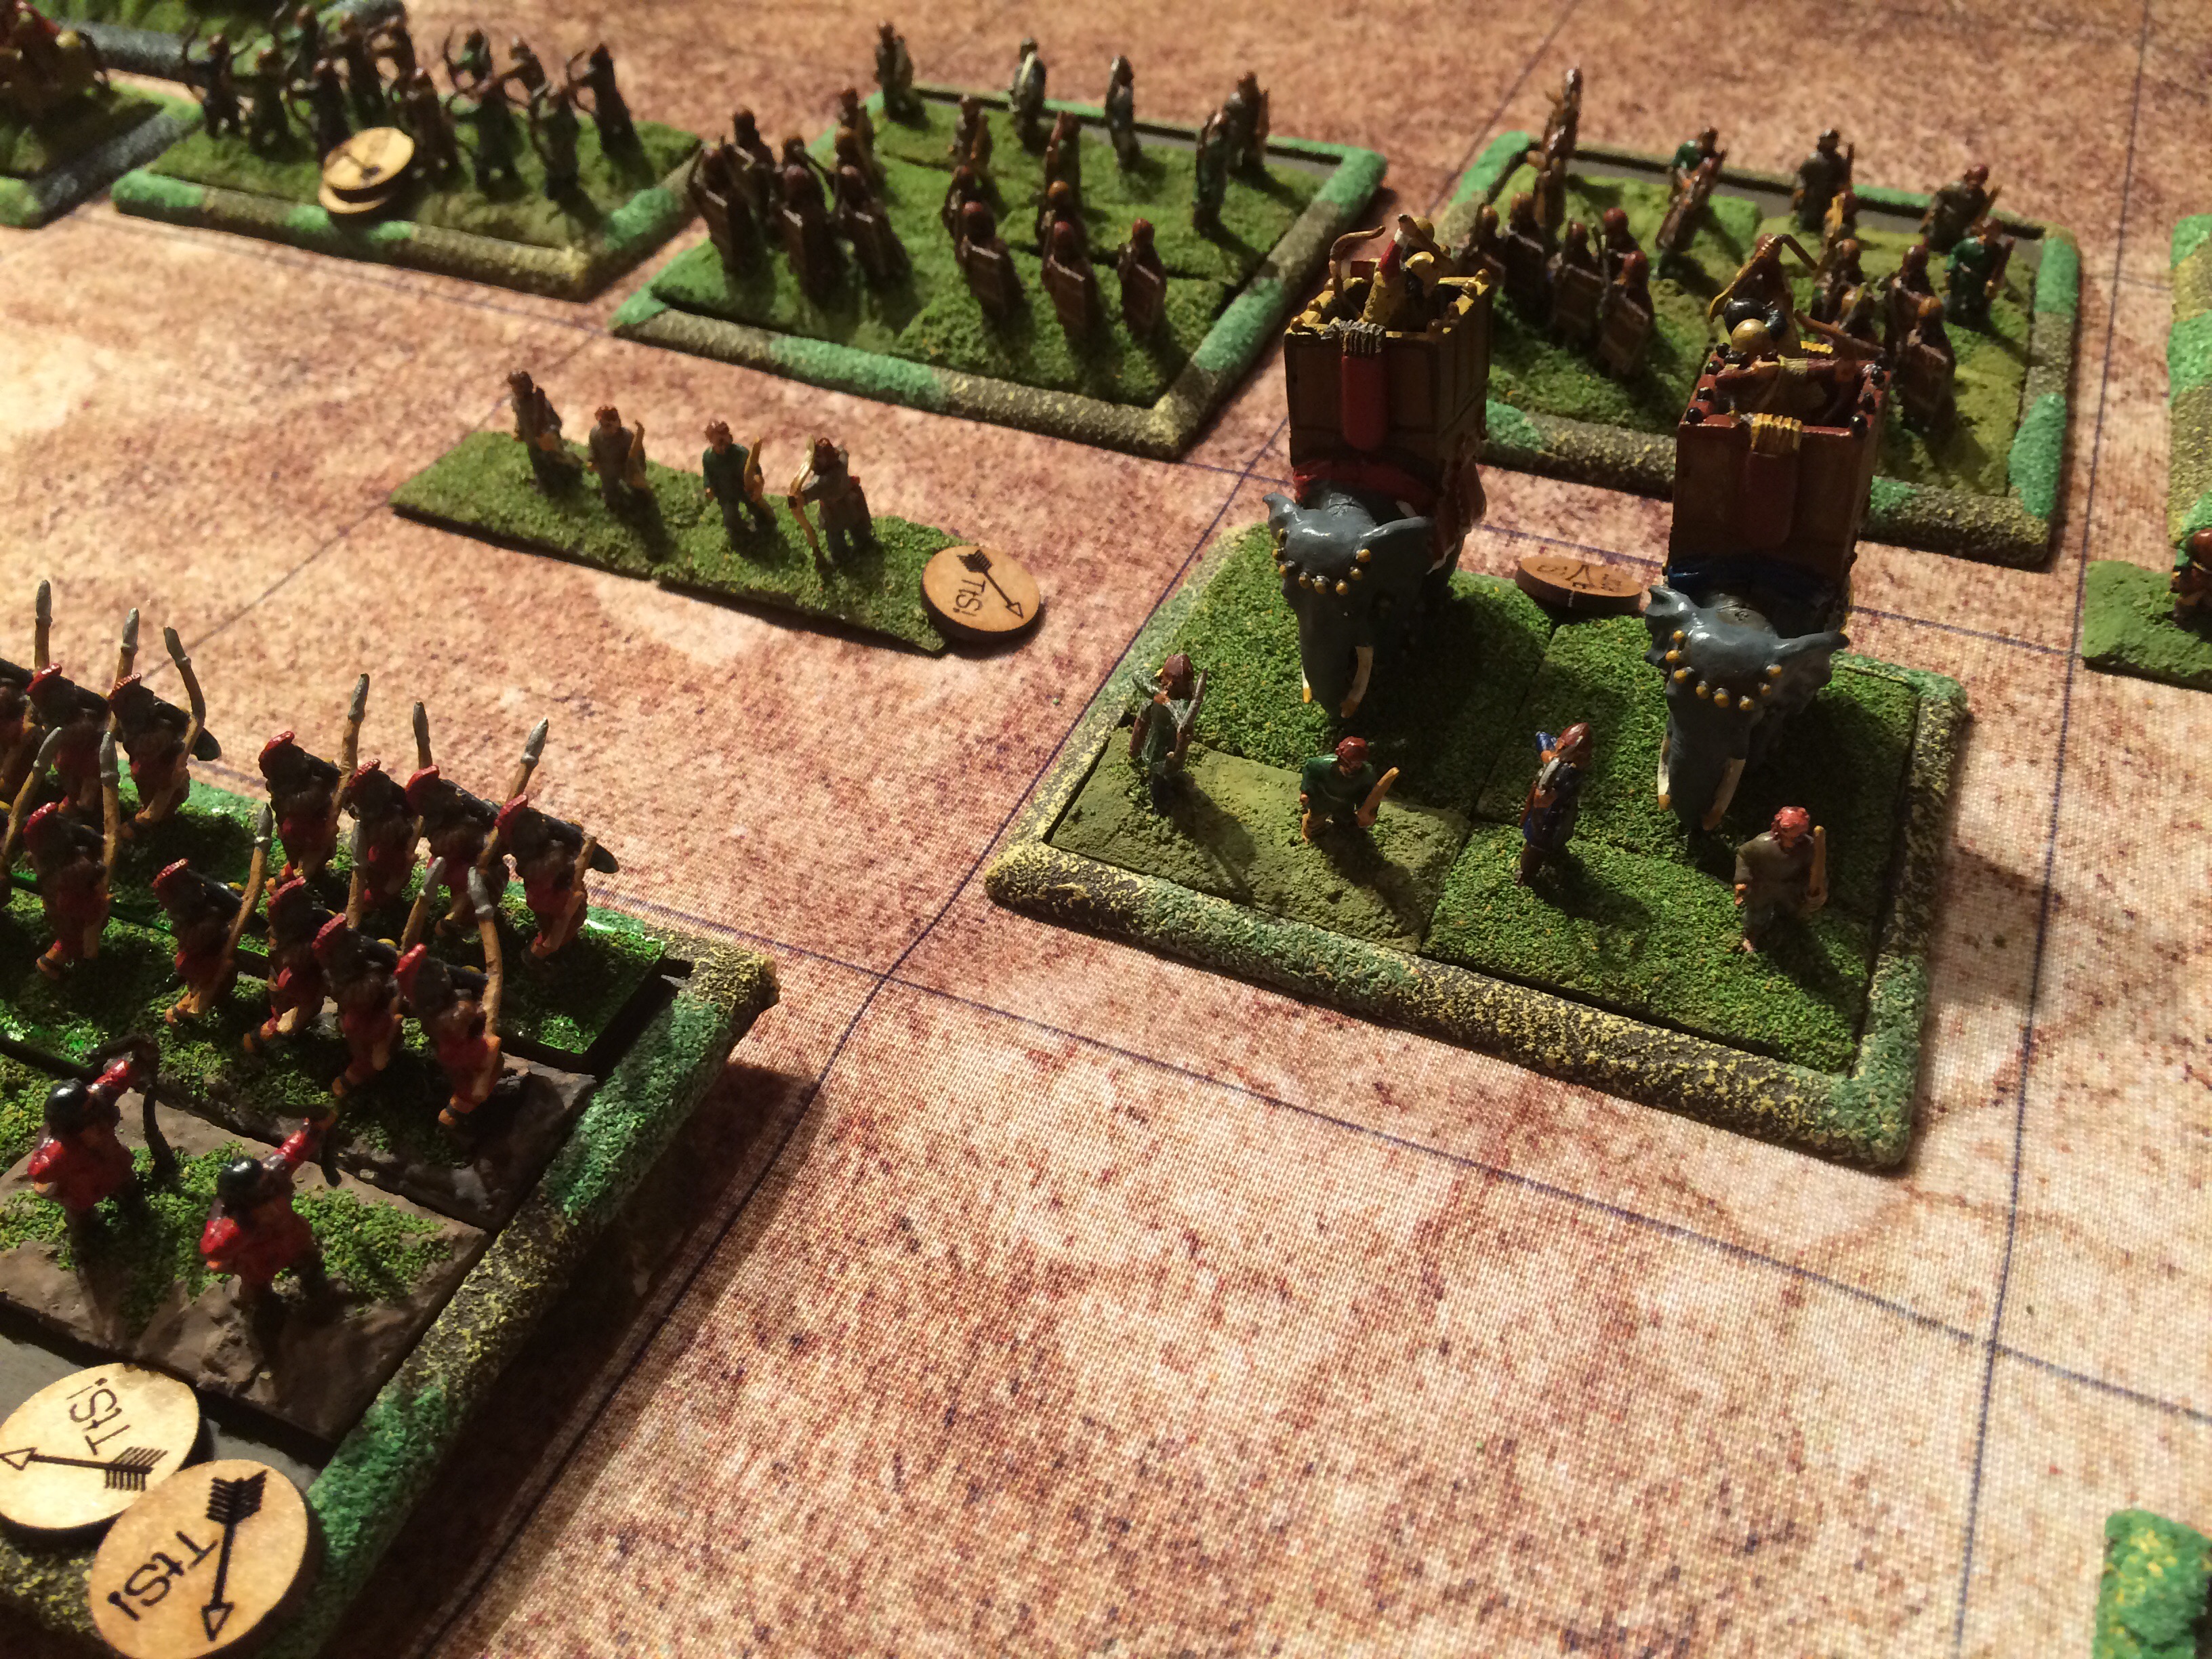
The Persians and their fearsome Elephants

The Persians and the Romans

Persians

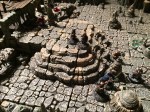
View on the Persian right flank.

Roman light cavalry advance to skirmish against the Persian cataphracts but are ridden down when failing to evade

Clash of cavalry on Roman left flank led by the heroic Roman contari extra heavy cavalry general

Persians

The Roman centre advances rapidly towards the Persian elephant and infantry supported by the commander in chief Valerian in reserve

The lines are closing but the Roman right flank is held slightly back in the face of the elephant advance

The cataphracts play the tonight we dine in hell card and become heroic in their refusal to be beaten by the Roman cavalry

The Persian reserve advance only to realise a lost Roman cavalry unit has arrived to their rear , the Roman strategy card randomly placed a unit from the right flank here

The auxiliaries fair badly. A unit including the general is lost facing the levy and the unit facing the elephants falls into disorder

The Roman cavalry falls back in disorder. Valerian attempts to halt the Persian advance by Interposing if his own heavy cavalry

Disaster as the guard cavalry rout and Valerian is captured. At this point all seems lost for the Romans but they stubbornly detained to fight on after a brief lunch break.

Things look bad now on the left flank but the cavalry with the general manage to rally

The Roman cavalry on the far left though have driven back the light horse and can see the arrival of their comrades to the Persian rear.

The Roman auxilia attempt to retreat and then rally but the elephants just keep advancing

Not forgetting the action on the right flank. The elephant proves resistant to all archery, ballista bolts and pila . The Persian cavalry manoeuvre to their left hoping to encircle the legionnaires

Aft many hours and multiple attempts the elephants finally are beaten

The Roman cataphracts are destroyed but the heavy cavalry push back!

View from the Roman camp

The Persian cavalry turn to face attacks from all directions now.

Persian cataphracts

The Roman legions begin to close and push back the Persians, turning to defend the flanks.

The view from the Persian left flank as the reserve closes with the lost Roman unit to halt their slow advance and protect their comrades

Roman heavy cavalry halt the Persian cataphracts whilst the auxilia retreat in disorder towards the camp fortifications and safety

The Roman light horse attack the flank of the. Persian reserve cavalry multiple times whilst the Roman heavy cavalry attack. From the front.

Finally it comes down to the last victory point. The romans manage to hold onto their last two on the. Persian turn whilst on their turn they are able to inflict the final victory point losses onto the Persians bringing them to zero and claiming an unexpected victory.
So in the end things turned round for the Romans after Valerians’s capture and the loss of the centre general. Darryl’s cautious preservation of the Praetorian Legion and its commander Successianus plus the heroic left flank Roman cavalry managed to turn things round and seize an unlikely but close victory.
Perhaps Succesianus was able to sack Edessa and negotiate the release of Valerian? Or maybe simply being able to retreat back into Roman territory was enough now for the Romans, leaving their hapless Emperor in the Persian clutches for ever more?
Was certainly a fun battle. The new rout rules prevented the Roman guard cavalry from becoming demoralised and the new no rally in zone of control had an effect too. It stops the romans using detached generals to continuously rally in the face of the enemy but it also meant that disordered forces fought on for ages with very little effect on each other.
A good game and thanks to Mike and Alex with their Persians and to Darryl for stabilising the Romans for Phil when all seemed lost.

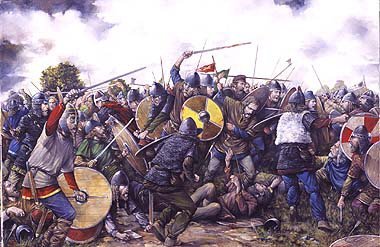
By User:Fabienkhan – Own work, CC BY-SA 2.5, https://commons.wikimedia.org/w/index.php?curid=588632
Battle of Edessa 260 AD
https://en.wikipedia.org/wiki/Battle_of_Edessa

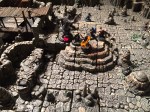
Table is all set up ready for the arrival of Shapur and his Persians (Mike and Alex) to take on Emperor Valerian (Phil and Darryl) and the Romans. This was ultimately an ill fated campaign for the Romans historically but perhaps our representation of the first few days of the campaigning around Edessa might yield a different result.
Two sides of 250 points each.
Romans and Persia.
Our scenario represents the first day’s engagement. The Romans have deployed for battle outside their camp whilst an advance force of Persians have arrived at the outskirts of Edessa ready to fight and block the Roman advance. If the romans can defeat the Persians on this day then they will be able to resupply from the city but if they cannot then they will soon be out of water and fodder and the Emperor will be forced to negotiate terms when the bulk of Persian Army arrives over the next few days. During the negotiations the Romans will be betrayed and Valerian will be captured, leading to the eventual surrender of the Roman Army trapped in the camp thus suffering the worst defeat in Roman history. So our scenario is the only hope the Romans have to avoid the terrible true historical outcome.

Using my new super glue instant hardener have fixed together these newly released figures from Forgeworld. They are quite fiddly but I suppose that does give more options for different poses and weapon configurations. Have also put together some Iron Hill Dwarven Command figures.

The Ballista kit was quite tricky to fix together being resin. The rope snapped in one place whilst I was struggling to get it all into position. I have bought some new instant hardener for super glue which would have helped. Overall though it is quite evocative of the movies and the captain pose is quite good too.
Mike, Michael and Phil refought our what if version of the famous Battle. It is 363 AD and Julian and the Romans have crossed the Tigris and are attacking the forces arrayed before Ctesiphon. However in our version the Persians have support from the advance cavalry guard of the Royal Army.

The Romans arrayed for battle.

The Persians.

The Field of Battle. Tigris at far side, woods and villages near side.

Persians deploy behind the high ground.

Romans too with infantry in centre.

The Roman veterans.

The slingers advance into the rough ground as the Light Horse close.

The Left Flank cavalry see a threat forming in the centre, turn to face and then spend the rest of the game failing to move at all towards it.

Did someone say advance?

As the lines close.

The Elephants in the centre smash into the Roman lines .

Still a battle going on?

Treachery. We played until near the end of the Persian deck and found the last few cards that had not been used contained all the Aces! Who shuffled, Michael!?

The Roman infantry near the woods prove hard to defeat but even harder to rally!

Things are opening up in the centre and on the Roman right. Julian himself is moving through to the Persian centre.

The Roman cataphracts on the far right have failed. They failed to defeat the Peasant Levy twice! They got roughed up by Elephants and smashed by the Persian Cataphract Guard Unit. Disastrous.

The Elephants clear a way forward.

Maybe we should turn those reseve cavalry back round now!?

Cataphracts charge Auxilia and will be pushed back!

Nothing can stop these Elephants!

Roman cavalry Guard led by Julian put up a good fight!

The Persian cataphracts clear away the opposition but then become disordered in the confusion (Ace drawn).

The Romans have cleared away the foolhardy Sassanid cavalry who had smashed through the centre to face the reserve unit of archers and cavalry.

The weakened Roman Right Flank.

The view from the left flank. One unit of Auxilia has been lured into the woods and proved unable to ever (difficult) move again. Another unit has finally been destroyed by cataphracts who now face the light horse and the reserve cavalry units on the left.

The Roman centre is pushing forwards as are the right infantry units. However the Persian units on their far left with the Elephants are making progress.

Having driven away the cavalry and archers towards the Persian baseline the heroic roman infantry turn to threaten the flanks of the Peasant Levy and the Elephants who have advanced in support of the Cataphracts. Note the Persian Guard catapract unit having fallen into disorder fell prey to the javelins of the Elite Lanciarri. So the general has had to relocate to the now outflanked Persian infantry Levy Unit!

Some light horse threaten the Auxilias flank as they attempt to hold the left flank whilst the centre advances.

The other Auxilia are trapped in the safety of the woods and refuse to budge.

The slingers still hold the rough ground. Too much happening around them!
As night falls the position perhaps is looking a little better for the Romans after rescuing the situation on the right flank. However the elephants remain undaunted and the VP total of 12 vs 8 counts against them. So a narrow victory is awarded to the Persians. They have stalled the Roman advance and will retire now to the City Walls. For Julian with the Persian Royal army rapidly advancing and no siege equipment of his own to match the high walls he will now have to retire away from the City in search of his Armenian re-enforcements.
Still slowly working Knights.


The Aliance

Olaf and the Norse-Irish

The Anglo-Saxons

The British cavalry deployed in reserve behind the Scots Spearmen

Athelstan advances

The Scots and men of Wessex close

Clash of Shieldwalls

The lines close, push of spear, sword axe and shield across the battlefield.

The Irish attempt to cross the marsh but are held back by Saxon Javelinmen

The Norse-Irish and Saxon shieldwalls in close combat

None retreat or give ground

The Scots hold their ground

Again the lines are holding on each side

Finally a gap in the lines as the Norse Irish Axemen led by Olaf smash through the Prince’s Mercians

The British cavalry pour through the gap created by Scots Spearmen Nobles. They soon drive off the Angl-Saxon cavalry and now the Camp is in site and undefended!

The Saxon camp is unaware of the danger!
We fought our second fight of Brunanburh, this time with attached leaders and more Fyrd on the Saxon side. The Saxon cavalry were downgraded to raw, so the forces more closely resembled the army lists. Once again it was a fun battle with the shieldwalls holding for a long time in a tense scrum in the centre of the field.
To begin with it was going all the Saxon way. Constantine died to the first blow; so we let him live as it was too early on stating it was his in fact his son first time and now Constantine was in command. Thanks Mike. He then died on the next round and Olaf took a wound. This time the Alliance felt there was no coming back from such a fate so the Scots spent all the battle out of command really which was frustrating. We did not use the attacking scenario rule that allowed one less pip as it was too confusing but we did keep the Golden Token of a free activation redraw once momentum was being achieved (after 4 points of enemy losses in formed units). This did help the Scots regain their momentum later in the game plus one unit of Scots Noble Spearmen with a hero never failed to strike all game which helped too.
Once the Saxon lines broke in two places it was all over for them and this time victory was awarded to the Alliance.
The Poem in Old English
The forces:
brunanburh-smallv2
Mike and Phil refighting Brunanburh using To the Strongest Rules. On a field enhazelled near the settlement of Brunanburh two sides shall meet to determine the fate of Britain. Aethelstan’s forces from Wessex and Mercia against those of the Alliance of Hiberno-Scandinavians (from Dublin), Scots and Strathclyde British from Cumbria led by Olaf (Anlaf).
About 150 points each side with a field bordered by woods, and a marshy stream.

Scenario Rules:
1 Only Olaf and Aethelstan can command forces from other divisions.
2 Units charging into melee get a plus one to command (making it easier) to do so.
3 The first army to destroy four enemy formed units may take the “golden hoard” token. This may be used as a free additional general replacement activation card once per turn for any unit in the army that is in command range of its general (including Olaf and Athelstan). However each unit may only have one replacement card played on it per turn.
The battle
Phil played the Alliance and Mike the Saxons. The forces began by advancing towards each other though the Hiberno-Scandinavians (H-N) on the right flank proved extremely reluctant to follow Olaf and his Axemen. On the left flank the Strathclyde British light horse took refuge in the enclosed field proving an irritation to the Saxons. Fearing a charge at the rear of the Viking mercenaries the reserve Saxon cavalry were dispatched to eventually winkle them out.
As the skirmish lines closed the casualties fell heaviest on the Alliance whose skirmishers occasionally failed to evade as the shieldwalls clashed too. Olaf and his axemen were caught exposed thanks to the reluctant Ostmen H-N shieldwalls and fell into disorder. He had to retreat them back to his line and rally whilst the Saxons under Edmund reordered their own lines and then advanced again.
To the left flank the British cavalry failed to dislodge the Vikings even with a charge to the flank and were eventually threatened by the reserve horse. The Alliance used about 18 ammo chits throughout the battle but inflicted very few if any casualties. The Saxon shieldwalls held strong. The battles were furious aided by the scenario rule of a plus one to activate a melee. However with both sides fielding lots of deep units it proved difficult to achieve a decisive breakthrough. The Scots seemed to be making headway against Aethelstan’s forces but because of his detached status and free command moves every time they infliced 2 disorder on the deep units he soon had them rallied again.
Eventually even the Scots could not hold back the indestructable deep shieldwalls and their cavalry and javelnmen/ archers proved inneffective. Even the Irish blackshields on the right flank failed to take the opportunity of a flank charge when Olaf really needed support. Note the two Aces next to Olaf’s doomed Axmen. With the route to the camp cleared once the Ostmen were destroyed the Alliance realised the day was lost and Victory was awarded to the Saxons. Well played Mike.
The Leaders
Thoughts:
we might do this as a display game hence the large sized leader name cards pictured. Would be better double sided. The Saxons should not really have detached leaders. Far too powerful in this period with Deep shieldwalls and heroes. What to do about the cavalry? Just seemed to be too much cavalry for a clash of shieldwalls battle. Probably should make the saxons raw or small units and allow the Saxons to deploy with their flanks better protected by the woods. Head on there seems little the British cavalry can do to a formed shieldwall as it should be. Also the Saxons had too many veterans compared to standard Fyrd which unbalanced the forces further. This was done in an attempt to balance the forces but backfired. Mike is painting up some Irish warriors for Olaf’s H-N force which will be better and then more Fyrd can be allocated to the Saxon side as originally planned. One we will definitely do again and the To the Strongest rules worked well, as always with lots of tense moments and fascinating moments. Such as when Athelstan took a light wound from a Scottish Spear thrust and survived to keep on fighting and rallying his Shieldwalls.
The Original Poem translated into English:
King Athelstan, the lord of warriors,
Patron of heroes, and his brother too,
Prince Edmund, won themselves eternal glory
In battle with the edges of their swords
Round Brunanburh; they broke the wall of shields,
The sons of Edward with their well-forged swords
Slashed at the linden-shields; such was their nature
From boyhood that in battle they had often
Fought for their land, its treasures and its homes,
Against all enemies. Their foes fell dead,
The Scottish soldiers and their pirate host
Were doomed to perish; and with blood of men
The field was darkened from the time the sun
Rose at the break of day, the glorious star,
God the eternal Lord’s bright candle passed
Across the land, until this noble creature
Sank to its resting-place. There many men
Lay slain by spears, and northern warriors
Shot down despite their shields, and Scotsmen too,
Weary, with battle sated. The West Saxons
Throughout the whole long passing of the day
Pressed on in troops behind the hostile people,
Hewed fiercely from the rear the fleeing host
With well-ground swords. The Mercians refused
Hard battle-play to none among the fighters
Who came with Anlaf over rolling seas,
Bringing invasion to this land by ship,
Destined to die in battle. Five young kings
Lay dead upon the battlefield, by swords
Sent to their final sleep; and likewise seven
Of Anlaf’s earls, and countless of his host,
Both Scots and seamen. There the Norsemen’s chief
Was put to flight, and driven by dire need
With a small retinue to seek his ship.
The ship pressed out to sea, the king departed
Onto the yellow flood and saved his life.
Likewise the wise old Constantinus came,
The veteran, to his northern native land
By flight; he had no reason to exult
In that encounter; for he lost there friends
And was deprived of kinsmen in the strife
Upon that battlefield, and left his son
Destroyed by wounds on that grim place of slaughter,
The young man in the fight. The grey-haired man
Had little cause to boast about that battle,
The sly old soldier, any more than Anlaf;
They could not with their remnant laugh and claim
That they were better in warlike deeds
When banners met upon the battlefield,
Spears clashed and heroes greeted one another,
Weapons contended, when they played at war
With Edward’s sons upon the place of carnage.
The Norsemen left them in their well-nailed ships,
The sad survivors of the darts, on Dingesmere
Over the deep sea back they went to Dublin
To Ireland they returned with shameful hearts.
The brothers also both went home together,
The king and prince returned to their own country,
The land of Wessex, triumphing in war.
They left behind corpses for the dark
Black-coated raven, horny beaked to enjoy,
And for the eagle, white-backed and dun-coated,
The greedy war-hawk, and that grey wild beast
The forest wolf. Nor has there on this island
Been ever yet a greater number slain,
Killed by the edges of the sword before
this time,as books make known to us, and old
And learned scholars, after hither came
The Angles and the Saxons from the east
Over the broad sea sought the land of Britain,
Proud warmakers. Victorious warriors,
Conquered the Welsh, and so obtained this land.